
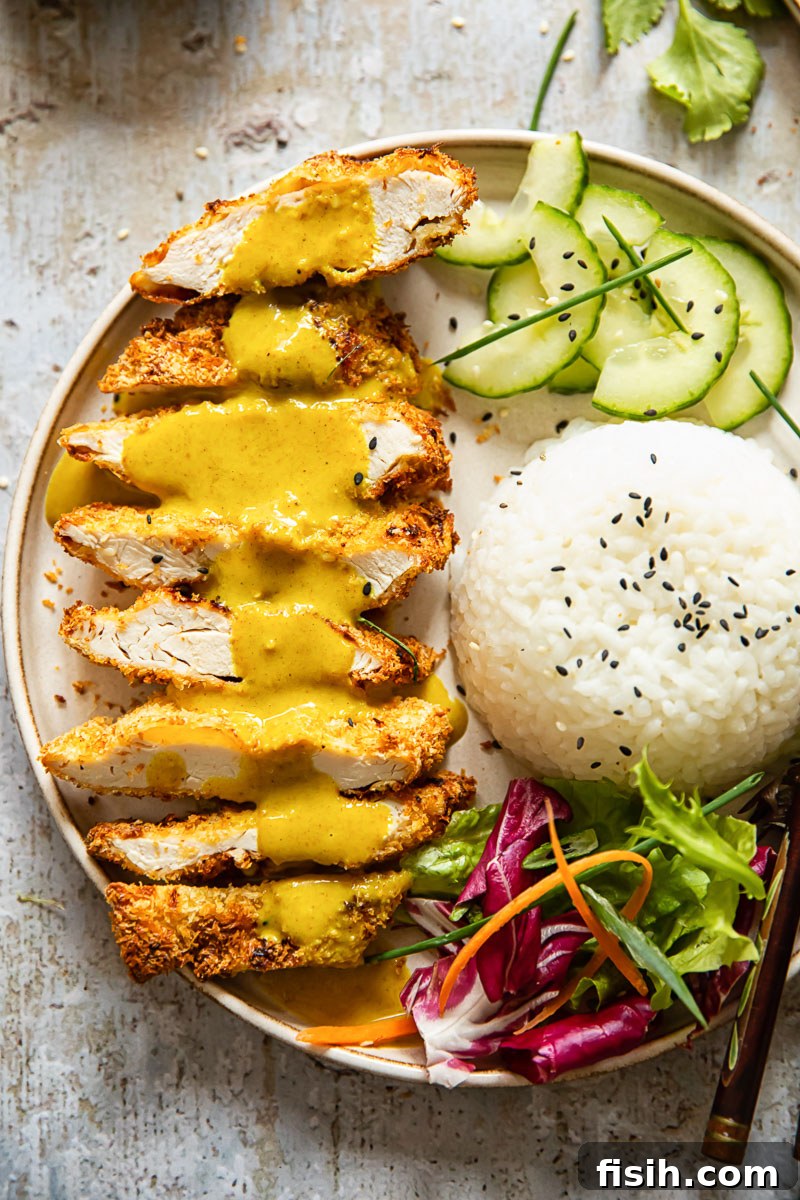
Crispy on the outside and wonderfully juicy within, this homemade Chicken Katsu is a revelation of flavor and ease. Forget the hassle of deep-frying; our air fryer method delivers a healthier, less messy take on this beloved Japanese comfort food. Pair it with a rich, creamy curry sauce, and you’ll transform your kitchen into your favorite Japanese restaurant, bringing that irresistible dining experience right to your home.
Do you crave the vibrant and comforting flavors of Japanese cuisine? Then you’ll adore this recipe! While you’re here, why not explore our super easy Udon Noodle Soup for another delightful taste of Japan?
Discovering the Magic of Homemade Chicken Katsu Curry
It’s hard to overstate the popularity of Chicken Katsu in our household. Whenever we decide to order takeout, more often than not, at least three out of four family members will unanimously choose Chicken Katsu Curry as their top pick. The allure of that perfectly crisp exterior encasing tender, flavorful chicken, all smothered in a rich, savory curry, is simply undeniable. It’s a dish that brings immediate satisfaction and a touch of culinary joy to any meal.
I’m certainly no stranger to reimagining our beloved takeout dishes for home cooking. My successful Butter Chicken recipe is a testament to that. However, for a long time, the prospect of tackling Chicken Katsu at home felt daunting. The signature crispy, deep-fried coating intimidated me, and truthfully, I have an aversion to the mess and fuss that comes with deep-frying. The idea of splattering oil, the lingering smell, and the cleanup always made me hesitant to try replicating this restaurant favorite.
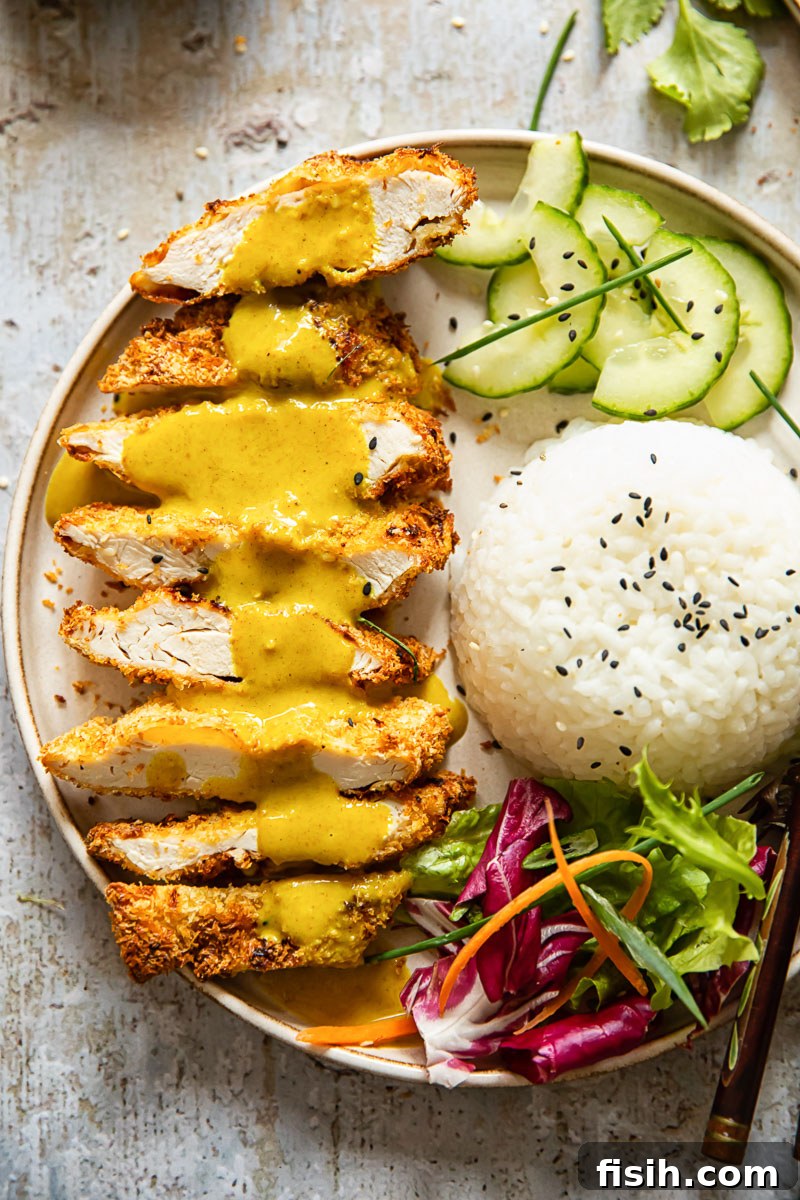
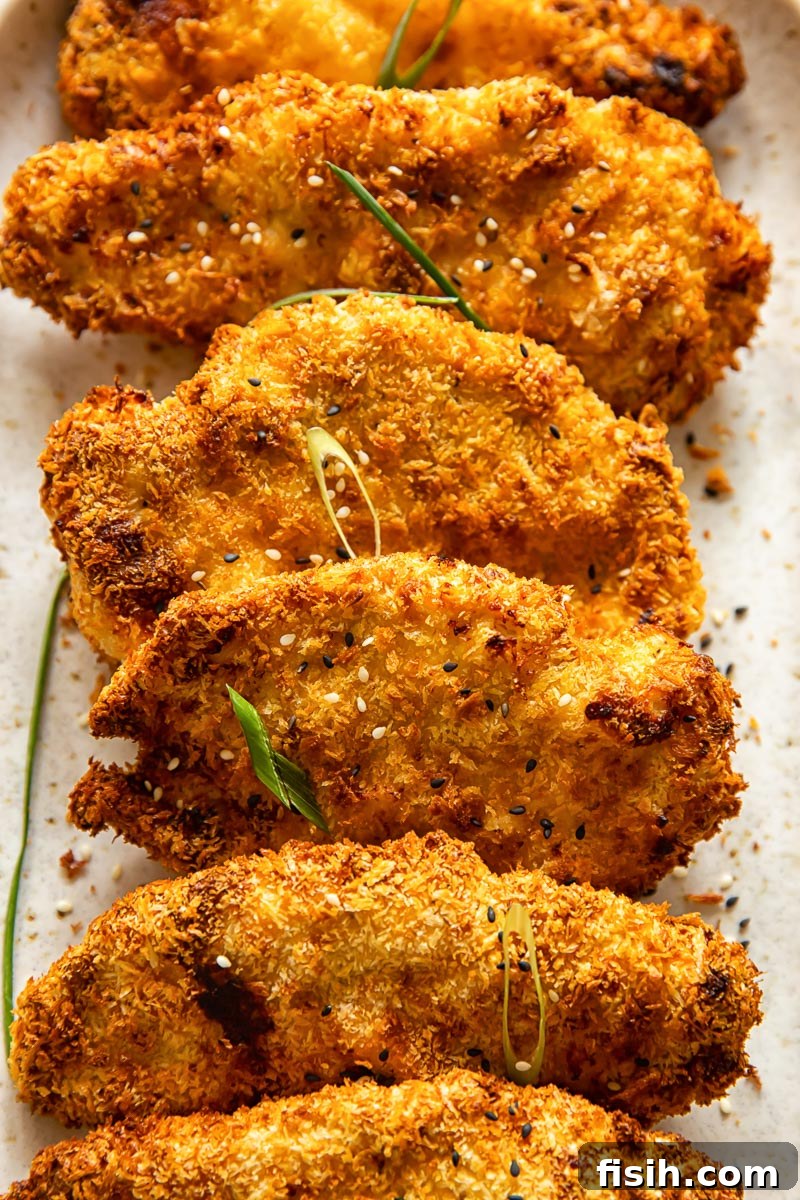
My perspective completely shifted the moment I realized the incredible potential of my Air Fryer. Could this kitchen marvel truly mimic the crispiness of deep-frying without all the drawbacks? A few experimental batches later, I found myself in possession of a Chicken Katsu recipe that I was immensely proud of. The results were astounding! You genuinely cannot tell that this air-fried chicken cutlet has significantly fewer calories compared to its deep-fried counterpart. It tastes just like the authentic, breaded and fried chicken you crave, but with all the added health benefits and convenience of air frying. Just behold its golden perfection!
This success further solidified my belief in the air fryer’s capabilities. My Chicken Tenders with Honey Mustard Sauce is another prime example where the air fryer consistently delivers stellar, crispy results while keeping the calorie count pleasantly low. It’s a game-changer for recreating fried favorites in a healthier way.
What Exactly is Chicken Katsu?
To truly appreciate this dish, let’s break down its components. “Katsu” in Japanese translates to “cutlet,” which immediately offers insight into the dish’s fundamental form. Chicken Katsu typically features chicken breasts, pounded thin into uniform cutlets, then meticulously coated in well-seasoned, light, and extra-crispy Panko breadcrumbs before being traditionally deep-fried. The result is a delightful contrast of textures: an incredibly crunchy exterior yielding to tender, moist chicken inside. It’s most frequently served alongside fluffy white rice and a uniquely mild, subtly sweet, and wonderfully aromatic Japanese curry sauce, a pairing that has captured hearts worldwide.
If you’re wondering about the connection between curry sauce and Japanese cuisine, you’re not alone. It’s a fascinating culinary journey! Curries were actually introduced to Japan via Britain, which in turn had adopted them from India. This intricate historical route, though seemingly convoluted, ultimately led to the birth of some truly incredible food pairings. Japanese curry has evolved into its own distinct style, characterized by a thicker, sweeter, and milder profile compared to its Indian counterparts, often incorporating fruits and vegetables for depth. And among these delicious fusions, Chicken Katsu Curry undeniably stands out as one of the most iconic and beloved creations.
Crafting the Perfect Katsu Curry Sauce
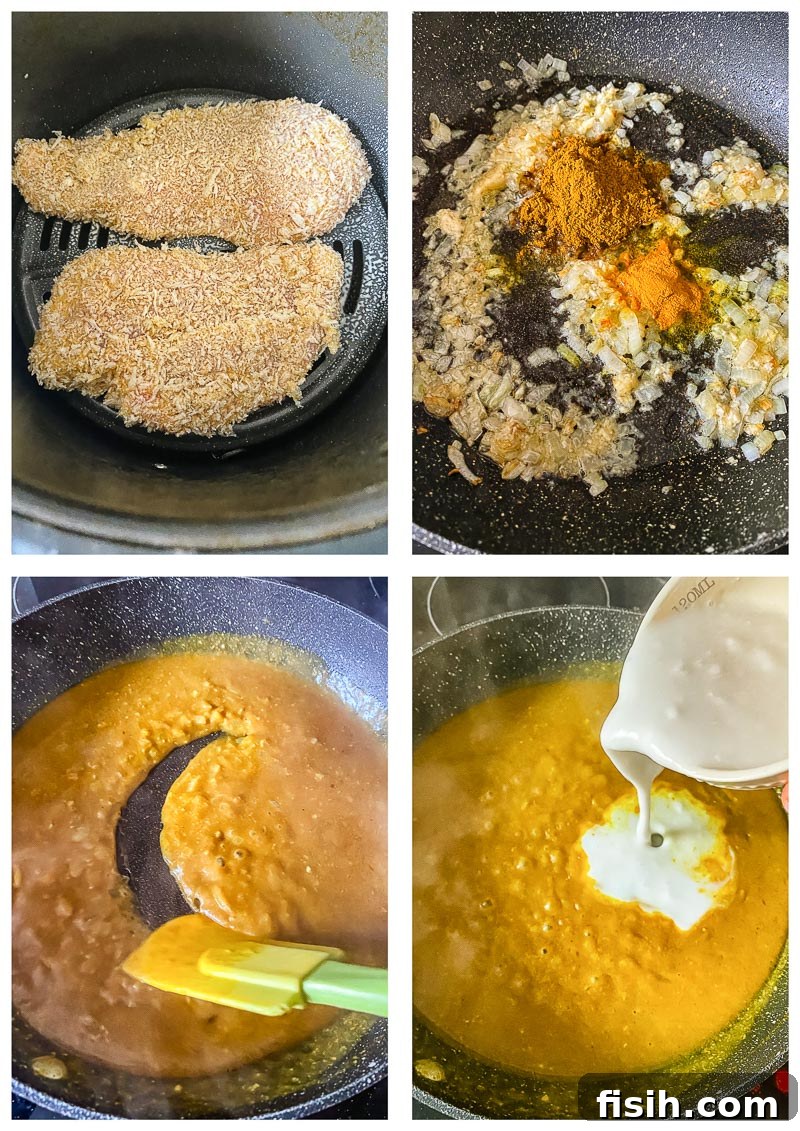
Please, don’t let the idea of making curry from scratch intimidate you. This is, hands down, one of the simplest and most rewarding curry recipes I’ve ever shared, requiring only a handful of readily available ingredients. The key to its depth of flavor lies in building a solid aromatic base and then allowing the spices and liquids to meld into a creamy, comforting sauce.
You’ll begin with a foundation of sautéed onion, garlic, and fresh ginger, gently cooked in a touch of oil until softened and fragrant. This trio creates a savory, slightly sweet backbone for the curry. To achieve that characteristic thick, rich texture of Japanese curry, we’ll incorporate a small amount of flour to create a quick roux. This simple step is crucial for thickening without adding heavy creams or excessive fats.
Next, we introduce the vibrant spices: any mild curry powder you prefer, along with earthy turmeric for its golden hue and subtle flavor. These spices are briefly toasted with the roux to deepen their aroma before adding the liquids. For our liquid base, I’ve opted for a harmonious combination of chicken stock and creamy coconut milk. The chicken stock adds savory umami, while the coconut milk lends a beautiful richness and subtle sweetness, contributing to the sauce’s silky texture. If you desire an even creamier, slightly sweeter curry, you can absolutely skip the chicken stock entirely and increase the amount of coconut milk.
No Japanese curry would be complete without a touch of umami-rich soy sauce to balance the flavors. A small amount goes a long way in adding complexity and depth. Remarkably, this entire sauce can be prepared in less than 10 minutes from start to finish. For that extra-silky smooth texture we often expect from restaurant-quality Katsu Curry, I like to give mine a quick blitz in a blender. However, this step is entirely optional; a rustic, slightly chunky sauce is equally delicious and authentic. The choice is yours, based on your preference for texture.
Mastering Your Air Fryer Chicken Katsu: Essential Tips and Notes
- The Panko Advantage: As highlighted earlier, our game-changing method replaces traditional deep-frying with air frying. This makes the choice of breadcrumbs absolutely paramount to the success of this recipe. Panko breadcrumbs are your non-negotiable, number one choice if you desire that truly crispy, shatteringly light coating for your chicken. Unlike regular breadcrumbs, Panko boasts a drier, larger, and flakier texture, which prevents it from becoming soggy. Furthermore, Panko absorbs significantly less oil, contributing to its superior crispiness and a lighter, healthier finished product.
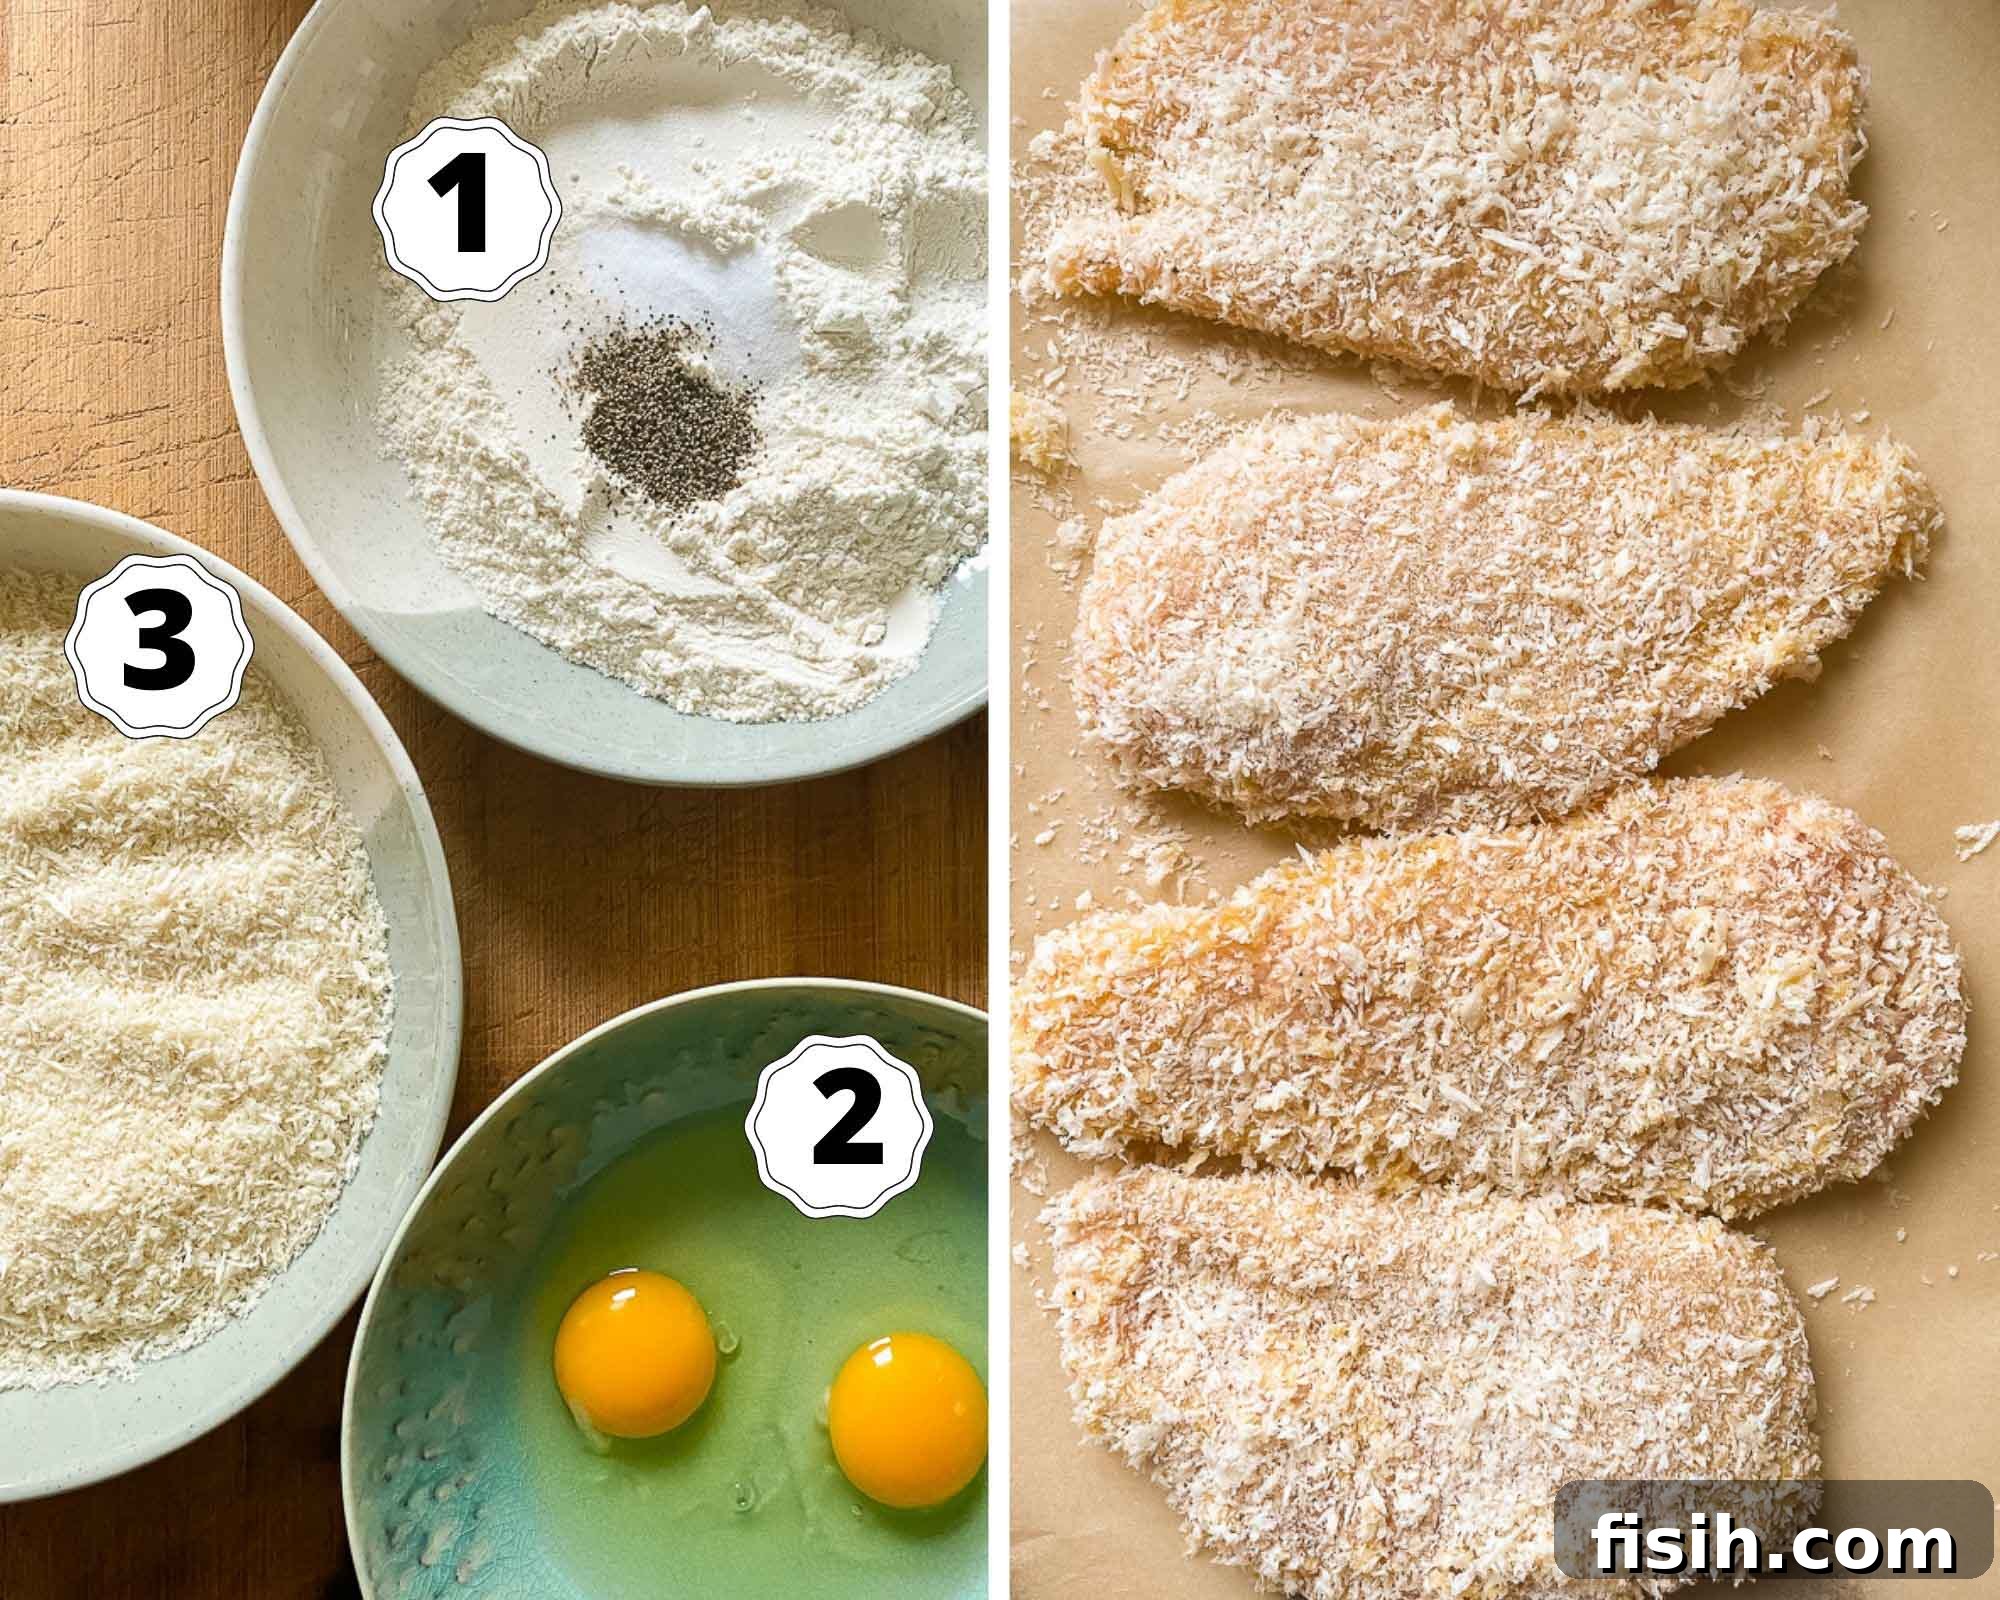
- The Breading Order is Key: To ensure an even, secure, and delectable coating, the chicken cutlets must be dipped in a specific order: first in seasoned flour, then thoroughly in beaten egg, and finally, generously coated in Panko breadcrumbs. This sequence creates a perfect adhesive layer for the Panko, ensuring maximum crunch. Refer to the process photos above for a visual guide to this crucial step.
- Season Every Layer: While it might seem like a minor detail, properly seasoning the flour mixture with salt and freshly ground black pepper is incredibly important. This ensures that every bite of your chicken Katsu is bursting with flavor, preventing any blandness beneath the crispy crust. Don’t skip this step – it elevates the entire dish!
- Pound Your Chicken Evenly: For consistent cooking and tenderness, it’s highly recommended to pound your chicken breasts to an even thickness, typically about ½ inch. This ensures that the chicken cooks through at the same rate as the breading crisps, preventing dry spots or unevenly cooked areas.
- Don’t Overcrowd the Air Fryer: For optimal crispiness, air fry the chicken in a single layer, ensuring there is enough space around each piece for air to circulate freely. If your air fryer basket is too small, cook in batches. Overcrowding will steam the chicken instead of crisping it, resulting in a less desirable texture.
- Oil Spray is Your Friend: A light, even coating of oil spray on both sides of the breaded chicken is essential for achieving that golden-brown, crispy finish in the air fryer. It helps the Panko toast beautifully and adds to the overall flavor.
Delightful Serving Suggestions for Chicken Katsu Curry
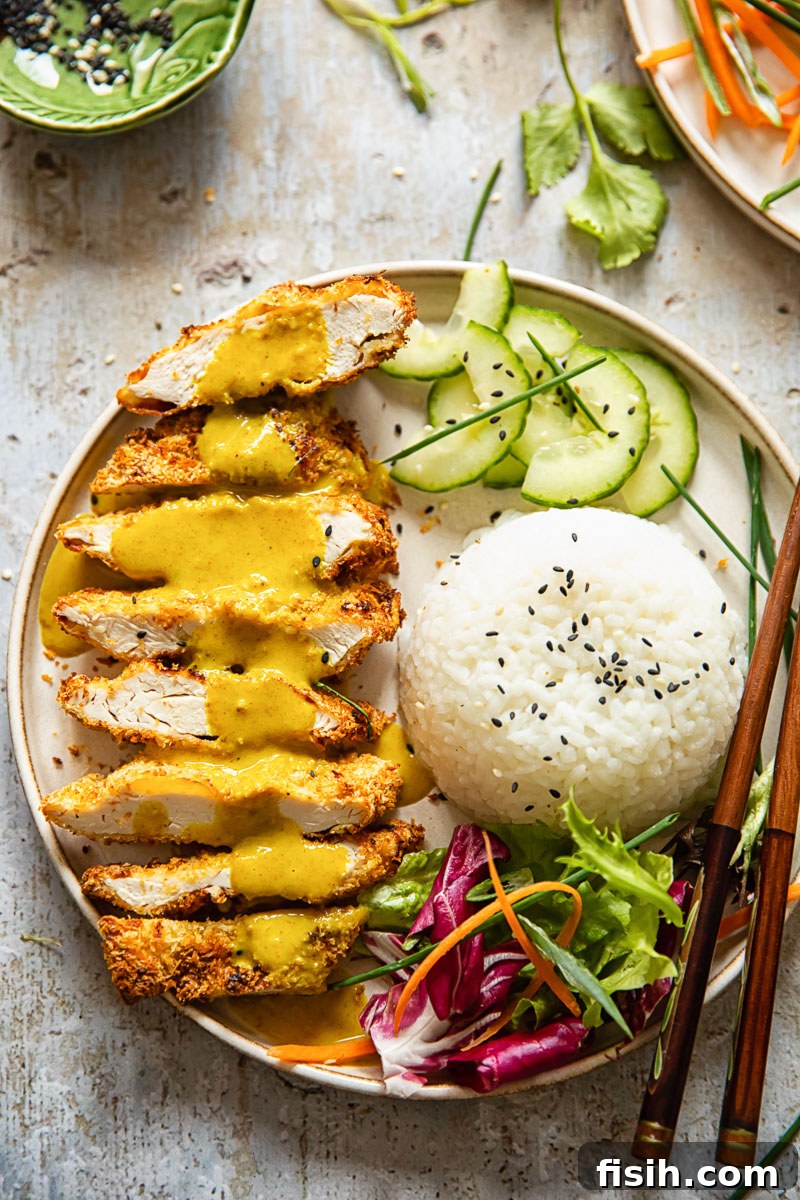
The classic way to enjoy Chicken Katsu Curry is undeniably with a generous portion of fluffy, plain white rice, which perfectly absorbs the rich curry sauce. A simple, crisp green salad on the side provides a refreshing contrast to the richness of the main dish, adding a vital element of freshness and lightness to the meal. Beyond these staples, there are several ways to elevate your serving experience:
- Sesame Seeds: A light sprinkling of black or white sesame seeds over the finished Katsu and curry is not just for visual appeal. It adds a lovely, subtle nutty flavor and an extra layer of delicate crunch that truly enhances the dish. This is an optional but highly recommended touch.
- Pickled Ginger (Gari): The vibrant, zingy flavor of pickled ginger can cut through the richness of the curry and chicken, offering a palate cleanser with every bite.
- Shredded Cabbage: Finely shredded fresh cabbage is another traditional accompaniment, providing a refreshing crunch and a slightly bitter note that complements the sweet curry.
- Miso Soup: A small bowl of warm miso soup served alongside is a wonderful way to complete the Japanese dining experience.
- Lemon Wedge: A squeeze of fresh lemon juice over the Katsu before drizzling the curry can brighten the flavors and add a zesty tang.
Feel free to customize your plating and sides to create a truly personalized and enjoyable meal!
Storage and Reheating for Perfectly Crispy Leftovers
One of the beauties of homemade Chicken Katsu is that it can be enjoyed as delicious leftovers, though the key is to preserve that delightful crispy exterior. It would truly be a shame to lose the lovely crunch of the Panko breading! Fortunately, your trusty air fryer is perfectly equipped to revive it.
- Reheating the Katsu: To bring your Katsu back to its former glory, simply place the leftover chicken cutlets in your air fryer basket in a single layer. Air fry at 350°F (175°C) for no longer than 5-7 minutes, or until thoroughly heated through and crisp again. This quick reheat method ensures the breading remains wonderfully crunchy, just like freshly made. Avoid covering the Katsu with foil during reheating, as this will trap moisture and make the breading soggy.
- Refrigeration: Cooked Chicken Katsu and the curry sauce should be stored separately in airtight containers in the refrigerator. Properly stored, they will keep fresh for 3-4 days. For best results, keep the Katsu uncovered or loosely covered while cooling to prevent condensation, then seal once completely cool.
- Freezing: Both the cooked chicken Katsu and the curry sauce freeze beautifully. For the Katsu, allow it to cool completely, then wrap individual cutlets tightly in plastic wrap and place them in a freezer-safe bag or container. The curry sauce can be frozen in an airtight container. They will maintain their quality for up to 6 months in the freezer. When ready to enjoy, thaw the curry sauce in the refrigerator overnight. Reheat the thawed Katsu directly in the air fryer for the best texture, adding a few extra minutes to the reheating time compared to refrigerated leftovers.
Why Choose Our Air Fryer Chicken Katsu Curry Recipe?
In a world bustling with culinary options, our Air Fryer Chicken Katsu Curry recipe stands out as a true gem for several compelling reasons:
- Healthier Indulgence: By opting for the air fryer over traditional deep-frying, we drastically reduce the amount of oil needed, transforming a typically indulgent dish into a healthier, guilt-free meal without sacrificing an ounce of flavor or crunch. Enjoy your favorite comfort food with less fat and fewer calories.
- Unbeatable Crispy Texture: Thanks to the magic of Panko breadcrumbs and the efficient circulation of hot air, our chicken katsu achieves an unparalleled crispy, golden-brown crust that rivals any deep-fried version.
- Juicy, Tender Chicken Every Time: The air frying method ensures the chicken cooks through perfectly, remaining incredibly tender and juicy on the inside, a perfect contrast to its crisp exterior.
- Effortless & Clean Cooking: Say goodbye to splattering oil, greasy countertops, and the heavy smell of deep-frying. The air fryer makes the cooking process remarkably clean and simple, allowing for quick cleanup.
- Authentic Japanese Flavors at Home: We’ve meticulously crafted the creamy curry sauce to capture the mild, savory, and subtly sweet essence of a classic Japanese curry, making it easy for you to recreate this beloved restaurant dish in your own kitchen.
- Family-Friendly Favorite: This dish is a proven crowd-pleaser, appealing to both adults and children alike. It’s a fantastic way to introduce new flavors or revisit a cherished takeout staple with a homemade touch.
- Quick & Convenient: With minimal prep and active cooking time, this recipe is perfect for busy weeknights when you crave something special but don’t have hours to spend in the kitchen.
Embrace the simplicity, health benefits, and incredible flavor of our Air Fryer Chicken Katsu Curry. It’s more than just a recipe; it’s an invitation to enjoy a healthier, happier cooking experience!
More Japanese Inspired Recipes to Explore
- Teriyaki Salmon with Bok Choy
- Shoyu Chicken Recipe
- Teriyaki Chicken Stir Fry
- Quick Beef Yakisoba
Chicken Katsu Curry
By Julia Frey of Vikalinka
Crispy on the outside and juicy on the inside, this Chicken Katsu is so easy to make. Don’t forget the creamy curry sauce and bring your favorite restaurant treat home.
Equipment
- Air Fryer
Ingredients
For the Curry
- 2 tbsp vegetable oil
- 1 onion, chopped
- 2 cloves garlic, minced
- 1 tbsp grated ginger or ginger paste
- 1 tsp turmeric
- 2 tbsp curry powder
- 1 tbsp flour
- 250ml/ 1 cup chicken stock
- 125ml/1/2 cup coconut milk
- 1 tsp soy sauce
- 2 tsp white sugar
For the Chicken Katsu
- 4 skinless, boneless chicken breasts
- 100g/3/4 cup plain flour
- 3 tsp salt
- 1 1/2 tsp black pepper
- 2 eggs, beaten
- 150g/1 1/3 cup Panko breadcrumbs
- oil spray
Instructions
- Heat the oil in a frying pan over low heat. Add the chopped onion and sauté until softened, about 7 minutes. Then, add the minced garlic and grated ginger, cooking for about 1 minute more while stirring.
- Stir in the turmeric, curry powder, and flour, cooking for 1 minute until the mixture is fragrant and forms a paste. Gradually pour in the chicken stock, stirring constantly to combine and avoid lumps. Next, add the coconut milk and soy sauce, then simmer until the curry thickens to your desired consistency. Taste and adjust seasoning, adding 1-2 teaspoons of sugar to your preference for a balanced flavor. Cool the curry slightly, then process it in a blender until smooth for a silky texture, or leave it as is for a more rustic feel.
- Prepare the chicken cutlets: Slice each chicken breast in half lengthwise to create thinner cutlets. Set up a breading station with three shallow bowls: one with plain flour mixed with salt and pepper, one with beaten eggs, and a third with Panko breadcrumbs. Arrange them in this order for easy dipping.
- Coat each chicken cutlet: First, dredge a chicken cutlet thoroughly in the seasoned flour, shaking off any excess. Next, dip it into the beaten egg, ensuring it’s fully coated. Finally, press the chicken firmly into the Panko breadcrumbs, ensuring an even and generous coating on all sides. Place the coated cutlet on a clean cutting board or plate. Repeat this process for all chicken cutlets until you have 8 perfectly breaded pieces.
- Air Fry the Chicken Katsu: Lightly spray each breaded chicken cutlet with oil spray on both sides. Place the cutlets in your air fryer basket in a single layer, ensuring they are not overcrowded (you may need to work in batches, as most air fryers fit about 2 cutlets at a time). Air fry at 375°F (190°C) for 8 minutes on one side. Flip the cutlets, spray them again with oil, and continue to air fry for another 7 minutes, or until golden brown and cooked through (internal temperature reaches 165°F/74°C). If cooking in batches, keep the remaining raw chicken in the fridge until ready to air fry. Once cooked, keep the chicken warm in a low oven (without covering with foil to preserve crispiness) until all batches are ready to serve.
- Serve: Warm up the curry sauce gently. Slice the cooked chicken Katsu into strips. Serve the crispy chicken Katsu immediately with the warm, creamy curry sauce poured over, accompanied by plain rice and a simple side salad.
Nutrition
Nutrition information is automatically calculated, so should only be used as an approximation.
Calories: 586kcal | Carbohydrates: 59g | Protein: 38g | Fat: 22g | Saturated Fat: 14g | Trans Fat: 1g | Cholesterol: 156mg | Sodium: 2359mg | Potassium: 808mg | Fiber: 4g | Sugar: 7g | Vitamin A: 189IU | Vitamin C: 5mg | Calcium: 127mg | Iron: 6mg