
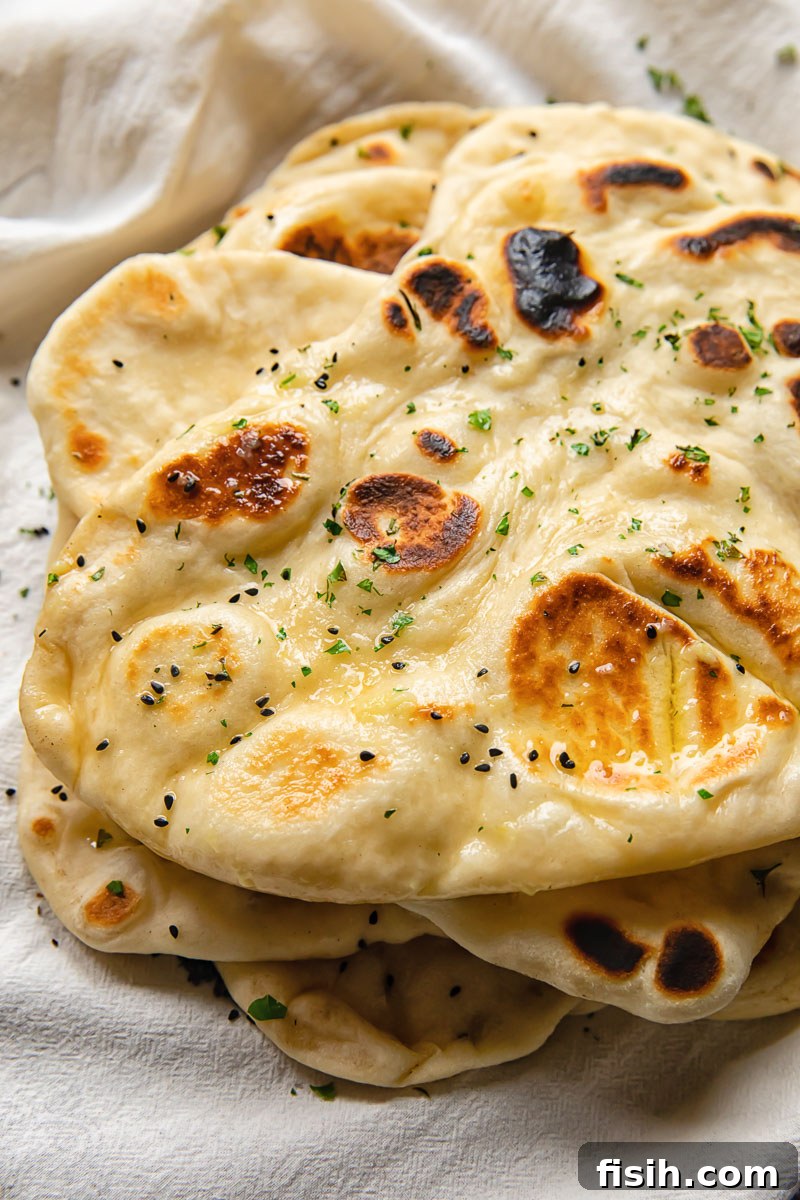
Forget expensive takeout and bland store-bought versions! Learning to make homemade naan bread has been a revelation in my kitchen. What started with perfecting homemade curries has evolved into crafting these sweet, milky-smelling naans that emerge hot, soft, and utterly fresh off the pan. Not only is it incredibly satisfying, but it’s also significantly cheaper and healthier than any alternative (and yes, that’s just good “girl math”). With just a few pantry staples and an incredibly simple method, you’ll soon be wondering why you didn’t start sooner. Get ready to experience the true taste of freshly baked Indian flatbread!
While this recipe for naan bread is remarkably easy, it does involve working with yeast, which requires a basic understanding of dough chemistry. If you’re completely new to bread making and prefer a zero-fuss, rapid-proof option for your first foray, you might want to try my easy flatbread recipe. It’s yeast-free and perfect for building confidence before diving into the delightful world of naan.

Easy Homemade Naan Bread Recipe: Stovetop Perfection
When you think of traditional naan, you likely picture it baking inside a scorching hot tandoor oven. But let’s be real, most of us don’t have a tandoor in our home kitchens – and neither do I! Yet, that minor detail certainly doesn’t stop us from achieving perfectly delicious, authentic-tasting naan.
My secret lies in adapting the method for Western kitchens, utilizing a simple, heavy-based frying pan on the stovetop. This clever adjustment replicates the intense, even heat of a tandoor, allowing the naan to puff up beautifully and develop that irresistible bubbly texture. The result? Pillowy-perfect naan bread that rivals any you’d find at your favorite Indian restaurant.
In just minutes, you’ll be pulling off incredibly bubbly, flour-soft naans with a gentle chew that makes them absolutely irresistible. Imagine these warm, fresh flatbreads, ready to brilliantly mop up every last drop of your favorite curry sauce. It’s a culinary experience that elevates any meal.
Why Make Naan at Home? Cost, Health, and Unbeatable Freshness
Let’s talk about the incredible benefits of making naan from scratch. My eyes practically water at the thought of paying £3.50 for a single plain naan from the local takeout spot! Especially when I know all the ingredients are readily available in my kitchen and cost a mere fraction of that price. Beyond the simple economics, consider the store-bought versions that often come loaded with extra additives and preservatives to extend their shelf life. When I’m already putting in the effort to make a curry from scratch, it only makes sense to complete the authentic experience by making my own naan as well.
The freshness of homemade naan is unparalleled. It’s warm, soft, and infused with the subtle aromas of milk and yogurt – ingredients that might surprise you. These dairy components are crucial; they enrich the dough, giving it a delightful cushiony spring and a mildly sweet flavor that sets it apart from other flatbreads. This richness contributes directly to the soft, tender crumb and slightly chewy exterior that defines a truly great naan.
The Naan-Making Process: Easier Than You Think!
Making naan does require a little planning ahead, primarily due to the proofing time needed for the yeast. However, the hands-on effort is surprisingly minimal. The process itself is quite enjoyable! It takes mere minutes to mix the ingredients together, followed by a quick session of kneading the dough – a therapeutic activity for many home bakers. After this, you simply let the dough proof for about 1 to 1.5 hours in a warm spot, allowing the yeast to work its magic. Once proofed, you roll and shape your naans, then cook them quickly on your preheated stovetop pan.
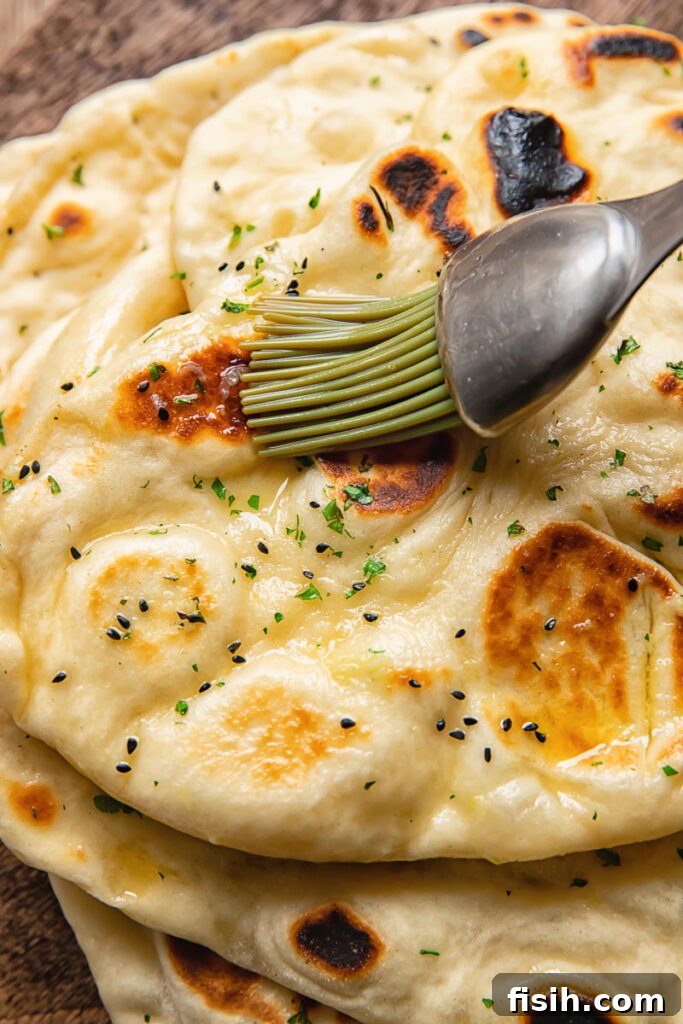
For an extra layer of flavor, I love adding nigella seeds and fresh coriander (cilantro) to my naan dough. These additions provide a wonderful aromatic complexity. And if you’re a garlic lover, transforming these into garlic naans is incredibly simple: just melt butter with grated garlic and brush it generously over the top of the freshly cooked naan. The aroma alone is enough to get your mouth watering!
The satisfaction that comes from creating an entire Indian feast from scratch – from a rich curry to these warm, bubbly naans – is truly second-to-none. It’s an accomplishment that tastes as good as it feels.
Expert Tips for Perfect Homemade Naan Every Time
- Embrace the Yeasted Dough Journey: While “naan bread” might sound exotic, the process of making these homemade flatbreads is fundamentally similar to baking any other yeasted loaf. The main difference lies in the cooking method – using a frying pan instead of a traditional oven. If you’ve previously experimented with my easy flatbread recipe, you’ll find many familiar steps, making this an accessible next step in your bread-making adventures.
- Proofing in a Cool Kitchen: A Clever Hack: Yeasted dough can be quite temperamental, especially in colder environments where it struggles to rise. If your kitchen is on the cooler side, here’s a simple trick to create the perfect warm, humid microclimate for proofing: Place a bowl of freshly boiled water inside your oven. Close the oven door for a few minutes until the interior feels gently warm and steamy. Then, remove the water bowl and immediately place your dough bowl inside. Close the door and let it proof for the required time. Remember, you do not need to turn the oven on – the residual warmth and humidity are enough!
- Beauty in Imperfection: For novice naan-makers, remember that the true charm of these tear-shaped flatbreads lies in their rough, rustic, and unique appearance. Don’t stress too much about achieving a perfectly symmetrical or uniform shape. The texture and taste are what truly count, so focus on getting that delightful chew and pillowy softness. Each naan will have its own character, which is part of the homemade appeal!
- Batch Cooking for Speed: These breads cook incredibly quickly on a hot pan. To ensure a smooth cooking process and prevent waiting around, prepare a couple of naans by rolling them out in advance. This way, as one naan is cooking, you can easily place the next one onto the hot pan right after, maintaining a steady flow.
- Flavor Exploration: Nigella and Cilantro: Nigella seeds (also known as black cumin seeds) and freshly chopped cilantro (coriander in the UK) are my personal favorite flavor enhancers for naan. Cilantro brings a bright, fresh, and zingy note, while nigella offers a distinct, subtly bitter, and slightly onion-like aroma. Don’t be shy – give them a try! Of course, if they’re not to your taste, feel free to omit them. It’s your naan, customize it as you wish!
- The Power of the Right Pan: Using a thick, cast-iron pan is truly ideal for cooking naan. Cast iron heats evenly and, crucially, retains that intense heat for a long time, which is key for getting those beautiful bubbles and char. If you don’t have one, a good quality non-stick frying pan will work perfectly well. The most important thing is to ensure your pan is screaming hot before you place the dough on it.
- Lightly Oil the Pan: Before cooking each naan, use a little vegetable oil to lightly brush the pan. This helps prevent sticking and contributes to a lovely, slightly crisped exterior.
- Stay Vigilant: Naans Cook Fast! Naans cook very quickly and can easily catch and burn if not watched closely. Keep a keen eye on them, and don’t hesitate to adjust the heat of your stove as you go along to prevent over-browning. A perfectly cooked naan will have golden-brown spots and puffed-up bubbles.

Serving Suggestions: More Than Just a Curry Companion
The simple contentment and cozy satisfaction that comes from a steaming bowl of Nepalese red lentil dahl served with a warm, homemade naan bread is truly unbeatable for a comforting meal. However, on a day when you’re craving something heartier, a boldly flavored Indian kofta curry or a rich and smooth butter chicken curry paired with your fresh naan absolutely hits the spot.
But the versatility of homemade naan extends far beyond traditional curries. I always keep a useful stash of these flatbreads for all kinds of last-minute culinary needs and creative meal ideas:
- Homemade Pizzas: Naans make a brilliant, ready-made base for quick and delicious personal pizzas. Top them with your favorite sauce, cheese, and toppings, then bake or pan-fry until bubbly.
- Dipping Delight: Their soft texture and mild flavor are perfect for dipping into rich and flavorful spreads like smoky baba ghanoush or a creamy whipped feta and ricotta dip.
- Breakfast Side: Serve them as a substantial bread-side for a hearty breakfast, such as alongside a vibrant shakshuka, perfect for soaking up all those delicious egg yolks and tomato sauce.
- Middle Eastern Meals: They also make a fantastic, more substantial flatbread to accompany various Middle Eastern dishes, such as skewered chicken souvlaki or the flavorful chicken musakhan.
Storage and Leftovers: Keep Your Naan Fresh
To keep any leftover homemade naan bread as fresh as possible, store them in an airtight container or a sealed bag at room temperature. They will remain soft and delicious for 1-2 days. Reheating is a breeze: simply warm them through on the stovetop over medium heat, in a preheated oven, or even quickly pop them in a toaster for a few seconds until heated through.
Preparing a multi-dish curry feast from scratch can sometimes feel like juggling many tasks at once. This is where the beauty of homemade naan truly shines, as you can easily prepare them in advance. Once cooked and thoroughly cooled, wrap each naan individually to prevent them from sticking together, and then freeze them for up to 3 months. The fantastic thing about flatbreads is that there’s no need to defrost them before reheating! You can warm them directly from frozen in the oven for 5-6 minutes at 400°F/200°C, or simply reheat them on a hot hob or frying pan until soft and pliable again. This makes quick weeknight meals or spontaneous Indian feasts incredibly easy to pull together.
More Delicious Side Dishes to Try
- Truffle Aioli
- Air Fryer Garlic Bread
- Chickpea Tuna Salad
- Muhammara
Homemade Naan
Julia Frey of Vikalinka
1 hr 40 mins
5 mins
1 hr 45 mins
8 people

Equipment
-
Food processor
-
Cast iron skillet
-
Pastry brush
Ingredients
- 150ml / 2/3 cup warm milk
- 2 tbsp granulated or caster sugar
- 7g / 2 tsp active yeast
- 450g / 3 3/4 cup bread flour
- 1 tsp salt
- 1 tsp baking powder
- 4 tbsp vegetable oil, divided
- 210ml / 3/4 cup plus 2 tbsp plain yogurt , full fat (not greek)
- 2 tbsp chopped cilantro / coriander , optional
- 2 tbsp nigella seeds, optional
For garlic naan
- 2 tbsp butter
- 1 clove garlic, grated or pressed
Instructions
-
In a medium bowl or a large measuring cup, combine the warm milk, sugar, and yeast. Let it sit for 10-15 minutes until it’s frothy. (If it’s not, your yeast is likely out of date and needs replacing.)
-
In the mixing bowl of a food processor, combine the flour, salt, the frothy yeasty milk, baking powder, yogurt, and 2 tbsp of vegetable oil. Knead for 5 minutes using the dough hook attachment until you have a soft and pliable dough. Alternatively, you can knead the dough by hand, which will take approximately 10 minutes. Coat the dough with 1 tbsp of vegetable oil and let it rise in a warm place until it doubles in bulk. This can take anywhere between 1 hour and 1.5 hours, depending on the temperature of your house.
-
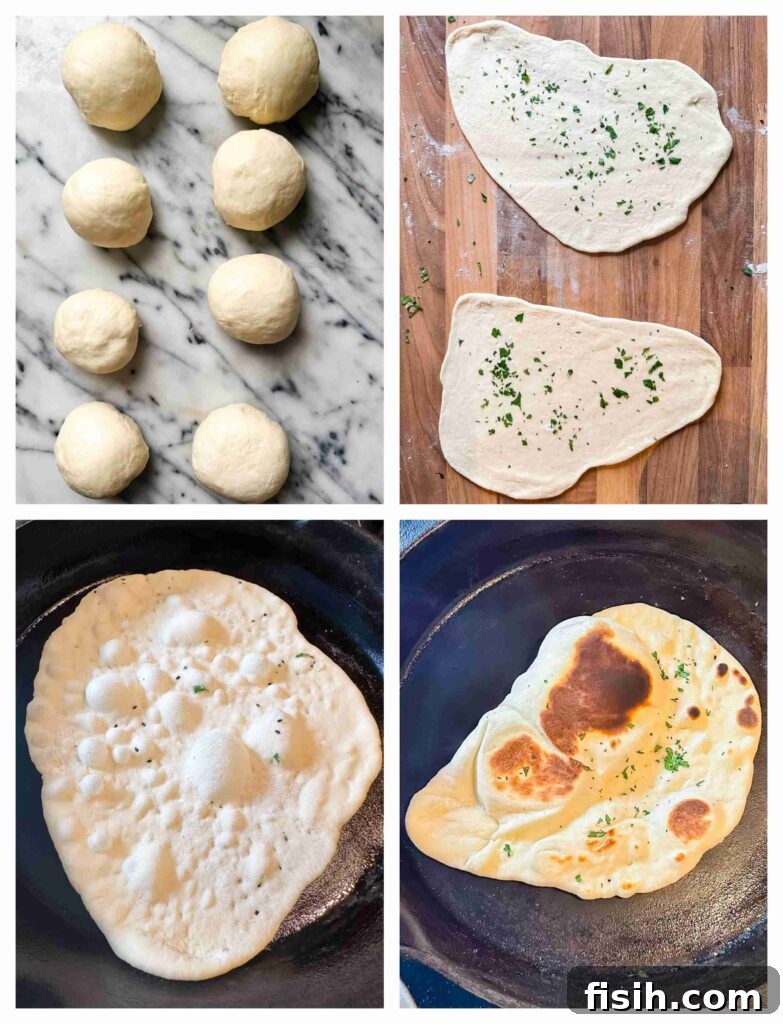
Once the dough is ready, turn it out onto a lightly floured surface, shape it into a ball, and divide it into 8 equal parts. Then, roll each part into a ball, cover with a kitchen towel, and let it rest for 10 more minutes.
-
While the dough is resting, prepare your cooking setup. If using a cast iron pan, preheat it over medium heat for approximately 7-10 minutes (it needs a long time to heat evenly). Alternatively, you can use a non-stick pan, which doesn’t need as long to preheat.
-
Chop up the cilantro leaves and set out nigella seeds if you are using them.
-
Start by rolling one dough ball into an oval shape. Make sure your work surface is lightly sprinkled with flour to prevent sticking. If you want to achieve the classic tear-shaped naan look, gently stretch out one end by hand. Sprinkle one side with either nigella seeds or chopped cilantro and press down lightly with the palm of your hand to adhere them.
-
Test if your pan is hot enough by sprinkling a tiny amount of water on it; it should immediately sizzle and evaporate.
-
Dip a bunched-up sheet of paper towel into vegetable oil and lightly rub the frying pan with it. Cook each naan until it bubbles up, which can take up to 1 minute or even longer depending on the heat of your pan. Then, flip and cook on the other side for 30-45 seconds longer. I find that covering the pan with a lid after the flip helps the naan puff up more dramatically. Watch carefully as it can burn quickly!
-
Since each naan cooks quite fast, it’s helpful to always have 2 of them rolled out and ready while one is in the pan. This keeps the cooking process efficient.
-
To make garlic naan, melt the butter in the microwave or a small pan and grate the garlic into it. Mix well and brush generously over each warm naan as desired.
Nutrition
Calories: 182kcal | Carbohydrates: 28g | Protein: 6g | Fat: 5g | Saturated Fat: 3g | Polyunsaturated Fat: 0.4g | Monounsaturated Fat: 1g | Trans Fat: 0.1g | Cholesterol: 13mg | Sodium: 337mg | Potassium: 190mg | Fiber: 1g | Sugar: 5g | Vitamin A: 172IU | Vitamin C: 0.4mg | Calcium: 99mg | Iron: 1mg
Nutrition information is automatically calculated, so should only be used as an approximation.
Tried this recipe? Let us know how it was!