
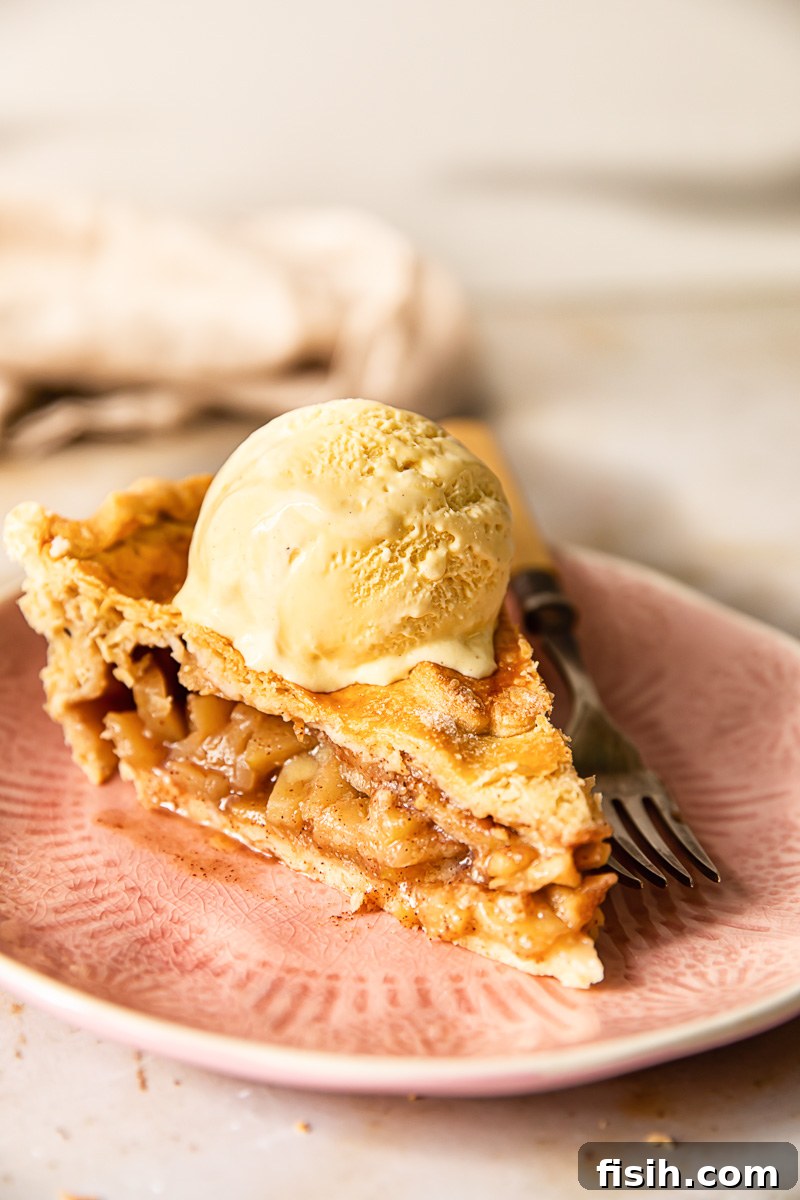
Craving the nostalgic taste of the apple pie you remember from childhood? This classic recipe promises a divinely flaky, buttery crust embracing a perfectly spiced, tender apple filling – truly just like grandma used to make!
For a delightful twist on tradition, consider exploring our Dulce de Leche Apple Pie, infusing a rich caramel flavor into your favorite dessert.

Grandma’s Classic Apple Pie: A Timeless Recipe for Comfort
Can you imagine a more comforting or inviting aroma filling your home than that of a freshly baking apple pie? It’s a scent that instantly evokes warmth, family gatherings, and cherished memories. This dessert has an enduring charm, consistently hitting all the right notes, which is undoubtedly why it remains a beloved classic worldwide.
While I enjoy experimenting with various culinary twists and modern interpretations, there’s truly nothing that surpasses the authentic, traditional apple pie from my upbringing. It’s a taste of pure nostalgia, a sweet reminder of simpler times and the unconditional love put into homemade treats. That deep connection to tradition is precisely why I’m sharing this recipe for the ultimate classic apple pie.
This isn’t just a recipe; it’s a journey back to the heart of home baking, celebrating the simple perfection of a dessert crafted with care. Because, let’s be honest, when it comes to capturing that quintessential homemade flavor, who bakes a better pie than grandma?
The Secret to an Irresistibly Flaky and Flavorful Pie Crust
The quest for the perfect pie crust often hinges on the fats used. Lard has long been celebrated for its unparalleled ability to create an incredibly flaky pastry. However, in my experience, lard-only crusts, while wonderfully textured, can sometimes lack the rich, depth of flavor that butter brings to the table. They often leave a subtle, aromatic void that only butter can fill.
In developing this signature apple pie recipe, my goal was to bridge this gap, marrying the best characteristics of both fats. After countless experiments and many delicious pies, I discovered that by combining both lard and a generous amount of high-quality butter, I could achieve a crust that boasts both the ethereal flakiness of lard and the profound, delectable flavor of butter. This harmonious blend ensures a truly superior pastry.
The outcome is a pie crust so astonishingly flaky it practically “explodes” into delicate layers with every bite, yet it never compromises on its rich, buttery taste. Each forkful offers a symphony of crisp texture and savory-sweet flavor, providing the perfect foundation for the vibrant apple filling. This balanced approach to the crust is what elevates this pie from merely good to truly unforgettable.
Selecting the Best Apples for Your Homemade Pie
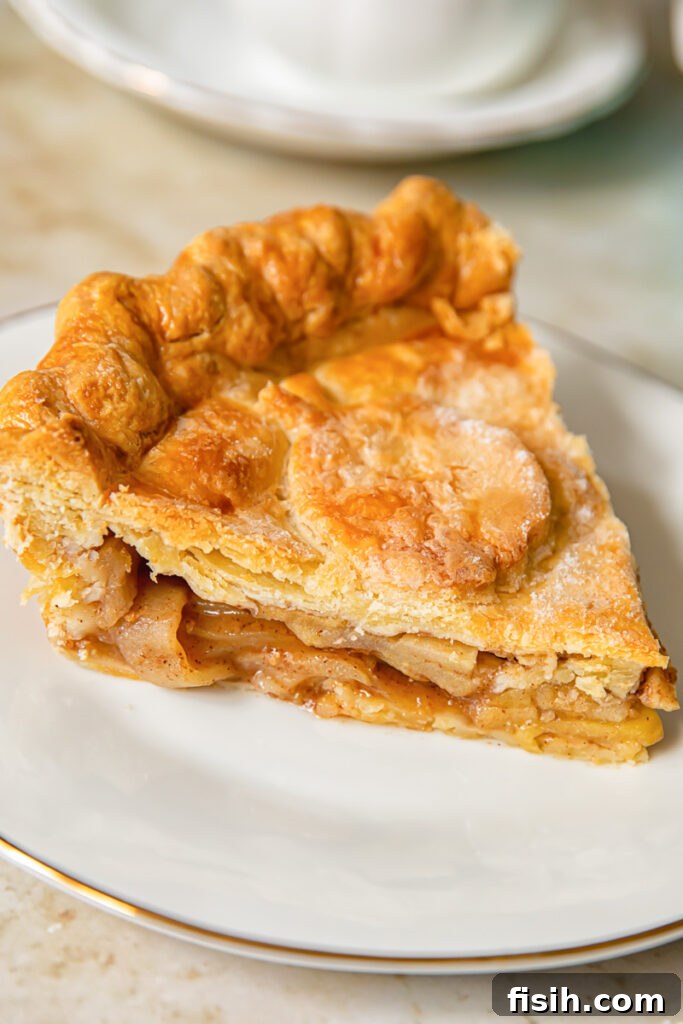
The choice of apples is a critical factor in the overall success and texture of your apple pie. My top recommendation, and personal favorite, is the Granny Smith apple. This variety stands out for its firm, crisp texture and refreshingly tart flavor, which holds up exceptionally well during the baking process. Granny Smiths maintain their shape beautifully, preventing the filling from becoming an unappetizing, watery mush and ensuring distinct, tender apple slices in every bite. Their tartness also provides a wonderful counterpoint to the sweetness of the sugar and spices in the filling.
Should Granny Smith apples not be available, or if you prefer a slightly different flavor profile, several other firm apple varieties also perform admirably in pies. Excellent alternatives include Honeycrisp, Braeburn, and Golden Delicious apples. These varieties share the crucial characteristic of retaining their structure and a pleasant bite even after prolonged baking, contributing to a superior and more enjoyable pie texture. When selecting your apples, aim for those that are firm to the touch and free of blemishes.
Conversely, it is essential to avoid soft apple varieties, such as McIntosh or Red Delicious, when preparing apple pies. These types of apples lack the structural integrity required to withstand the heat of the oven. When baked, they tend to break down excessively and rapidly, transforming into an applesauce-like consistency that can make your pie filling overly wet and lacking in textural interest. Opting for firm, baking-friendly apples ensures your pie filling remains delightful, substantial, and truly reminiscent of that classic homemade taste.
Expert Tips and Notes for Baking Your Best Apple Pie
Achieving a truly magnificent apple pie involves more than just following steps; it’s about understanding the nuances that elevate a good pie to a great one. These insights, gathered from years of baking, will help you master every element, from the incredibly flaky crust to the perfectly spiced filling.
- The Unbeatable Pie Crust: Of the countless pie pastry recipes I’ve experimented with over the years, the one detailed here stands out as my undisputed favorite. It consistently delivers a pastry that is wonderfully flaky, richly buttery, yet remarkably light. Beyond its exquisite texture and flavor, it’s also a dream to work with, rolling out smoothly without resistance, making the pie-making process genuinely enjoyable.
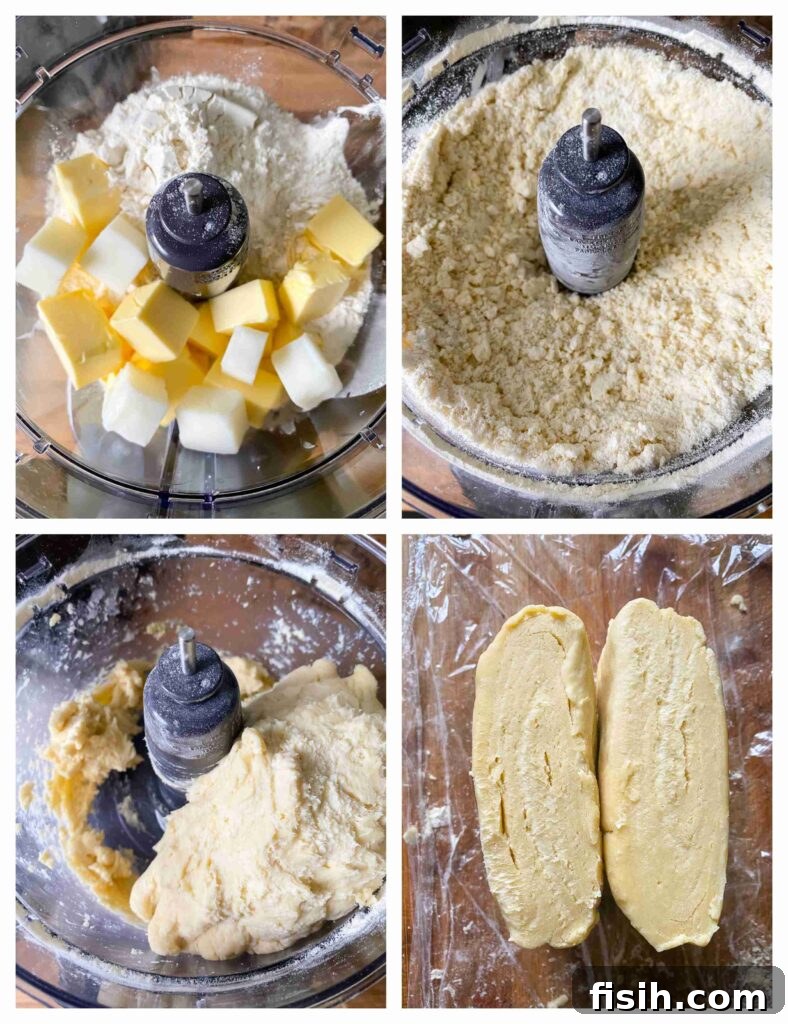
- Leverage Your Food Processor for Pastry: For an even simpler and more foolproof pie crust, I wholeheartedly recommend using a food processor. This method is not only incredibly quick but also minimizes direct hand contact with the dough. The heat from your hands can melt the fats prematurely, hindering flakiness. The food processor ensures the fats remain cold and distinct, which is paramount for creating those beautiful, flaky layers.
- The Non-Negotiable Cold Ingredients Rule: The secret to a truly flaky pie crust lies in using very cold ingredients. Ensure your butter, lard, egg, and especially the water, are thoroughly chilled. I always use ice-cold water, often adding an ice cube or two to the measuring cup, to maintain the lowest possible temperature for the dough, preventing the fats from melting too soon.
- Elevate Flakiness with Lamination: To achieve an even more spectacular, multi-layered flaky pastry, try a simple lamination technique. After initially rolling out your dough, fold it into quarters (like a business letter). Then, rotate it 90 degrees, roll it out again, and fold it into quarters once more. This process, as demonstrated in the image above, creates additional thin layers of fat within the dough, resulting in an exceptionally tender and flaky crust.
- Don’t Skip the Chilling Step: Patience is a virtue in pie making, and chilling your pie crust is a crucial step that should never be rushed. I recommend refrigerating the prepared dough for at least 20-30 minutes before rolling and assembling. For maximum convenience and ease of handling, I often prepare my pie dough a day in advance and let it chill overnight. This allows the gluten to relax and the fats to firm up, making the dough much easier to roll and work with.
- Optimal Dough Storage: Once your pastry dough is prepared, divide it into two portions – one slightly larger for the bottom crust (about 2/3) and one smaller for the top (about 1/3). Gently shape each portion into a flat disk, wrap tightly in plastic wrap, and refrigerate. For extended storage, you can wrap the disks in multiple layers of plastic wrap and place them in a freezer-safe bag, where they will keep beautifully for up to a month. Thaw them in the refrigerator before use.
- Meticulous Apple Preparation: Always peel your apples before slicing. This not only ensures a smoother, more pleasant texture in the cooked filling but also contributes to a more refined eating experience. Slice the apples thinly and uniformly. This thinness is essential for the apples to cook all the way through and become wonderfully tender within the same baking time required for your crust to achieve golden perfection.
- Harmonizing the Spices: The ideal spice blend for apple pie is a matter of personal preference. I favor a balance where spices enhance, rather than overpower, the natural sweetness and tartness of the apples. My preferred blend includes cinnamon and mixed spice. If mixed spice (a common blend of cinnamon, coriander, caraway, nutmeg, ground ginger, and cloves) isn’t readily available, pumpkin spice is an excellent substitute, or simply use a generous pinch of freshly grated nutmeg. Adjust quantities to suit your taste!
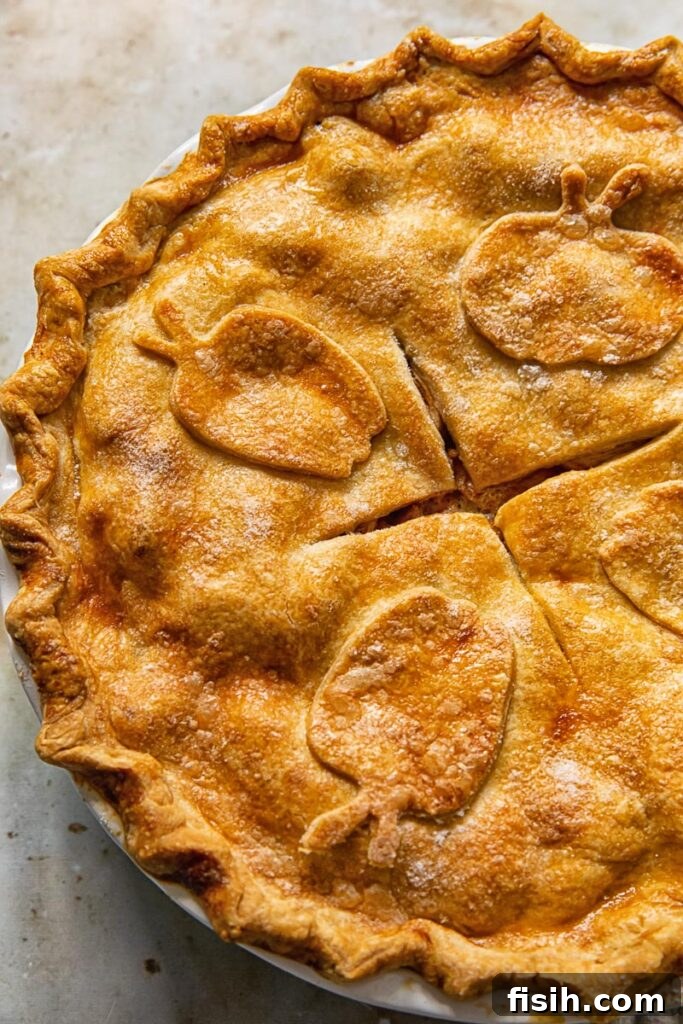
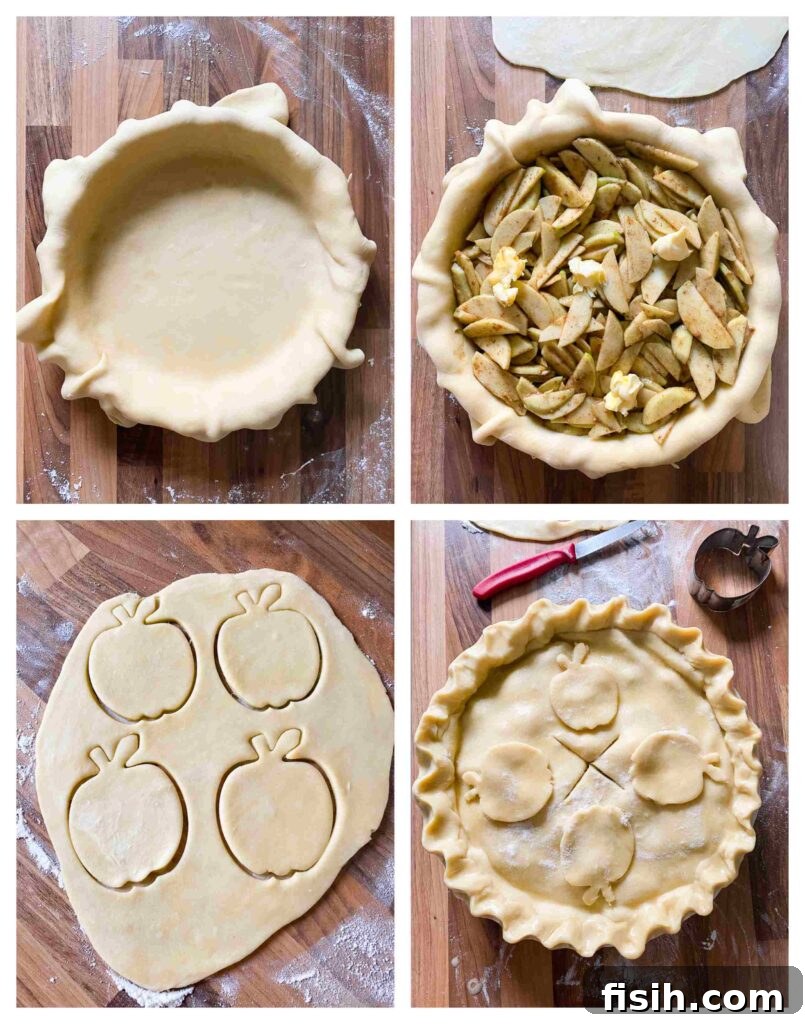
- Ventilation and Creative Decoration: Remember to cut several slits, typically four to five, into your top pie crust before baking. These slits are vital for ventilation, allowing steam to escape from the apple filling. Without them, the steam can build up, potentially making your crust soggy or even causing it to burst. You’ll often have leftover pastry trimmings after shaping your pie; repurpose these! Re-roll the scraps and use cookie cutters (an apple or autumn leaf design is perfect) to create charming decorative elements. Place these on the pie’s surface. Just ensure any decorative pieces are rolled thinly to ensure even baking with the main crust.
- Achieving the Golden Finish: For that irresistible, deep golden-brown hue and a delightful touch of extra sweetness, always brush the entire top crust of your pie with a lightly beaten egg wash before baking. Immediately after, sprinkle generously with caster sugar (or extra-fine granulated sugar). This creates a beautiful, glistening finish and a subtly caramelized, crunchy texture that elevates the visual appeal and taste of your pie.
Troubleshooting Common Apple Pie Challenges
Even seasoned bakers encounter hiccups. Here are solutions to common apple pie problems:
- Soggy Bottom Crust: This is a common complaint, but preventable! To combat it, ensure your pie dish is well-chilled before adding the crust and filling. Some bakers also recommend blind baking the bottom crust partially before adding the filling. Additionally, make sure to toss your apples with a bit of flour (as in this recipe) to absorb excess moisture, and drain any significant liquid that accumulates after mixing the apples with sugar. Baking on a preheated baking stone or heavy baking sheet can also help crisp the bottom.
- Cracked Top Crust: A cracked top crust usually indicates the dough was either too dry or stretched too thin when placing it over the filling. Ensure your dough is properly hydrated and avoid overworking it. If cracks appear, they can often be camouflaged with extra dough scraps shaped into decorative elements, or simply embraced as a rustic charm.
- Burnt Edges: If the pie crust edges start browning too quickly while the rest of the pie is still baking, simply create a pie shield with aluminum foil. Loosely cover the edges of the pie for the last 20-30 minutes of baking to protect them.
- Runny Filling: This can happen if the apples aren’t mixed with enough thickener (like flour or cornstarch) or if the pie isn’t allowed to cool sufficiently. Ensure you use the recommended amount of flour in the filling and allow the pie to cool for at least 2-3 hours after baking. The filling will thicken significantly as it cools.
More Delightful Pie Recipes to Explore
If you’ve enjoyed the comforting satisfaction of baking this classic apple pie, we invite you to explore other fantastic pie recipes from our collection:
- Maple Bourbon Pecan Pie: Indulge in a rich, nutty pie with sophisticated notes of maple and bourbon.
- Wild Blackberry Pie: A vibrant and fruity pie bursting with the sweet-tart flavor of wild blackberries.
- Pumpkin Pie with Chocolate Swirl: A luxurious and unexpected twist on a holiday favorite, perfect for chocolate lovers.
- Rhubarb Slab Pie: An excellent choice for entertaining a crowd, offering a delightful balance of tangy rhubarb in a generous slab format.
Rated 5 out of 5 stars by 2 users
Grandma’s Apple Pie
By Julia Frey of Vikalinka
Prep Time: 30 mins
Cook Time: 1 hr
Servings: 8
Print Recipe
This delightful recipe features an incredibly flaky, buttery crust encasing a sweet and tender apple filling, truly reminiscent of homemade perfection.
Ingredients
For the Flaky Crust
- 420 g / 3 cups all-purpose flour
- 0.5 tsp salt
- 250 g / 1 cup unsalted butter, very cold and cubed
- 65 g / 5 tbsp lard, very cold and cubed
- 1 large egg, lightly beaten
- 85 ml / 1/3 cup ice-cold water
For the Apple Filling
- 8-9 small Granny Smith apples, peeled, cored, and thinly sliced (approximately 2.5 lbs or 8 cups sliced)
- 150 g / 3/4 cup packed light brown sugar
- 1 tsp ground cinnamon
- 1/4 tsp mixed spice or ground nutmeg
- 2 tbsp all-purpose flour
- 2 tbsp unsalted butter, cut into small pieces
- 1 large egg, lightly beaten (for egg wash)
- 1 tbsp caster sugar / extra fine granulated sugar (for sprinkling)
Instructions
- Prepare the Pie Crust: In the bowl of a food processor, combine the flour and salt. Add the very cold, cubed butter and lard. Pulse a few times until the mixture resembles coarse crumbs with some pea-sized pieces of fat remaining. Add the beaten egg and ice water, then pulse for about 20 seconds, or until the dough just comes together into a shaggy ball around the blade. Avoid over-processing.
- Divide and Chill Dough: Remove the dough from the food processor. Divide it into two portions: one slightly larger (about 2/3 of the dough for the bottom crust) and one smaller (about 1/3 for the top crust). Gently shape each portion into a flat disk, wrap tightly in plastic wrap, and refrigerate for at least 30 minutes. Chilling overnight is ideal, as it makes the dough easier to roll.
- Prepare the Apple Filling: In a large mixing bowl, combine the thinly sliced apples with the brown sugar, cinnamon, mixed spice (or nutmeg), and 2 tablespoons of flour. Toss gently but thoroughly until all the apple slices are evenly coated.
- Roll Out the Bottom Crust: On a lightly floured surface, roll out the larger dough disk into a circle approximately 12 inches in diameter and about 1/8 inch thick. Carefully transfer the rolled dough into a 9-inch pie plate, gently pressing it into the bottom and sides without stretching. Leave about a 1/2-inch overhang around the rim.
- Add Filling and Top Crust: Pour the prepared apple filling into the pastry-lined pie plate, mounding it slightly in the center. Distribute the small pieces of butter evenly over the top of the apple filling. Now, roll out the smaller dough disk for the top crust to about an 11-inch circle. Carefully place this top crust over the apple filling.
- Seal, Vent, and Decorate: Trim any excess dough from both crusts, leaving a consistent 1/2-inch overhang. Fold the top crust overhang under the bottom crust overhang, then crimp the edges together to create a secure and decorative seal. Using a sharp knife, cut several slits into the top crust for steam to escape during baking. For added decoration, re-roll any pastry scraps and use cookie cutters to make shapes (like leaves or small apples). Arrange these on the top of the pie.
- Egg Wash and Sugar: In a small bowl, whisk the remaining egg lightly to create an egg wash. Brush the entire top surface of the pie (including any decorations) with the egg wash for a beautiful golden-brown finish. Sprinkle generously with caster sugar/extra fine sugar for added sweetness and a crisp top.
- Bake the Pie: Preheat your oven to 375°F (190°C). Place the pie on a baking sheet (to catch any potential drips) and bake for 60 minutes, or until the crust is deeply golden brown and the apple filling is bubbling visibly through the slits. If the edges of the crust start to brown too quickly, loosely cover them with strips of aluminum foil.
- Cool Completely: Once baked, carefully remove the pie from the oven and place it on a wire rack. Allow the pie to cool for at least 2-3 hours before slicing and serving. This crucial cooling time allows the filling to set properly, preventing it from being too runny when cut.
Nutrition Information
- Serving Size: 8g
- Calories: 682 kcal
- Carbohydrates: 80g
- Protein: 8g
- Fat: 38g
- Saturated Fat: 10g
- Polyunsaturated Fat: 9g
- Monounsaturated Fat: 17g
- Trans Fat: 1g
- Cholesterol: 48mg
- Sodium: 485mg
- Potassium: 299mg
- Fiber: 6g
- Sugar: 32g
- Vitamin A: 1364 IU
- Vitamin C: 8mg
- Calcium: 49mg
- Iron: 3mg
Nutrition information is automatically calculated and should be used as an approximation only.
Tried this recipe?
We would absolutely love to hear about your experience! Please leave a comment below and tell us how your Grandma’s Apple Pie turned out. Your feedback is invaluable and helps our baking community grow!
Serving Suggestions for Your Perfect Apple Pie
A slice of warm apple pie is a masterpiece on its own, but certain accompaniments can elevate the experience to new heights. Here are some classic and utterly delightful serving suggestions to complete your dessert:
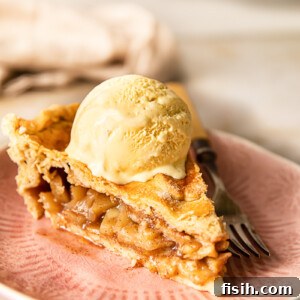
- Classic Vanilla Ice Cream: This is arguably the most iconic pairing. The cold, creamy vanilla ice cream slowly melts into the warm, spiced apple filling, creating an irresistible dance of temperatures and flavors. A scoop of homemade vanilla bean ice cream takes it over the top!
- Freshly Whipped Cream: For a lighter, airier contrast, a generous dollop of freshly whipped cream adds a delicate sweetness and a luxurious texture that beautifully complements the rich pie. You can even infuse it with a hint of vanilla or cinnamon.
- Sharp Cheddar Cheese: A surprising but traditional pairing for many! A thin slice of sharp cheddar cheese served alongside (or even gently placed on top of a warm slice to melt slightly) offers a wonderful savory counterpoint that perfectly balances the pie’s sweetness. Don’t knock it till you’ve tried it!
- Warm Caramel Sauce: Drizzle a luscious homemade or high-quality store-bought caramel sauce over your slice for an extra layer of indulgent sweetness and a sticky, rich texture. A sprinkle of sea salt flakes can enhance the flavor further.
- Crème Fraîche: For a more sophisticated touch, a spoonful of tangy crème fraîche provides a creamy richness that cuts through the pie’s sweetness without adding extra sugar, offering a delightful European twist.
- A Comforting Beverage: Pair your pie with a steaming mug of hot coffee, a cozy cup of spiced tea, or a tall glass of cold milk for the ultimate comforting treat, perfect for any time of day.
Storage and Reheating Tips for Freshness
While apple pie is always best enjoyed fresh from the oven, proper storage ensures you can savor its deliciousness for several days. Here’s how to keep your pie fresh and reheat it perfectly:
- At Room Temperature: A freshly baked apple pie can be kept at room temperature for up to 2 days. Ensure it’s covered loosely with aluminum foil or plastic wrap to protect it from air and keep the crust from becoming soggy.
- Refrigeration: For longer storage, transfer your apple pie to the refrigerator. It will stay fresh and delicious for 3-4 days. Make sure it is well-covered to prevent it from drying out or absorbing other odors from the fridge.
- Freezing a Whole Pie: You can successfully freeze an entire baked apple pie (without any fresh toppings like ice cream or whipped cream) for up to 3-4 months. Once completely cooled, wrap the pie tightly in several layers of plastic wrap, then in a layer of heavy-duty aluminum foil. Place it in a freezer-safe bag or container to prevent freezer burn. Thaw the pie in the refrigerator overnight before reheating.
- Freezing Individual Slices: To enjoy pie on demand, freeze individual slices! Wrap each slice separately in plastic wrap, then in foil. Place the wrapped slices in a freezer bag. When ready to eat, simply thaw and reheat.
- Reheating for Perfection: To reheat a whole pie, place it in a preheated oven at 300°F (150°C) for 20-30 minutes, or until thoroughly warmed through. For individual slices, a microwave will warm them quickly, but for a crispier crust, reheat in a toaster oven or conventional oven at 350°F (175°C) for about 10-15 minutes.
This Grandma’s Classic Apple Pie recipe offers more than just a dessert; it’s an invitation to create lasting memories and share a timeless piece of comfort with loved ones. Embrace the joy of baking and prepare to delight everyone with a slice of pure homemade bliss. Happy baking!