
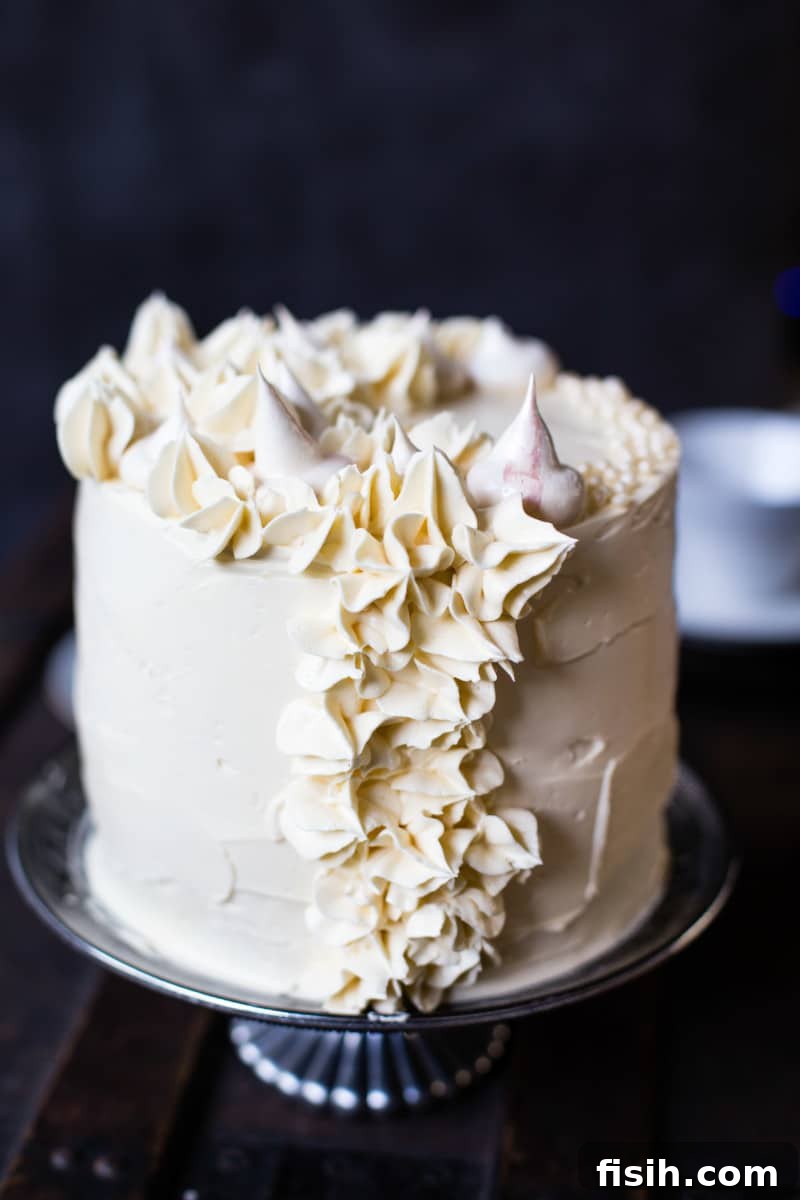
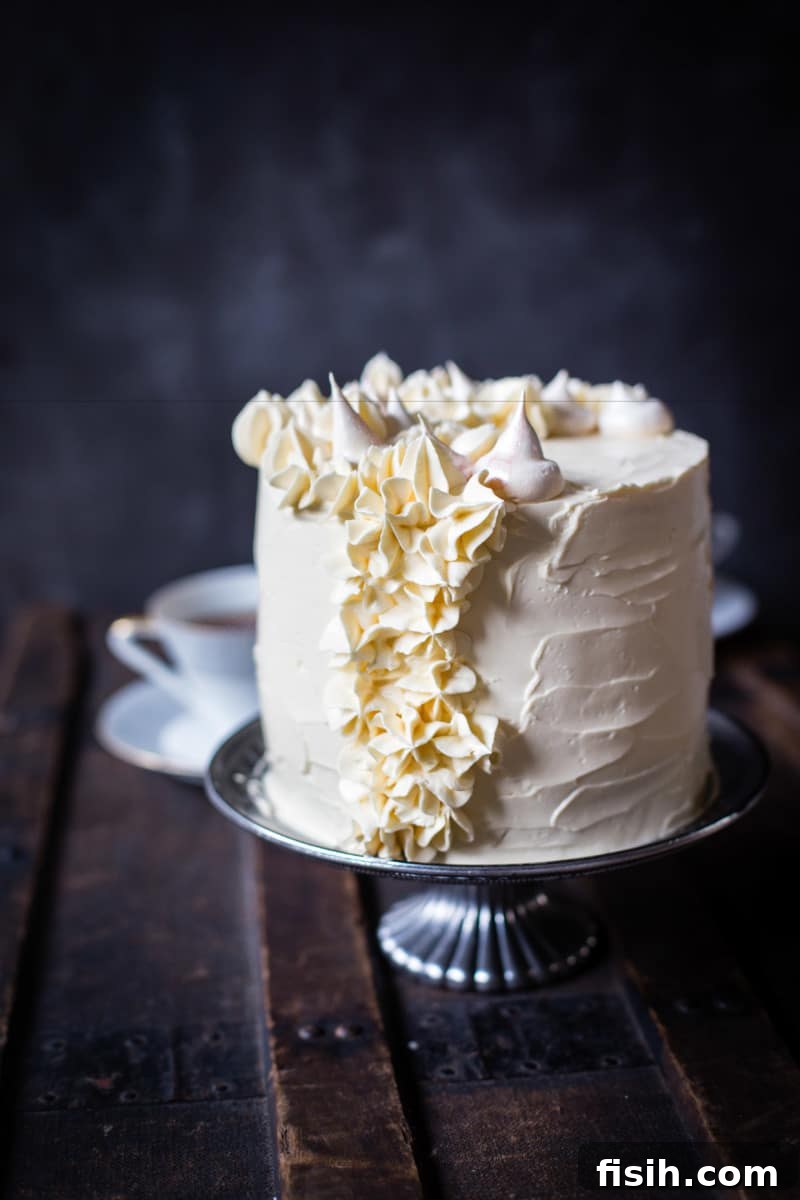
There’s an undeniable magic that happens when classic flavors are reimagined, and this **Earl Grey Meringue Cake** is a testament to that enchantment. Imagine presenting this stunning creation at a birthday celebration, an anniversary dinner, or any special gathering that calls for a truly unforgettable dessert. It’s more than just a cake; it’s an experience, a delicate symphony of textures and sophisticated flavors that will captivate every palate.
For those who love to bake and delight in creating something truly spectacular, this recipe offers a fulfilling challenge with a truly magnificent reward. If you’re passionate about baking and always on the lookout for exquisite treats, be sure to explore our extensive collection of beautiful cake recipes.
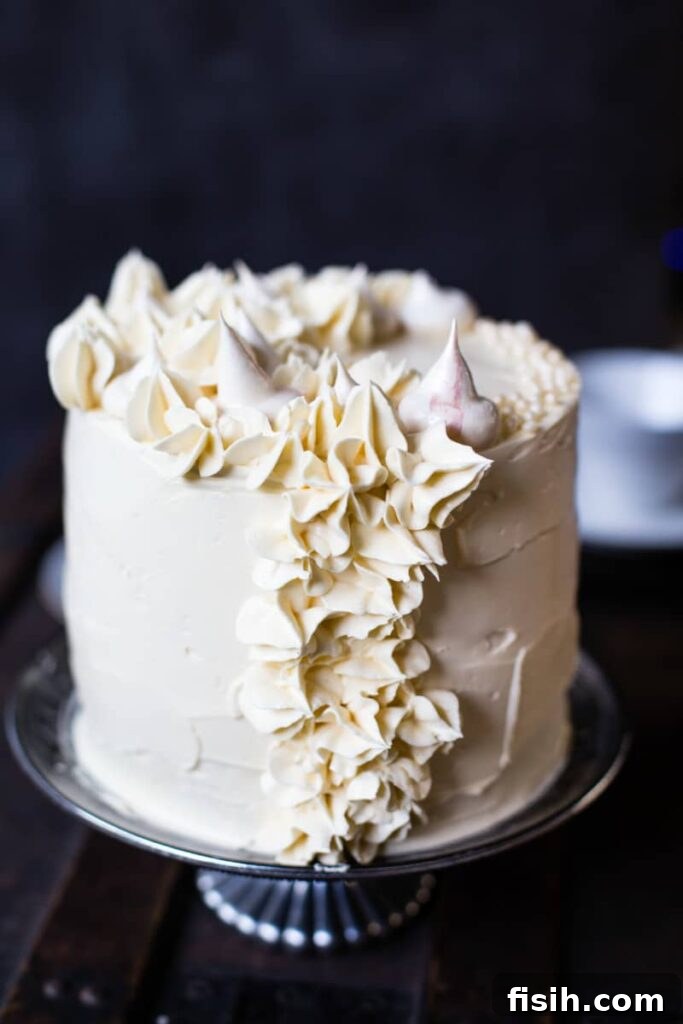
Every artist knows when they’ve crafted something truly special, and that’s precisely how I feel about this Earl Grey Meringue Cake. It represents a journey of culinary exploration and perseverance. Developing this recipe was no small feat; it involved two days of dedicated work, multiple trials for the perfect meringue, two distinct frosting recipes, and countless hours spent perfecting every detail.
But when you finally see the gleaming layers, taste the harmonious blend of flavors, and witness the joy it brings to others, all the effort becomes secondary. The sheer delight of a well-made cake, shared and savored, erases any memory of the challenges faced in its creation. This cake is a labor of love, designed to impress and provide a memorable grand finale to any meal.
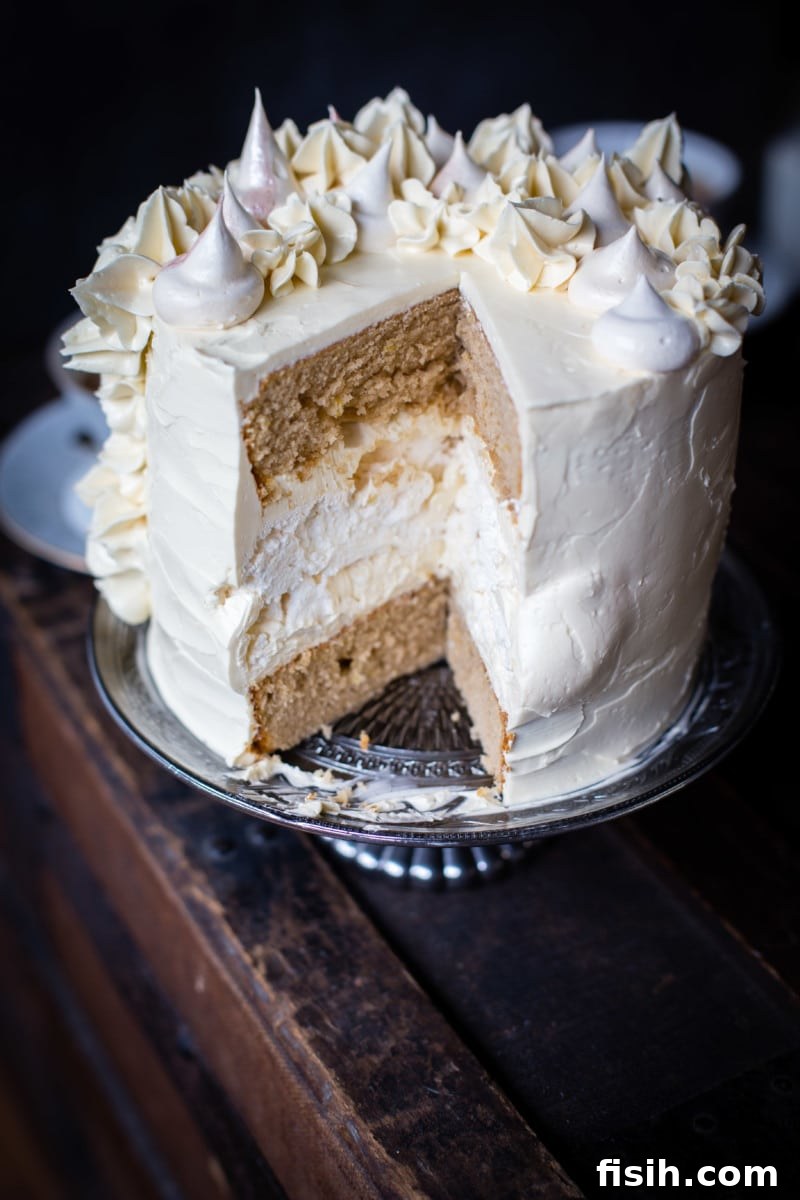
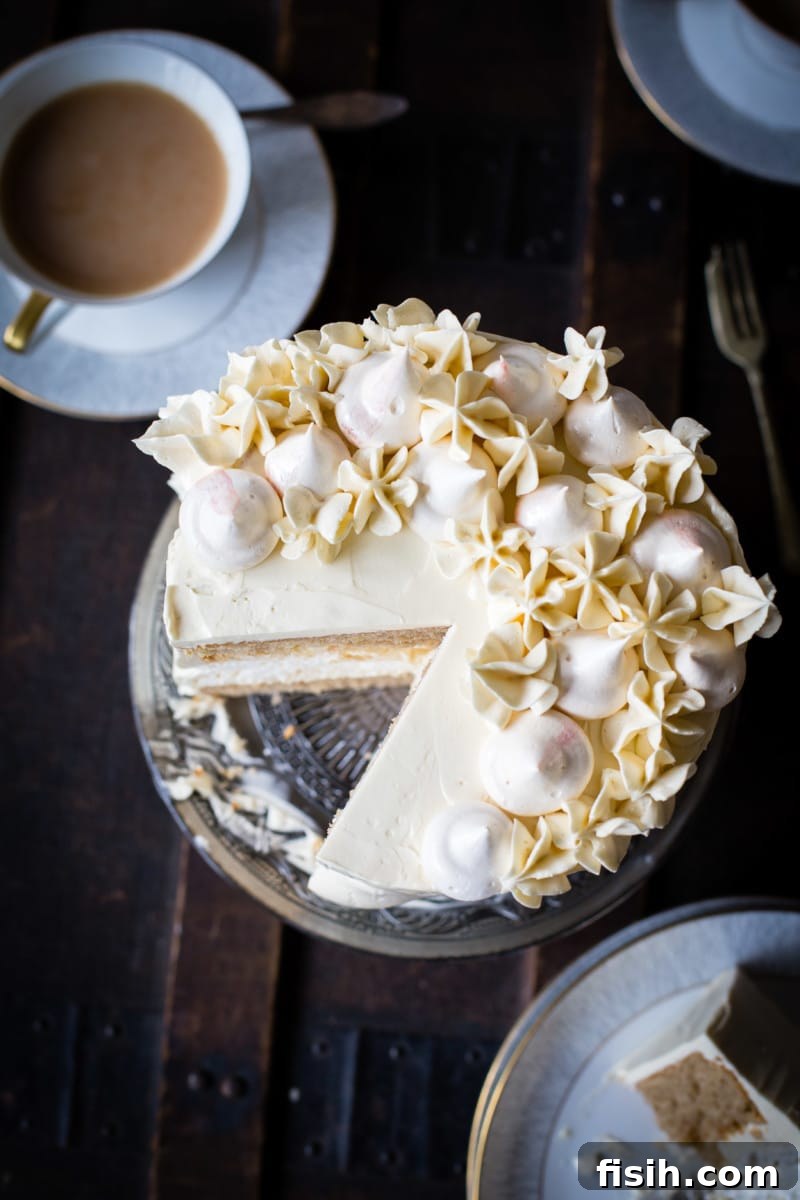
What truly sets this cake apart is the sensational interplay of textures. Each slice reveals layers of light, fragrant sponge cake, perfectly balanced with pockets of crisp, airy meringue. This delightful sandwich is then enveloped in a luscious, cloud-like Swiss meringue buttercream, creating a melt-in-your-mouth experience with every bite.
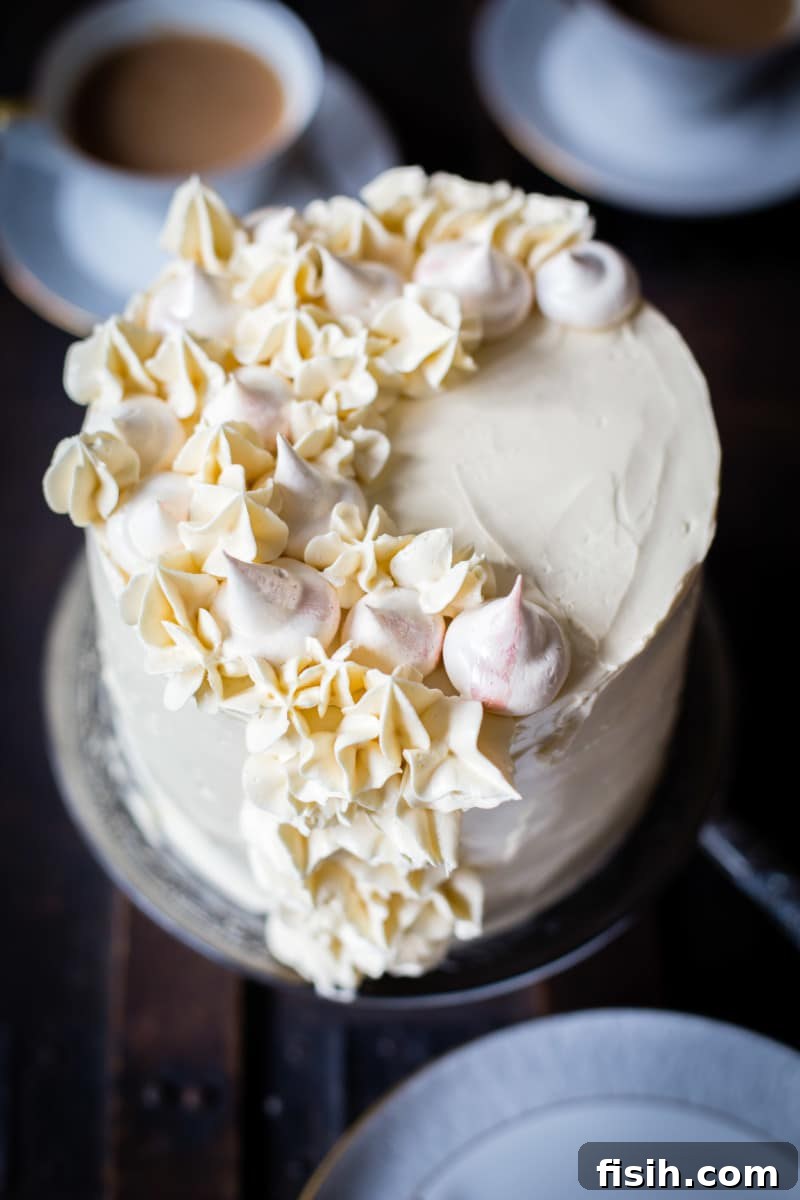
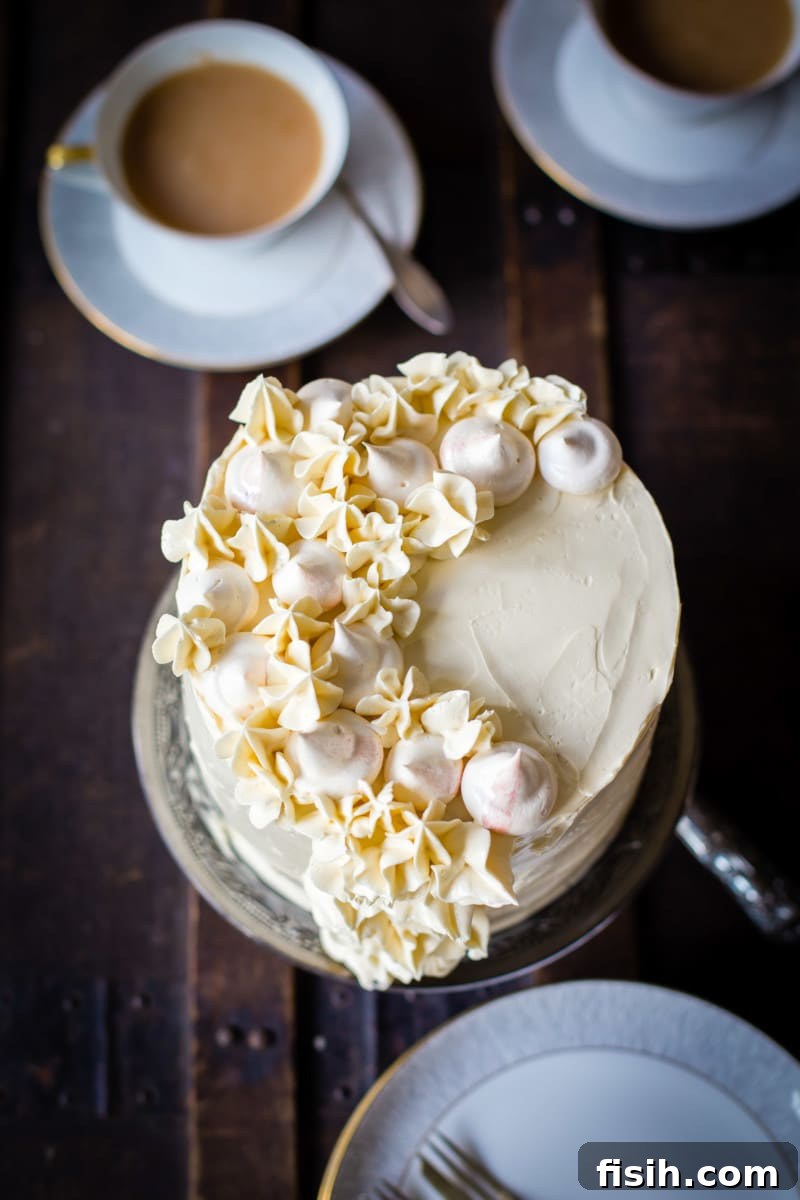
To complete the elegant presentation, I adorn the top with delicate meringue dollops. While not strictly essential for the flavor profile, these charming additions perfectly echo the meringue layer within, enhancing the cake’s visual appeal and reinforcing its unique character. They add an extra touch of whimsy and sophistication, making the cake even more irresistible.
The Elegance of Earl Grey Meringue Cake
Earl Grey has been my personal favorite tea for many years, and its captivating aroma and distinctive taste translate wonderfully into baking. It imparts a delicate, yet unmistakable floral and citrusy perfume that elevates cakes and biscuits without overpowering other flavors. Unlike some other black teas which can carry a deeper, sometimes bitter note, Earl Grey tea is celebrated for its nuanced and balanced profile, making it a stellar choice for infusing baked goods with sophisticated charm.
The distinctive character of Earl Grey comes from oil of bergamot, a citrus fruit. This natural citrus essence harmonizes beautifully with sweet ingredients, adding a layer of brightness and complexity that is truly unique. When combined with the richness of butter and sugar in a cake, it creates a flavor that is both comforting and extraordinarily refined. It’s this subtle sophistication that makes the Earl Grey Meringue Cake so exceptional and memorable, a dessert that stands out in a crowd.
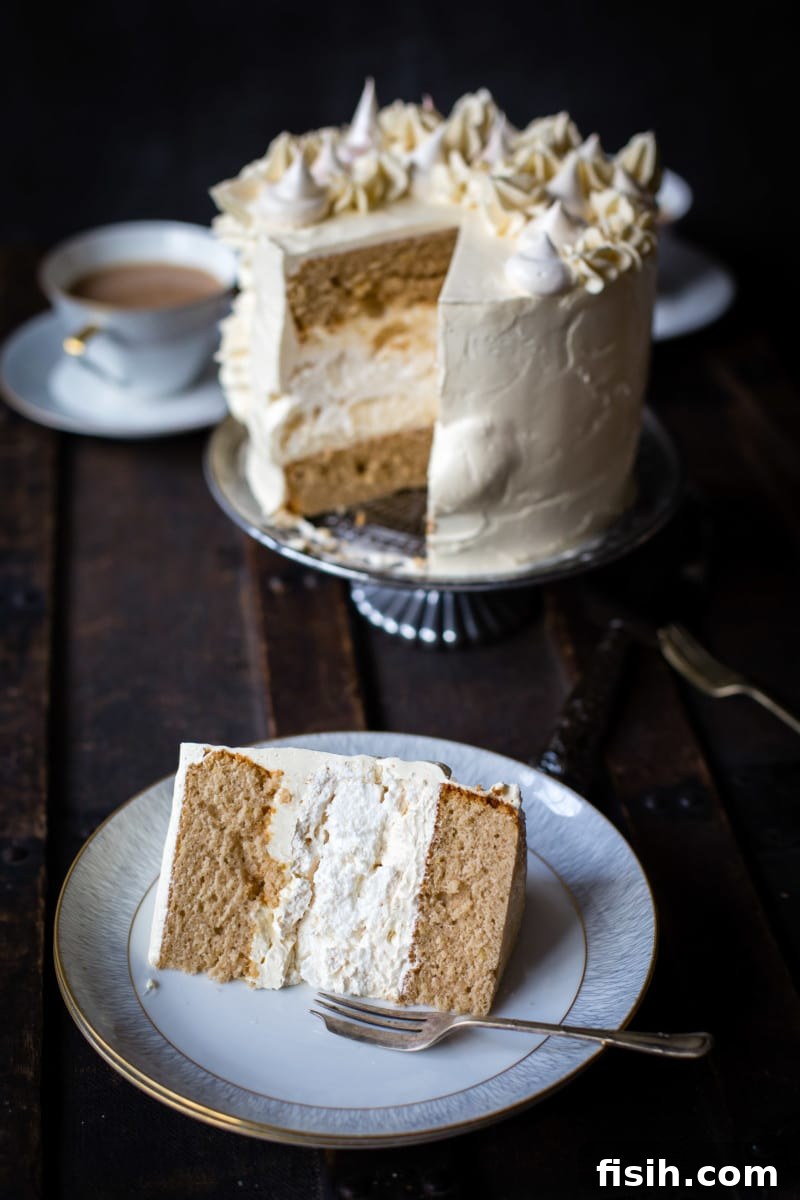
In this particular Earl Grey Meringue Cake, the tea’s natural citrus notes are gently amplified by a hint of fresh lemon zest in the sponge, creating a vibrant yet balanced flavor profile. The taste of the tea itself is never aggressive; instead, it is subtle, sophisticated, and utterly beautiful, inviting you to take another bite and discover its intricate layers.
For the best possible flavor, always remember that tea leaves, like other spices, lose their freshness over time. Avoid using tea bags that have been languishing at the back of your cupboard for years. While there’s no need to splurge on the most expensive, rare teas for this recipe, opting for higher quality Earl Grey will undoubtedly yield a more aromatic and flavorful cake. Better quality teas typically boast a superior blend of bergamot oil and black tea, ensuring that the exquisite flavor truly shines through in your final bake.
Mastering the Art of this Layered Cake
While the Earl Grey Meringue Cake is undeniably impressive, its creation is more a matter of thoughtful staging than overwhelming difficulty. I highly recommend approaching this recipe in stages to minimize stress and maximize enjoyment. Preparing the meringue and the sponge cake in advance allows you to focus solely on perfecting the Swiss meringue buttercream and assembling the cake with precision and calm on the day you plan to serve it.
The signature Earl Grey flavor is carefully woven throughout the cake, stemming from a total of seven tea bags: four for infusing the moist sponge cake, and three for the optional but highly recommended rum drizzle. The secret to extracting the deepest tea flavor lies in the initial steeping process. Ensure that both the water and milk used are brought to a temperature as close to boiling as possible before adding the tea bags. This intense heat is crucial for drawing out the full aromatic essence and robust flavor from the tea leaves, creating an unparalleled Earl Grey experience in every bite.
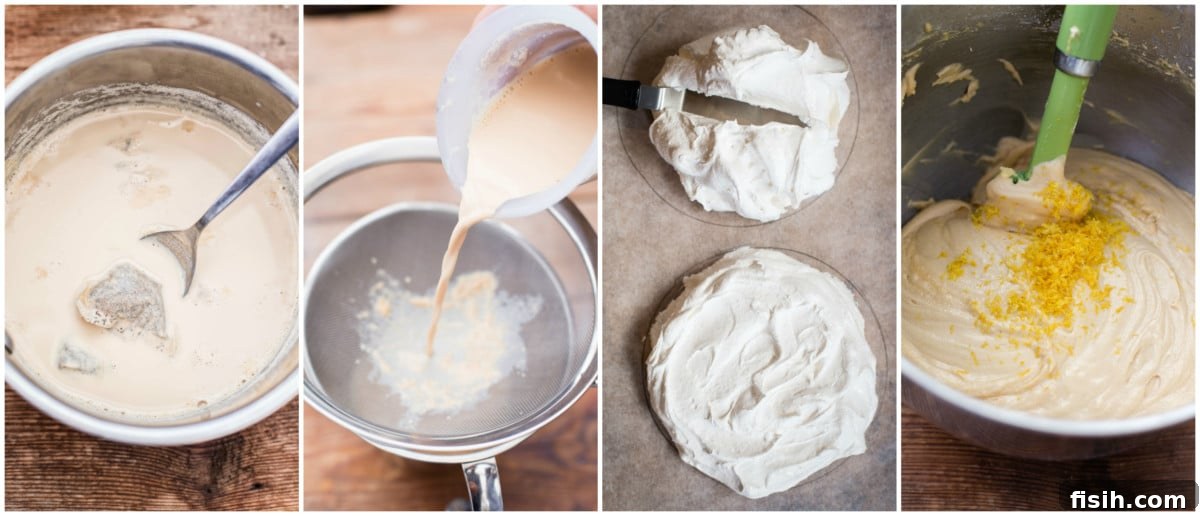
Making meringue can seem daunting if you’ve never attempted it, but it’s a fundamental baking skill well worth mastering. The delicate crunch and sweet airiness of a perfectly baked meringue add an incredible dimension to desserts. While this cake provides an excellent opportunity to practice, should you need more in-depth guidance, my pavlova recipe offers comprehensive instructions and invaluable tips to ensure your meringue layer is a resounding success.
A comforting aspect of using meringue in this cake is that it’s nestled between cake layers, making it a forgiving element. Don’t be overly concerned if your meringue develops a few small cracks during baking or handling; these imperfections can be easily masked and sealed with the generous application of buttercream during assembly. This recipe is an ideal chance to build your confidence with meringues, knowing that deliciousness is the ultimate goal, not absolute perfection.
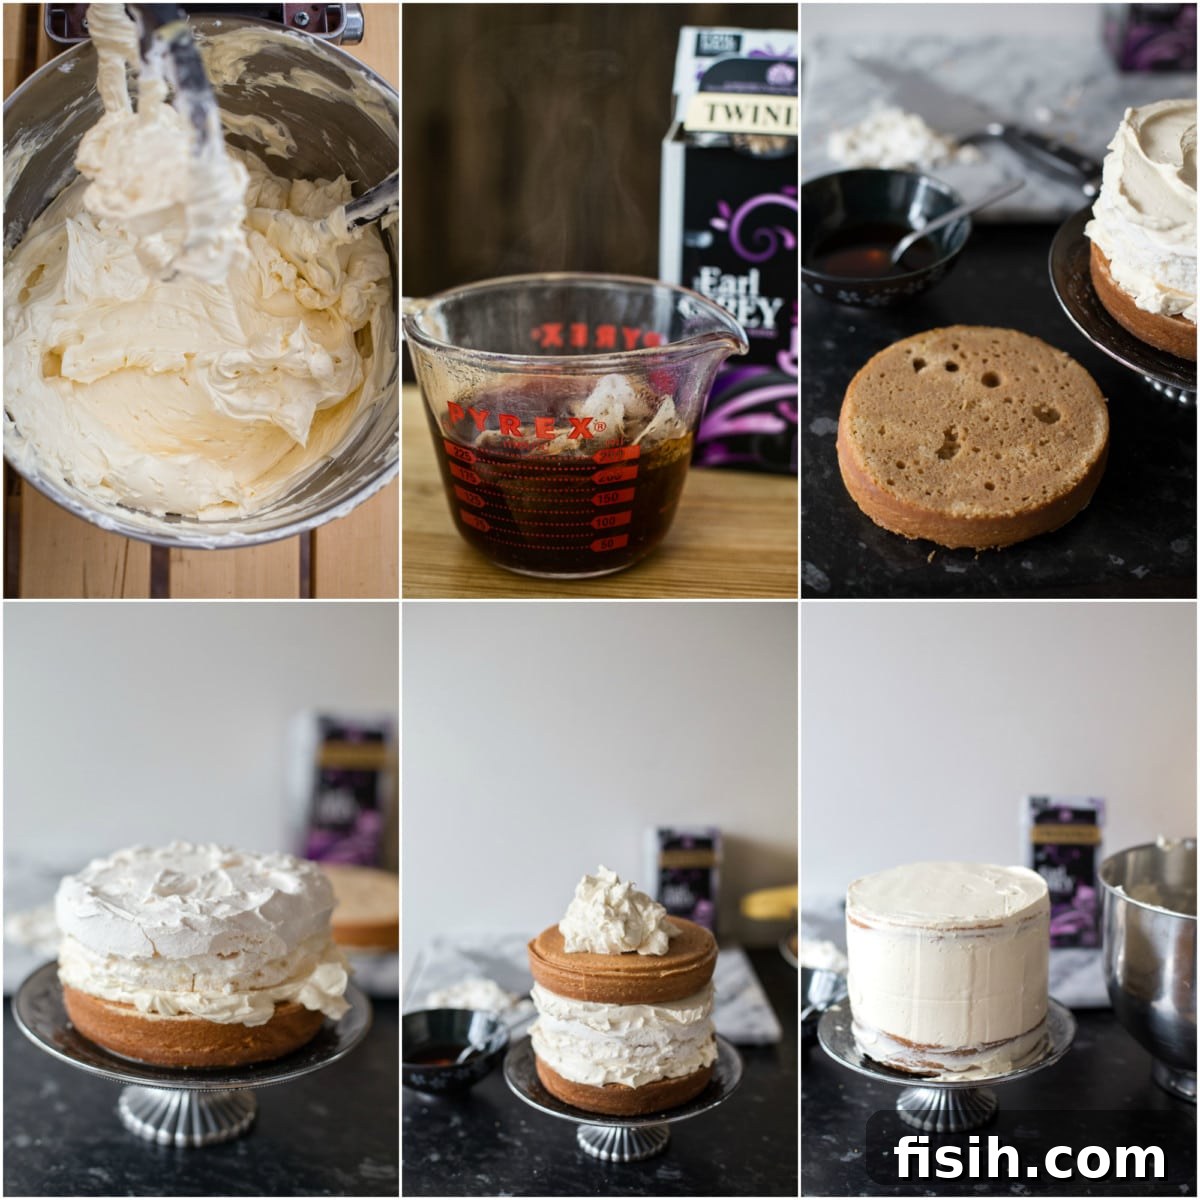
The Earl Grey Rum Drizzle, while optional, truly enhances the overall flavor profile of this cake, adding an extra layer of warmth and complexity. It subtly boosts the tea notes and introduces a delightful nuance that elevates the cake from merely fantastic to truly extraordinary. However, if you prefer to omit alcohol or simply want a slightly simpler preparation, rest assured that the cake will still be absolutely delicious and full of flavor even without the drizzle. It’s a matter of personal preference, but for those seeking an elevated taste experience, the drizzle is highly recommended.
Essential Baking Tips and Notes
- Preparation is Key: Before embarking on your baking adventure, take the time to read through the entire recipe from start to finish. Understanding the full process and timing of each component will help you plan effectively and ensure a smooth baking experience. Give yourself ample time; baking is a journey, not a race.
- Meringue Storage: For optimal results, bake your meringue layers and decorative meringue kisses the day before assembling the cake. Once completely cooled, store them in an airtight container. This critical step prevents them from absorbing moisture and softening, preserving their delightful crispness.
- Efficient Baking: Maximize your oven time by baking both the large meringue layer and the smaller meringue kisses simultaneously. They can share the same baking sheet, provided there’s adequate space for air circulation, as they bake at the same temperature.
- Buttercream Alternatives: While Swiss Meringue Buttercream offers an unparalleled silky texture and stability, it can be a bit more involved to prepare. If you’re looking for a quicker, simpler frosting option that’s equally delicious, consider using my personal favorite Mascarpone Cream instead. It’s light, creamy, and provides a wonderful contrast to the Earl Grey flavors.
- Ingredient Quality: As mentioned, the quality of your Earl Grey tea will significantly impact the cake’s flavor. Similarly, using good quality butter and fresh eggs will contribute to a superior final product.
- Temperature Matters: Ensure your butter for the cake sponge is properly softened, and your egg whites for meringue and buttercream are at room temperature. These small details can make a big difference in the consistency and outcome of your bake.
- Patience with Buttercream: Don’t panic if your Swiss Meringue Buttercream appears curdled or separated during the butter addition. Keep beating! With continued mixing, it will eventually come together into a beautifully smooth and stable frosting. Patience is a virtue in buttercream making.
More Favorite Cake Recipes to Inspire Your Baking
If you enjoyed crafting this elegant Earl Grey Meringue Cake, you might also love exploring these other delightful cake recipes from our collection:
- Russian Honey Cake Medovik: A rich, layered cake with delicate honey-infused sponge and a luscious sour cream frosting.
- Naked Cake with Mascarpone Cream and Crushed Strawberries: A rustic yet elegant cake, showcasing its beautiful layers with fresh berries and creamy mascarpone.
- Black Forest Cake: A classic indulgence featuring chocolate, cherries, and whipped cream, always a crowd-pleaser.
- Victoria Sponge Cake with Blackberry Compote: A quintessential British tea cake, light and fluffy, filled with fruit compote and cream.
Earl Grey Meringue Cake
By Julia Frey of Vikalinka
Prep Time: 30 mins
Cook Time: 2 hrs
Total Time: 2 hrs 30 mins
Servings: 10
Print Recipe
A beautifully layered cake featuring delicate Earl Grey sponge, crunchy meringue, and a silky Swiss meringue buttercream.
Ingredients
For the Meringue
- 2 egg whites
- 60g / 1/4 cup caster sugar
For the Cake
- 250ml / 1 cup whole milk
- 4 bags Earl Grey tea
- 300g / 2½ cups flour
- 2 tsp baking powder
- 1/2 tsp salt
- 170g / 3/4 cup butter, softened
- 300g / 1½ cups caster sugar
- 2 tsp vanilla extract
- 4 large egg yolks
- Zest of 1 lemon
For the Swiss Meringue Buttercream
- 6 egg whites (approx. 150ml)
- 250g / 1¼ cup caster sugar
- 340g / 1½ cups butter, cut into cubes
- 2 tsp vanilla extract
- 2 tbsp strong Earl Grey tea (cooled)
For the Earl Grey Rum Drizzle (optional)
- 100ml / 1/2 cup water
- 3 bags Earl Grey tea
- 4 tbsp caster sugar
- 2 tbsp rum
Instructions
For the Meringue
- Preheat your oven to 100°C / 200°F. Prepare a baking sheet by lining it with parchment paper.
- Carefully separate the egg whites from the yolks, ensuring no yolk traces are present. In a very clean, grease-free mixer bowl, begin whipping the egg whites on low speed. They will become frothy, then gradually form soft peaks. At this point, increase the speed to high and slowly add the caster sugar, one tablespoon at a time, ensuring it fully dissolves into the whites. Continue mixing until the meringue is thick, glossy, and smooth. You can test for dissolved sugar by rubbing a small amount between your fingers; it should feel smooth, not gritty.
- For decorative meringue kisses: Fill a pastry bag fitted with a round nozzle with some of the meringue mixture. Pipe 6-7 small meringue kisses onto a separate small baking sheet lined with parchment paper. Bake these for 1 hour.
- For the meringue layer: On the larger parchment-lined baking sheet, trace an 8-inch pan. Fill the inside of this circle with the remaining meringue mixture, leaving about a 1 cm gap from the traced edge. The meringue layer should be slightly smaller than your cake layers. Gently flatten the top and smooth out the sides to form a neat, cake-like disc.
- Bake the large meringue layer in the preheated oven for approximately 1.5 hours. Baking time may extend on humid or rainy days.
- Once baked, remove the meringues from the oven and allow them to cool completely. Store them in an airtight container until you are ready to assemble the cake to prevent softening.
- Pro Tip: You can bake both the large meringue layer and the small meringue kisses simultaneously on the same baking sheet to save time.
For the Cake
- Preheat your oven to 180°C / 350°F.
- Bring the milk to a boil. Remove from heat and add the 4 bags of Earl Grey tea. Let them steep for 5 minutes, then remove the tea bags and allow the milk to cool. Strain the infused milk through a fine sieve to ensure no tea particles remain.
- Grease two 8-inch / 20cm cake tins with butter and lightly dust them with flour. Set aside.
- In a medium bowl, sift together the flour, baking powder, and salt.
- In the bowl of a stand mixer fitted with a paddle attachment, beat the softened butter until it is light and fluffy. Add the caster sugar and continue mixing for about 3 minutes until well incorporated. Next, add the egg yolks one at a time, allowing each to be fully mixed in before adding the next. Stir in the vanilla extract.
- With the mixer running on low speed, alternately add the dry ingredients and the tea-infused milk. Begin with half of the flour mixture, followed by half of the tea milk, then the remaining flour, and finally the rest of the tea milk. Stop the mixer, scrape down the sides of the bowl with a spatula, add the lemon zest, and mix for just one more minute until everything is well combined.
- Divide the cake batter evenly between the two prepared pans and bake for 25-30 minutes, or until a cake tester inserted into the center comes out clean.
- Remove the cakes from the oven and let them cool in their pans on a wire rack for a few minutes. Once cool enough to handle, carefully invert them onto the wire rack to cool completely.
For the Swiss Meringue Buttercream
- Ensure your mixing bowl and whisk attachment are impeccably clean and completely grease-free. You can wipe them down with a bit of lemon juice to be sure. Cut the butter into small cubes and set aside to come to room temperature.
- Separate the egg whites from the yolks. Fill a large pot with about 1/3 water and bring it to a simmer over medium heat. In your clean mixing bowl, combine the egg whites and caster sugar. Place this bowl over the simmering water (creating a double boiler), ensuring the bottom of the bowl does not touch the water. Whisk continuously until the sugar has fully dissolved and the mixture is hot to the touch (around 70°C / 160°F).
- Remove the bowl from the heat. Attach the whisk attachment to your stand mixer and begin whisking the egg white mixture on high speed. Continue whisking until the meringue is no longer warm to the touch, has increased significantly in volume, and forms stiff, glossy peaks. This typically takes about 10 minutes. It is crucial that the bowl feels cool before proceeding to the next step.
- Switch to a paddle attachment. With the mixer running on medium-low speed, begin adding the softened butter cubes one at a time, allowing each cube to be fully incorporated before adding the next. The mixture may look curdled or separated at first – this is normal! Keep beating. Eventually, it will transform into a smooth, silky buttercream. Finally, add the vanilla extract and the cooled strong Earl Grey tea, mixing until just combined.
For the Earl Grey Rum Drizzle (optional)
- Steep the 3 Earl Grey tea bags in boiling water for 5 minutes. Remove the tea bags. Stir in the caster sugar until it completely dissolves. Let the tea syrup cool completely, then stir in the rum.
To Assemble the Cake
- Place the first cooled cake layer on your chosen cake stand or serving plate. If using the Earl Grey Rum Drizzle, lightly brush or drizzle about one-quarter of it over the cake layer.
- Spread approximately one-quarter of the Swiss meringue buttercream evenly over the first cake layer using an offset spatula.
- Carefully place the baked meringue layer on top of the buttercream. If the meringue layer extends beyond the cake, you can gently trim the edges with a sharp knife. Don’t worry if it cracks slightly; the buttercream will neatly conceal any imperfections.
- Repeat the layering: drizzle with rum (if using), spread another quarter of the buttercream over the meringue, then top with the second cake layer.
- Apply a thin layer of buttercream all around the top and sides of the cake. This is your “crumb coat,” which traps any loose crumbs and creates a smooth base. The crumb coat should be thin, about 1-2 cm thick. Refrigerate the cake for 10-15 minutes to allow this layer to firm up.
- Once the crumb coat is firm, remove the cake from the fridge. Apply the remaining buttercream, covering the entire cake evenly. Use an offset spatula to create attractive swirls or a smooth finish, depending on your desired aesthetic.
- For the final decorative flourish, fill a pastry bag fitted with a closed star nozzle with some buttercream. Pipe a few elegant rosettes on one side of the cake. Fill any remaining gaps with the baked meringue kisses. (Optional: For an extra touch, you can lightly brush some of the meringue kisses with edible food paint before placing them on the cake).
Nutrition
Nutrition information is automatically calculated, so should only be used as an approximation.
Calories: 791kcal | Carbohydrates: 91g | Protein: 8g | Fat: 45g | Saturated Fat: 27g | Polyunsaturated Fat: 2g | Monounsaturated Fat: 12g | Trans Fat: 2g | Cholesterol: 190mg | Sodium: 532mg | Potassium: 203mg | Fiber: 1g | Sugar: 67g | Vitamin A: 1419IU | Calcium: 91mg | Iron: 2mg
Thank you for trying this recipe! We’d love to hear how your Earl Grey Meringue Cake turned out. Please let us know in the comments how it was!