
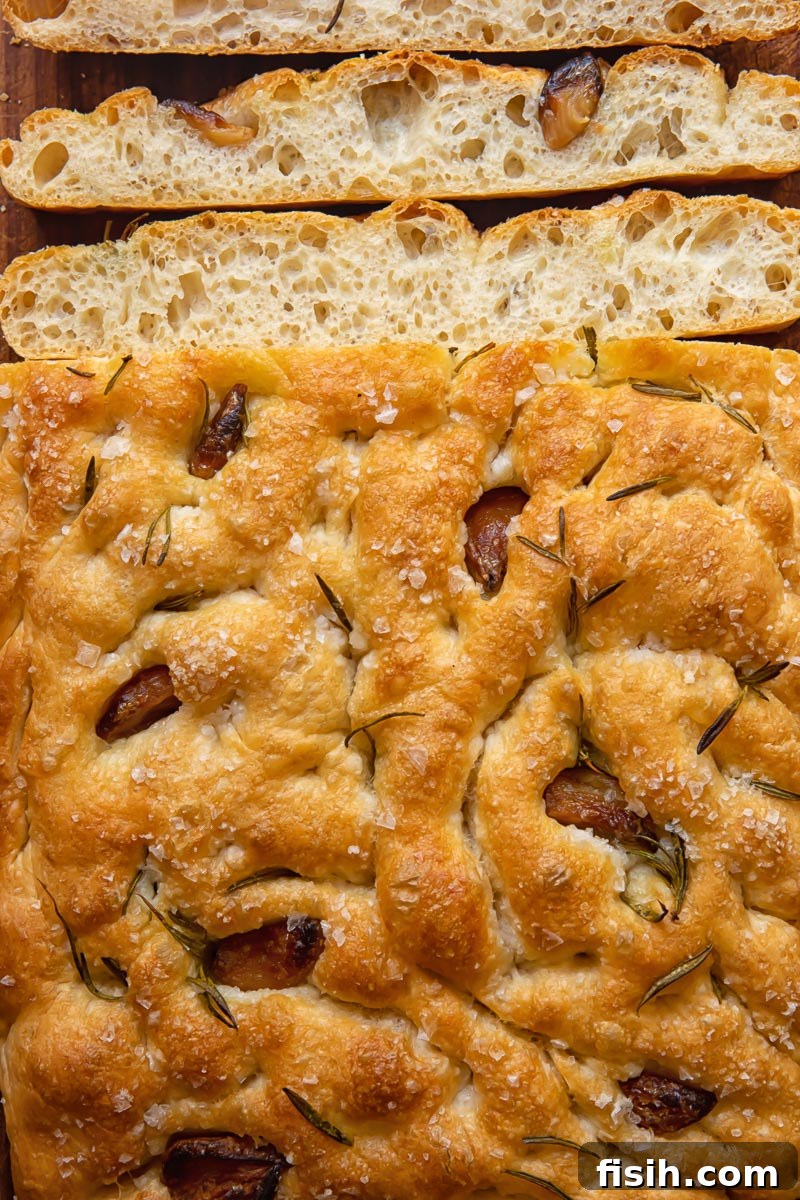
Step into the fascinating world of breadmaking, where science meets culinary art. Crafting the perfect loaf, especially something as exquisitely flavorful as focaccia bread, demands both precision and a touch of patience. This comprehensive guide will transform you into a focaccia master, yielding a broad, bouncy loaf that bursts with Mediterranean charm. Are you ready to hone your baking skills? Follow our no-knead method exactly, and prepare to be rewarded with an unforgettable homemade focaccia experience.
And for those fortunate enough to have any delicious focaccia leftovers, don’t miss out on creating an epic Focaccia Sandwich, a perfect way to extend the enjoyment of your freshly baked bread.
What Exactly Is Focaccia Bread? Unveiling an Italian Culinary Gem
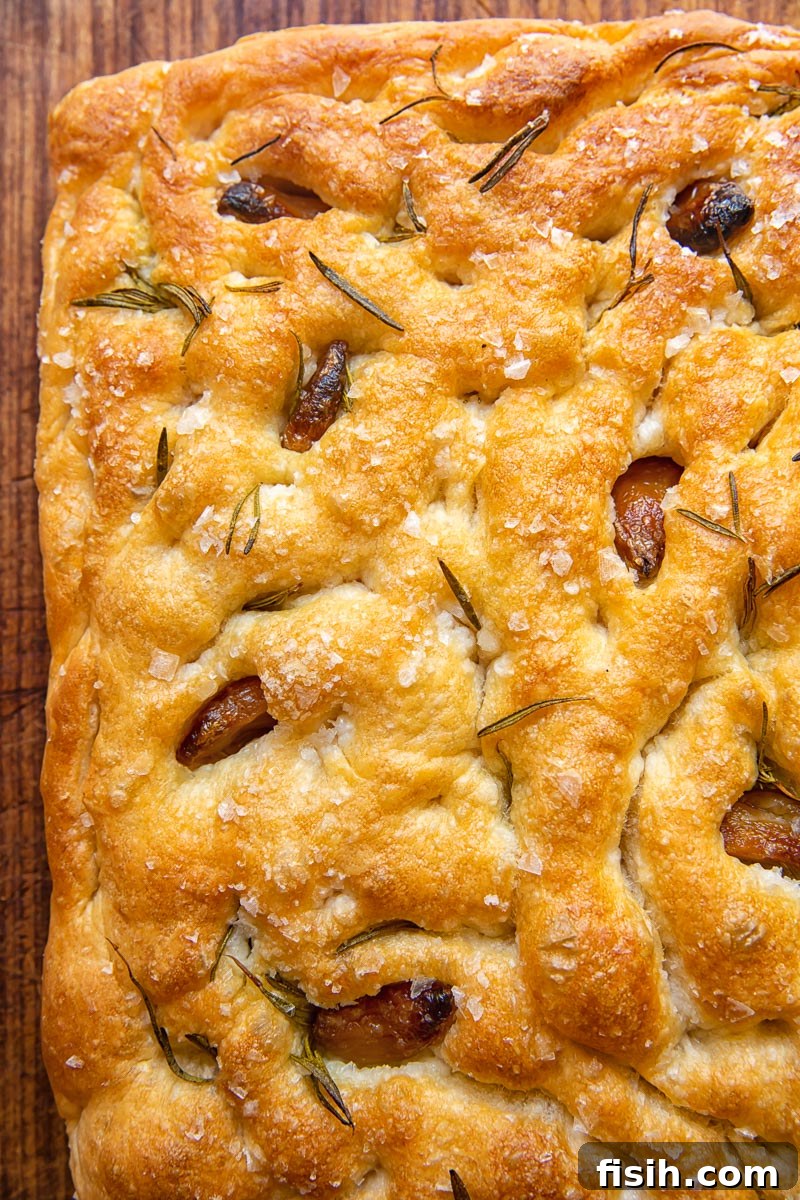
Focaccia is more than just bread; it’s a testament to simple ingredients transformed into something extraordinary. Instantly recognizable by its characteristic flat, often rectangular or round shape, and its signature dimpled surface, focaccia stands out in the vast world of baked goods. Its surface is frequently adorned with a delightful array of toppings, from aromatic fresh herbs like rosemary and thyme, to briny olives, pungent garlic, or vibrant roasted tomatoes, rich cheeses, and zesty pesto. But its visual appeal is just the beginning.
What truly distinguishes focaccia and elevates it to iconic status is its unique texture and profound flavor profile. The secret lies in the generous application of high-quality olive oil – a true cornerstone of this Italian specialty. Olive oil is first thoughtfully incorporated into the dough itself, lending richness and moisture. Then, a slick layer is spread to line the baking pan, ensuring a crisp, golden bottom crust and preventing sticking. Finally, before the dough enters the oven, it receives a liberal dousing of oil over its entire dimpled surface. This triple application of olive oil is not merely a suggestion; it’s a fundamental part of focaccia’s identity.
This lavish use of olive oil serves multiple crucial purposes. It ensures the creation of a thin, remarkably crisp crust that often develops an almost fried-like texture, adding a delightful crunch to every bite. Beneath this golden exterior, the interior remains wonderfully springy, airy, and fluffy, infused with an irresistible fragrance that speaks of the Mediterranean sun. The strategic dimples on the surface, made by gently pressing fingertips into the dough, also play a vital role, creating pockets for the olive oil and toppings to gather, intensifying the flavor and enhancing the bread’s unique visual appeal.
Originating in the Liguria region of Italy, focaccia shares a lineage with ancient Roman flatbreads. Its name likely derives from the Latin “panis focacius,” meaning “hearth bread,” indicating its traditional baking method in hearths or hot ashes. Over centuries, it evolved from a simple flatbread, often used to test oven temperatures, into the beloved, versatile delicacy we know today, cherished for its simplicity, depth of flavor, and incredible texture.
Unlock Effortless Baking with Our Simple No-Knead Focaccia Method
Let’s face it: traditional bread kneading can be a daunting, labor-intensive task, often fraught with potential errors that can lead to dense, uninviting loaves. For many home bakers, the thought of aching biceps and the risk of over-kneading is enough to deter them from baking bread altogether. But what if we told you there was a simpler way? We’ve embraced a revolutionary No-Knead Method, trading the strenuous effort for a hands-off approach that guarantees success.
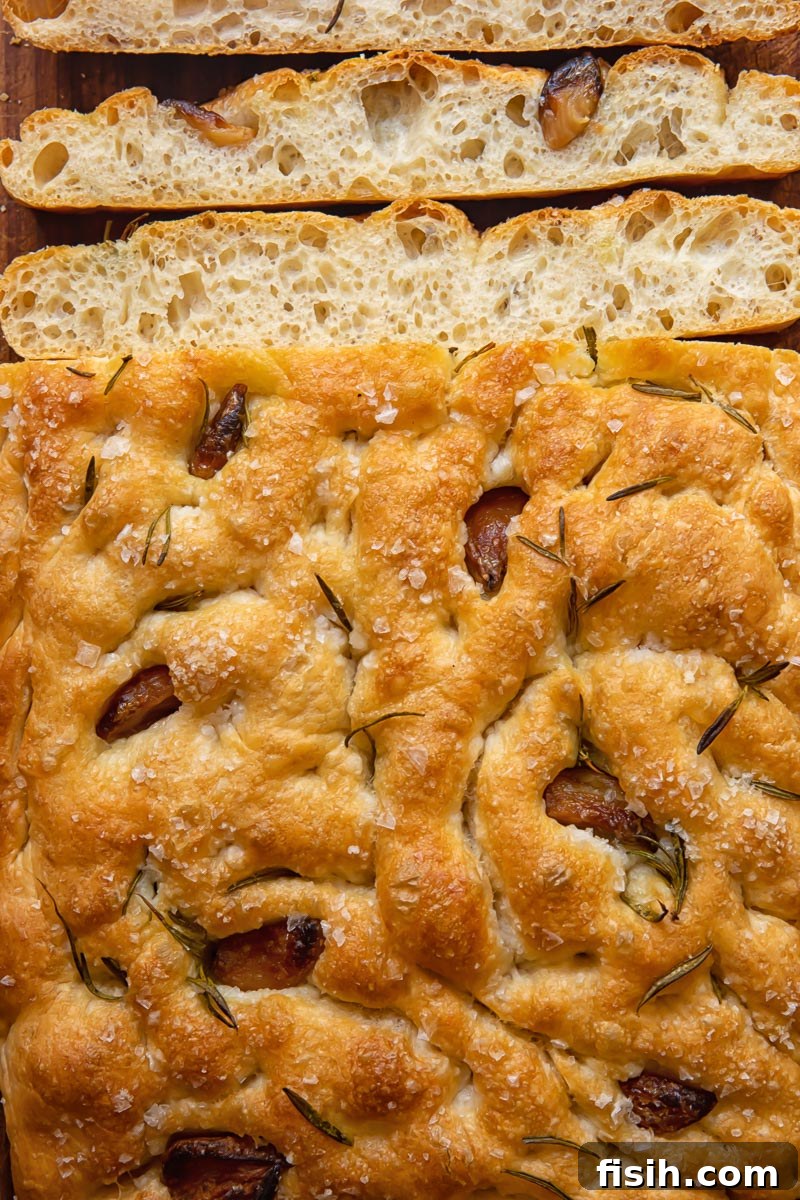
By adopting this knuckle-protecting, minimal-effort technique, you can confidently ensure your homemade focaccia bread will emerge from the oven beautifully light, wonderfully bubbly, and possessing that perfect, satisfying chewiness that defines exceptional focaccia. This method is a game-changer for beginners and seasoned bakers alike, removing the intimidation factor from artisanal bread making.
So, how does this magical no-knead process work its wonders? It’s remarkably simple, relying on the power of time and temperature rather than brute force. The initial step involves combining the core ingredients to form a rough, shaggy dough. Once mixed, the refrigerator takes over as your silent, diligent assistant. The consistent cold temperature of the fridge initiates and sustains a slow, extended fermentation process, working tirelessly while you go about your day.
Here’s the fascinating science behind it: as the dough rests in the chilled environment, yeast slowly but steadily consumes sugars, producing carbon dioxide gas. These gases form countless tiny bubbles within the dough, which are key to its airy, open crumb structure. Simultaneously, the long fermentation period allows enzymes within the flour to break down proteins, naturally developing gluten strands without any manual kneading. The longer you allow the dough to ferment in the fridge—ideally between 12 and 72 hours—the more numerous and robust these bubbles will become, and critically, the deeper, more complex, and more irresistible the flavor will develop. For an absolute explosion of taste and the most intricate yeasty notes, aim for a fermentation period of up to three days. This patient approach not only simplifies the process but profoundly enhances the final product, proving that sometimes, the best things truly do come to those who wait.
Elevate Your Focaccia: Endless Flavor Variations for Every Palate
One of the most exciting aspects of focaccia is its incredible versatility as a canvas for flavor. From classic savory combinations to unexpected sweet treats, there are four broad categories to explore: simple, extravagant, sweet, or savory. This adaptability ensures there’s a focaccia topping perfect for any occasion, meal, or craving.
Savory Classics and Everyday Delights
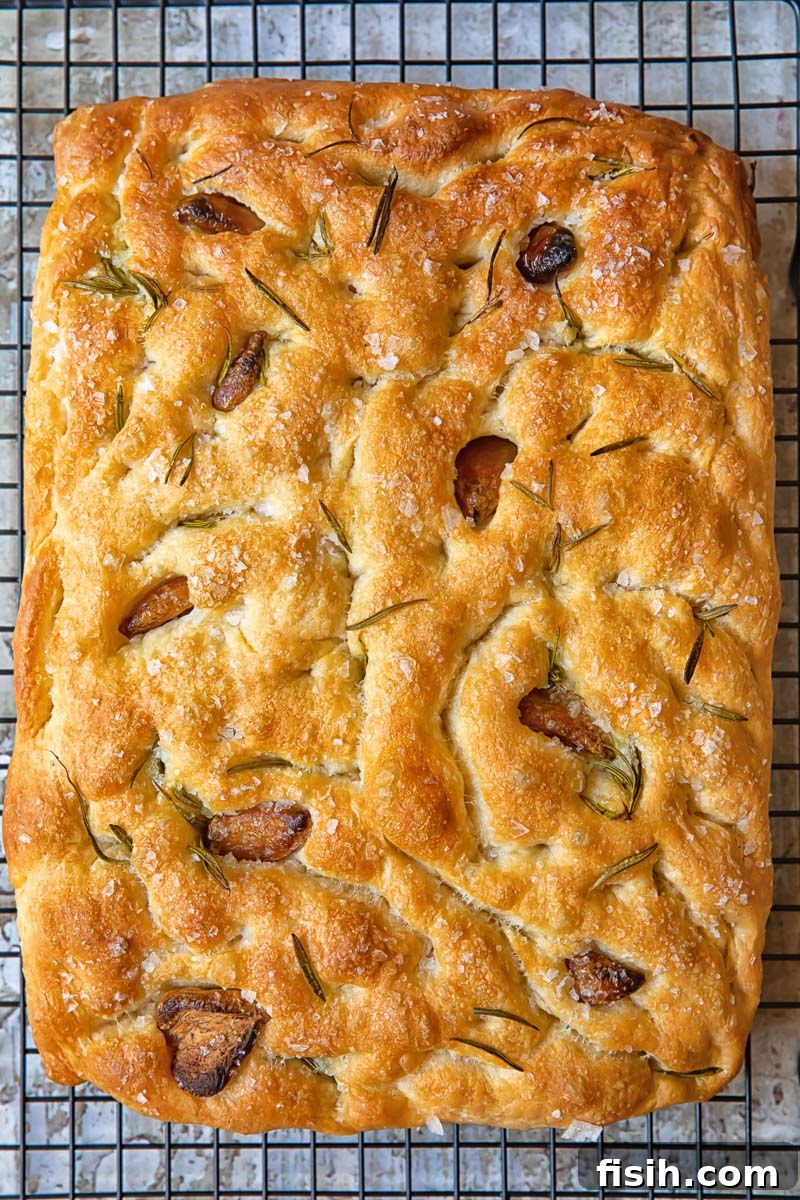
If your intention is to use your freshly baked focaccia for hearty sandwiches or as a versatile accompaniment to meals, keeping the toppings relatively simple often works best. For example, a timeless pairing of garlic confit and fresh rosemary offers incredibly potent flavor with minimal fuss. These humble ingredients deliver a knockout impact, infusing the bread with aromatic depth. Another fantastic and less “assaulting” option is the classic combination of sun-dried tomatoes and black olives, providing a perfect balance of tanginess and brininess. Other simple yet satisfying choices include thinly sliced red onion with a sprinkle of oregano, or just a generous amount of fresh basil leaves scattered after baking for vibrant freshness.
Gourmet and Substantial Savory Toppings
When focaccia is destined to be the star of the show—perhaps as a substantial snack, a standalone appetizer, or even a light meal—don’t hesitate to pile on more elaborate, pizza-like toppings. I often opt for combinations that offer a delightful interplay of textures and flavors. Imagine thinly sliced courgette, creamy ricotta, and aromatic basil creating a fresh, elegant profile. Or for a richer, more indulgent experience, try a base of vibrant sun-dried tomato pesto, draped with savory prosciutto, and finished with a scattering of sharp Parmesan cheese. Other gourmet ideas include caramelized onions with goat cheese and thyme, roasted red peppers with crumbled feta, or even a medley of mushrooms and truffle oil for an earthy, sophisticated touch.
Sweet Surprises: Focaccia for Breakfast or Dessert
Pushing the boundaries of traditional bread, focaccia can also transform into an exquisite sweet breakfast treat or an indulgent, unexpected alternative to a traditional dessert or cake. Picture a focaccia adorned with sliced fresh figs, dollops of creamy ricotta, and a drizzle of golden honey—a combination that is both rustic and refined. Alternatively, try baking with thinly sliced burnt orange, crunchy hazelnuts, and a surprising sprinkle of salty feta cheese. The contrast of inherent sweetness from the fruit and honey with the salty, savory elements creates an incredible taste explosion that will tantalize your taste buds in the most delightful way. Experiment with apples and cinnamon, berries and mascarpone, or even chocolate chips and a touch of sea salt for a truly unique dessert experience.
Finally, for an authentic Italian culinary hack that truly enhances the flavor experience: when biting into your savory focaccia, always turn it so the heavily salted, crisp side faces down. This allows the flaky salt crystals to hit your tongue first, delivering an immediate, powerful burst of flavor that awakens the palate before you even taste the soft, aromatic bread. Try it – it’s a sublime and simple trick that makes all the difference!
Expert Recipe Tips and Essential Baking Notes for Perfect Focaccia
- Precision is Key: Invest in Kitchen Scales. For all baking endeavors, and particularly for bread, kitchen scales are incredibly useful and a relatively inexpensive investment. I wholeheartedly recommend having a set! Measuring ingredients by weight (grams) offers a level of precision that measuring cups simply cannot match. Baking is a science, and exact measurements are vital for consistent, successful results.
- Understanding ‘Strong’ Flour: The Power of Gluten. You might wonder, “What exactly is ‘strong’ flour?” A great question! The term ‘strength’ in flour refers directly to its gluten content. Gluten, a protein composite, is the magical component responsible for the elasticity and structure of your dough. It’s what allows the dough to capture gases produced by yeast, enabling that spectacular rise in the oven and contributing to focaccia’s characteristic chewy texture. Using strong bread flour is crucial for achieving the desired airy, resilient crumb.
- The Essential Role of Olive Oil in Focaccia. While basic bread dough typically consists of flour, water, yeast, and salt (or a sourdough starter), focaccia deviates beautifully. It is made with an abundance of olive oil – glug upon glug! This generous application of oil is not just for flavor; it’s fundamental to focaccia’s signature pillow-soft texture, its dreamy rich taste, and that crisp, almost fried crust. Yes, it truly is a lot of oil, but it’s essential for an authentic focaccia experience. If you find yourself hesitant about such extravagance, perhaps a more pared-back loaf like my sourdough recipe for beginners, which contains no oil, might be a better starting point for your breadmaking journey. Or, if you appreciate both, why not try my incredible sourdough focaccia bread for the best of both worlds!
- Embracing the No-Knead Revolution. This focaccia recipe is based on the brilliant ‘No-Knead’ principle popularized by bakers like Jim Lahey. It’s so straightforward that even the most anxious beginner baker can achieve stellar results. Instead of traditional vigorous kneading to develop gluten, the dough benefits from a remarkably long fermentation process—anywhere between 12 and 72 hours. This extended period allows the gluten to develop naturally and slowly. Crucially, this process must take place in a cold environment, specifically your refrigerator, to slow down yeast activity and enhance flavor.
- The Science of Cold Fermentation. Here’s a very scientific equation that holds true for delicious bread: a colder environment = a slower fermentation process = a stronger, more complex flavor. This slow fermentation allows for a greater production of organic acids, which contribute to a more nuanced taste profile. Patience truly pays off in the world of no-knead bread.
- For the ‘On a Whim’ Baker: Minimum Fermentation. If you’re a spontaneous baker who decides on a whim to make focaccia, a minimum fermentation period of 2 hours will still yield a good loaf. However, manage your expectations; while it will be tasty, you won’t experience the profound depth of flavor or the incredibly airy texture that comes from longer fermentation. Another simple, yet very scientific equation for bread: longer fermentation = more delicious bread.
- Key Ingredients: Olive Oil and Flaky Salt. While focaccia is incredibly adaptable to various toppings, olive oil and salt are the foundational ingredients for a traditional focaccia. My personal favorite toppings include rosemary and confit garlic, but I also adore a vibrant cherry tomato and pesto topping. Feel free to unleash your creativity!
- Why Flaked Salt Reigns Supreme for Focaccia. When it comes to finishing your focaccia, flaked sea salt (such as Maldon sea salt) is infinitely superior to fine table salt. Its larger crystals provide a delightful textural contrast and a welcome spark of concentrated saltiness when caught in a mouthful. It also adheres beautifully to the olive oil on the surface, creating a stunning visual appeal and enhancing the overall eating experience.
- Water Temperature Matters. For activating active dry yeast, warm water (around 105-115°F or 40-46°C) is ideal. It’s warm enough to awaken the yeast without being too hot to kill it. Too cold, and the yeast won’t activate efficiently.
- Don’t Overbake! Focaccia is meant to be tender and moist on the inside with a golden, crisp exterior. Overbaking can lead to a dry, tough loaf. Keep a close eye on it, especially towards the end of the baking time, looking for that beautiful golden-brown color.
- Quality Ingredients Make a Difference. While the method is simple, using good quality ingredients will elevate your focaccia significantly. This means a good quality extra virgin olive oil, fresh yeast, and decent bread flour.
Storage and Leftovers: Keeping Your Focaccia Fresh and Flavorful
To preserve the exquisite springy texture and aromatic flavor of your freshly baked focaccia bread, proper storage is paramount. Air is truly bread’s worst enemy, as exposure quickly leads to staling and hardening. The goal is to create an airtight environment to lock in moisture and freshness.
The most effective way to store focaccia at room temperature is by wrapping it tightly in cling film (plastic wrap). If possible, wrap the entire loaf in one piece to minimize air exposure. Stored this way, your focaccia will remain soft and delicious for up to two days on your countertop. For an even longer shelf life, or if you prefer a slightly different texture, you can also store it in a clean, airtight container or a reusable bread bag.
When it comes to freezing focaccia, employ the same air-lock approach. Before freezing, it’s a good idea to portion the focaccia into individual hunks or slices. Wrap each portion tightly in cling film, then place them in a freezer-safe bag or container, pressing out as much air as possible. This meticulous preparation will keep your focaccia fresh in the freezer for up to about a month without compromising its quality.
To thaw frozen focaccia, simply remove the wrapped bread from the freezer and leave it at room temperature for an hour or so until fully defrosted. While delicious at room temperature, focaccia truly shines when warm. You can breathe new life back into your thawed or day-old loaf by warming it through in a preheated oven. Place it directly on the oven rack or on a baking sheet at 180°C (355°F) for 6-8 minutes, or until warmed through and the crust is crisp again. The aroma that fills your kitchen during this reheating process is simply divine, making it taste almost as good as it did fresh from the oven.
Don’t let any leftover focaccia go to waste! Beyond reheating, it’s wonderfully versatile. Transform stale pieces into homemade croutons for salads and soups, use it as the base for a rustic panzanella salad, or toast slices lightly for bruschetta. Its rich flavor and sturdy texture make it perfect for soaking up dressings and toppings.
More Favorite Bread Recipes to Try
- Walnut and Raisin Sourdough Bread
- Easy Flatbread Recipe
- Rye Bread Recipe
- Dutch Oven Bread (Ready in 2 hours)
No Knead Focaccia Bread
Equipment
-
Kitchen scale
-
Stand mixer (optional, hand mixing is fine)
-
9×13 baking pan
-
Cooling rack
Ingredients
- 500g / 4 cups bread flour
- 375ml / 1⅔ cup warm water
- 7g / 1 tbsp active dry yeast
- 10g / 1/2 tbsp salt
- 1 sprig rosemary, leaves only
- 1 pinch flaky sea salt, such as Maldon sea salt
- 6-7 cloves garlic confit, optional
- Extra virgin olive oil, for coating and topping
Instructions
-
In a large mixing bowl, combine the bread flour and salt. In a separate bowl, combine the warm water and active dry yeast, stirring gently until the yeast is fully dissolved. This should take approximately 5 minutes.
-
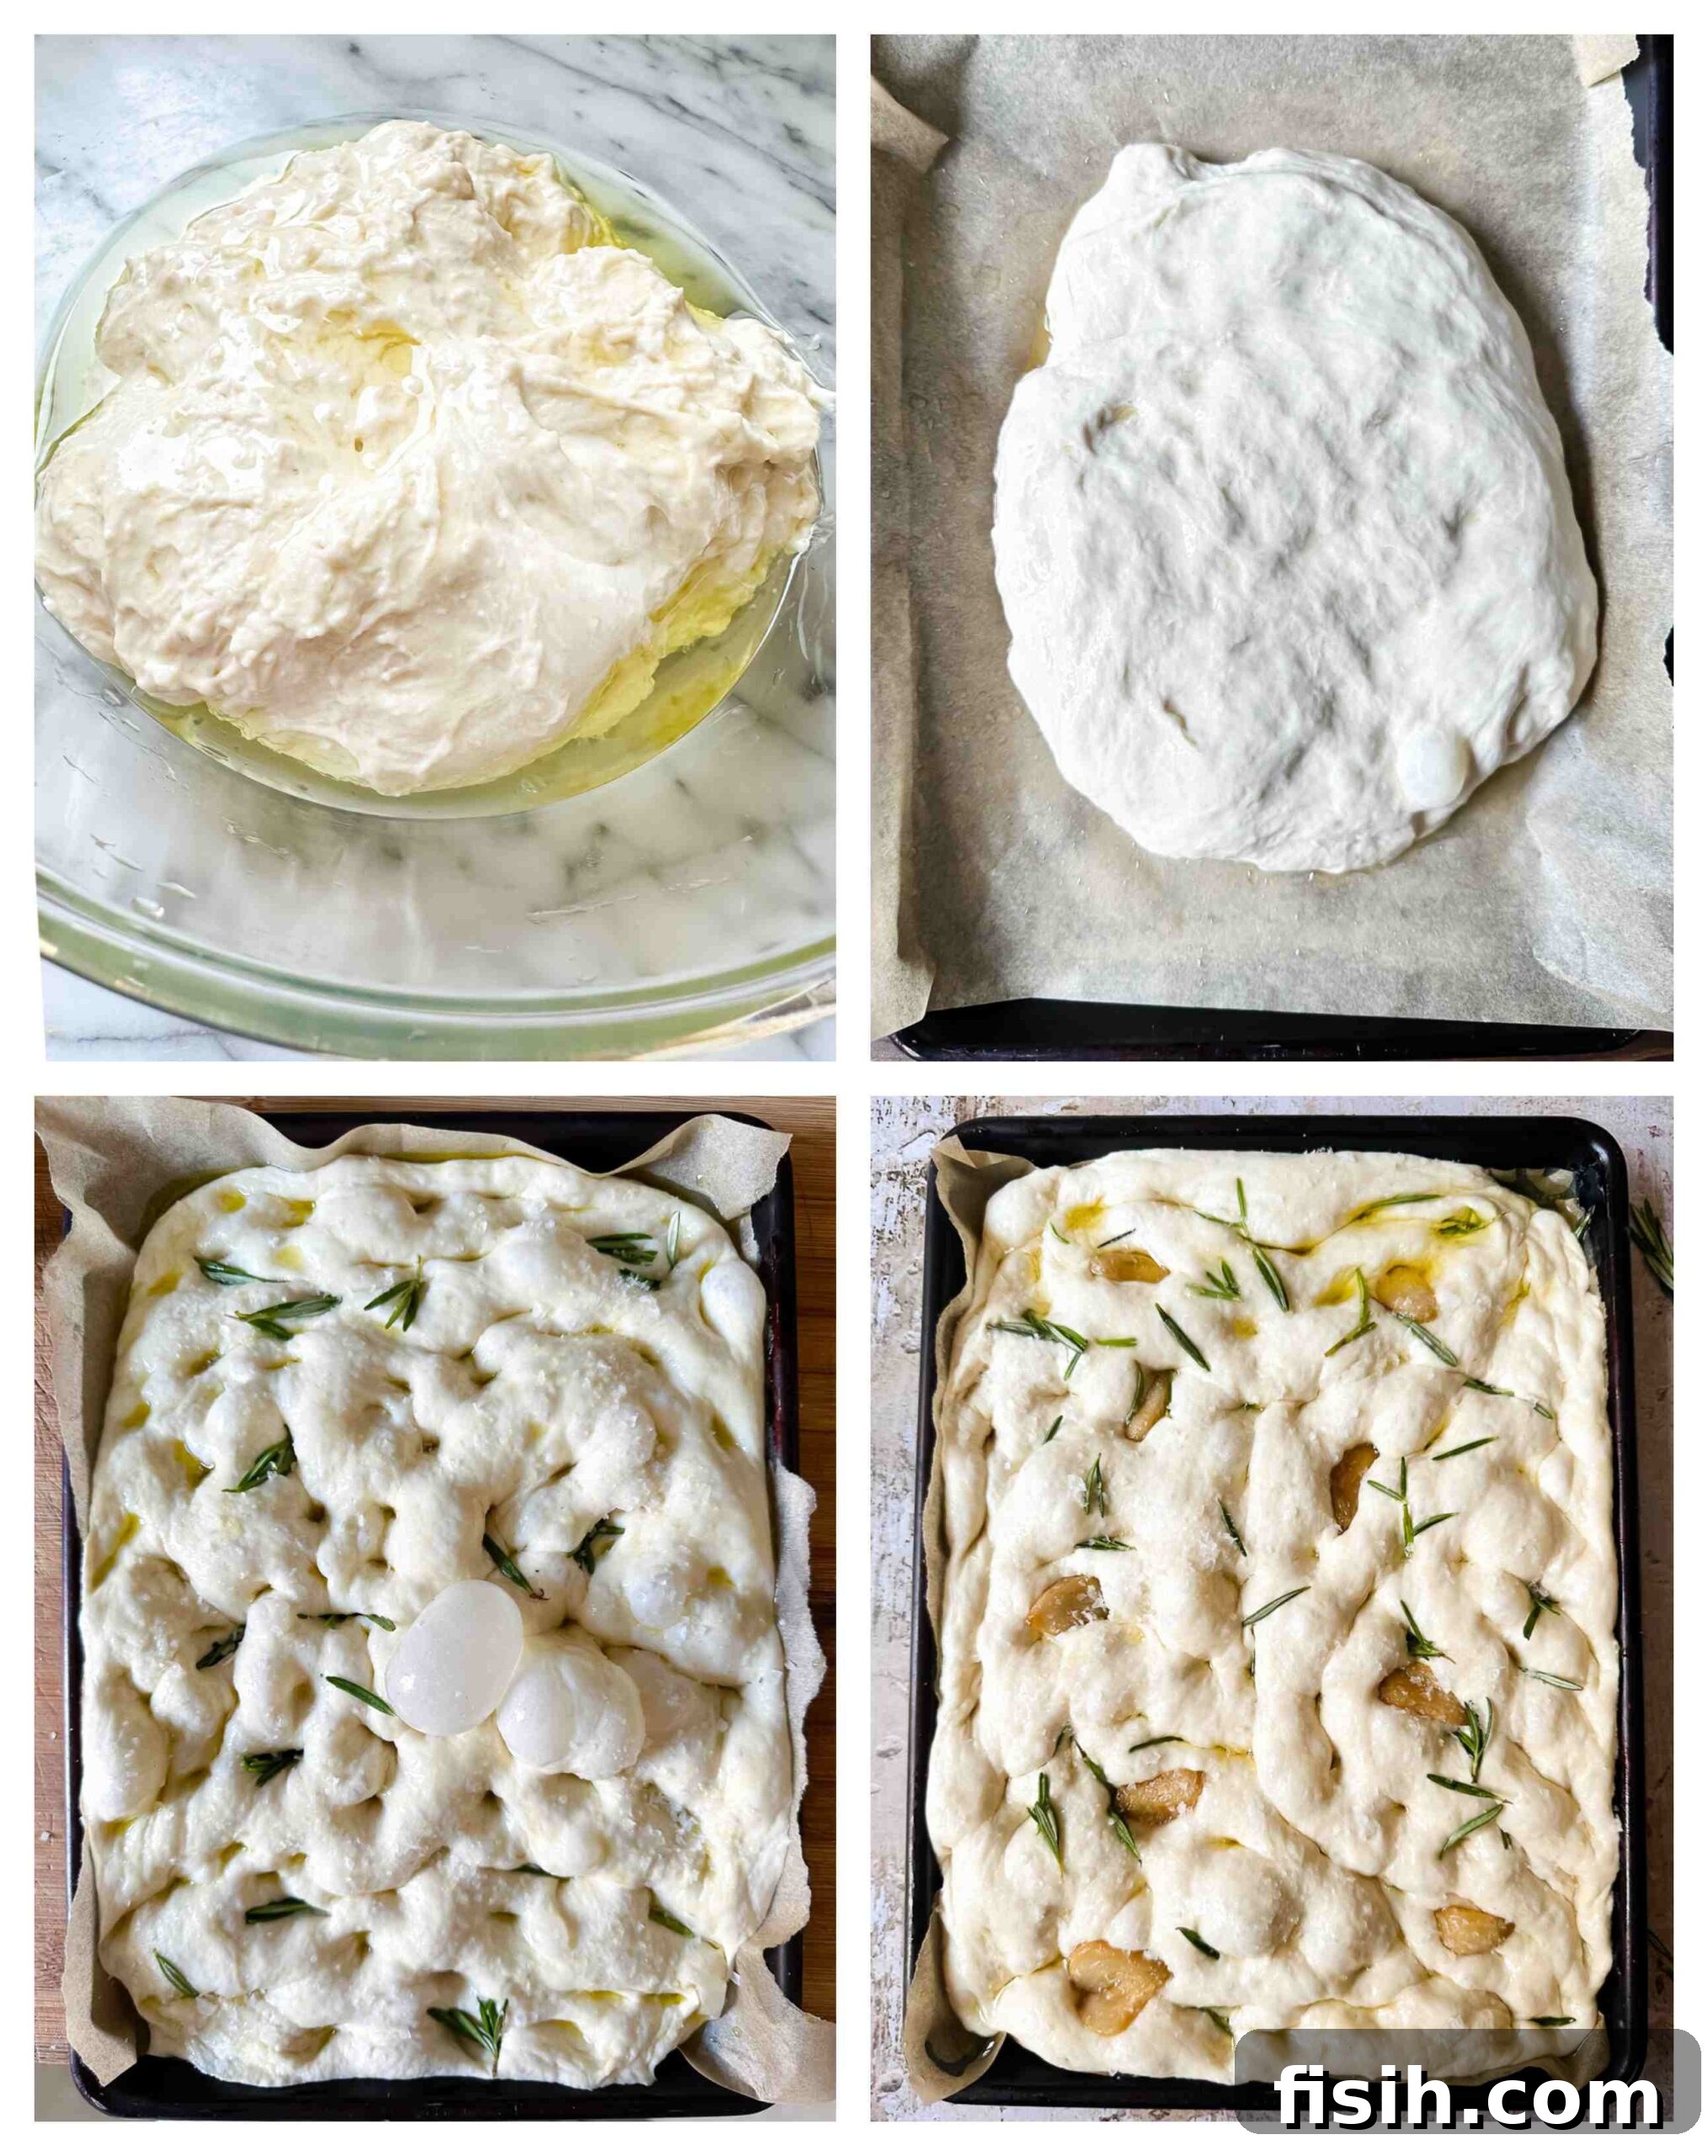
Pour the yeasted water mixture into the bowl with the flour. Mix with your hands or use a stand mixer fitted with a dough hook until all ingredients are just combined and you have a rough, shaggy dough ball. There is no need to knead it. Drizzle 1 tablespoon of olive oil over the dough, then gently flip it over so the entire surface is coated with oil. Cover the bowl tightly with plastic wrap and refrigerate for a minimum of 12 hours. For the best flavor development, the dough can be kept in the fridge for up to 3 days. The longer the fermentation, the more complex and delicious your focaccia will be.
-
When you are ready to bake, remove the dough from the refrigerator. Gently deflate it by running your fingers along the edges of the bowl, helping to detach it from the sides.
-
Line a 9×13 inch baking pan with parchment paper. Add a couple of tablespoons of olive oil to the bottom of the pan and spread it around evenly with your fingers. Transfer the dough to the prepared pan and gently flatten it, forming a rough rectangle. At this stage, it may not spread all the way to the edges of the pan. Ensure the entire surface of the dough is covered with olive oil, using your hands to spread it if needed. Allow the dough to rise at room temperature for 2.5 to 5 hours. The rising time will vary depending on the ambient temperature of your home—it might take as little as 2 hours on a warm summer day or up to 5 hours on a cold winter day. Pay attention to your dough: it should look rounded, puffy, and visibly bubbly.
-
Approximately 30 minutes before the dough is ready to bake, preheat your oven to 225°C (450°F).
-
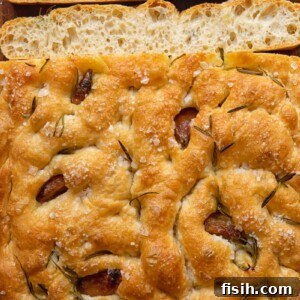
Once the dough has fully risen, drizzle another tablespoon of olive oil generously over its surface. Scatter the rosemary leaves all over (this is also the stage to add optional toppings like garlic confit or cherry tomatoes). With oiled fingertips, gently but firmly press down on the dough, creating deep dimples across the entire surface. You can gently stretch the corners slightly at this point to ensure the dough fills the pan. Finally, liberally sprinkle the dough with flaky sea salt and bake immediately for 25 minutes, or until the focaccia is beautifully golden brown. As soon as it’s done, remove the focaccia from the pan and transfer it to a wire rack to cool. This step is crucial to prevent the bottom crust from becoming soggy.
Nutrition
Nutrition information is automatically calculated, so should only be used as an approximation.
Tried this recipe? Share your thoughts and tell us how it was in the comments below!