
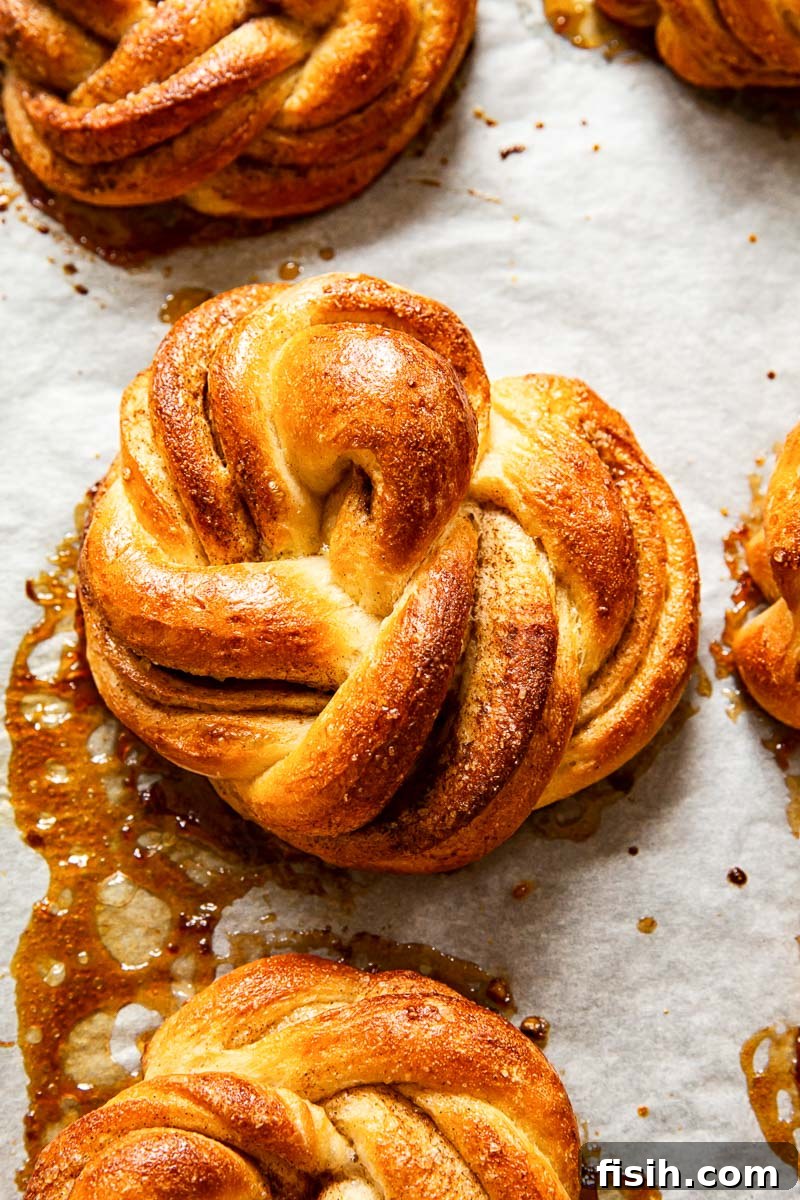
Imagine waking up to the irresistible aroma of freshly baked European-style cinnamon buns. These aren’t just any pastries; they are a delightful centerpiece for any gathering and a perfect reason to embrace your morning. While they might appear intricate with their gorgeous sugary knots, don’t be intimidated! The process is simpler than you think, especially with a little guidance.
For more sweet roll inspiration, explore our Chocolate Almond Rolls with Almond and Vanilla Bean Glaze. Or, for a savory twist, use the versatile dough from this recipe to create our Quick and Easy Hamburger Buns!
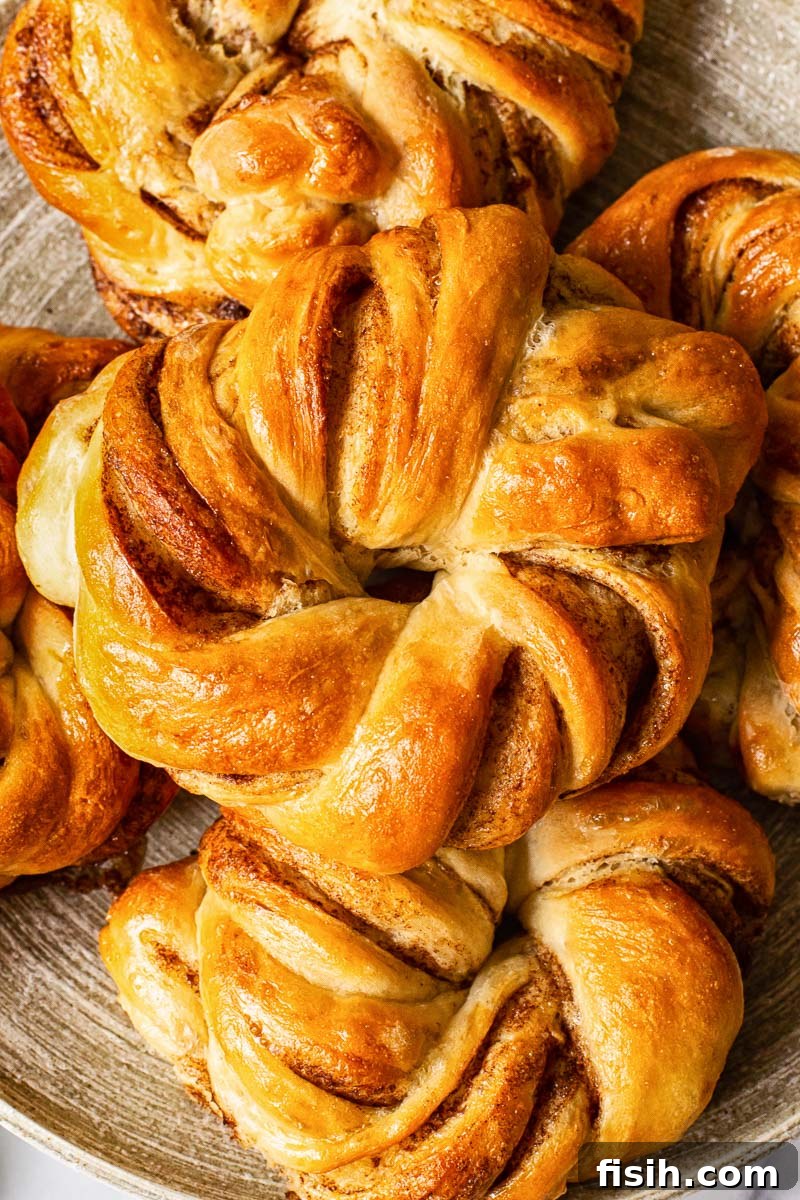
The Heartwarming Story Behind This European Cinnamon Bun Recipe
This cherished cinnamon bun recipe, known as “plushki” in Russian, comes straight from my mother’s kitchen. It’s a recipe that has sweetened countless family gatherings and even served as a unique form of currency for her! My mom is legendary for her plushki – soft, fluffy, and utterly delicious. Whether she’s enticing a builder with a fresh batch to speed up renovations or persuading a nephew to fix her computer, these sweet buns are her secret weapon, and she wields it with joyful expertise. No family birthday celebration is complete without her famous cinnamon buns gracing the table.
For years, I longed to capture her incredible recipe. The challenge, however, was typical of many generational family recipes: my Russian mother baked entirely by feel. There were no detailed measurements or written instructions, just instinct and experience. Translating her intuitive method into a precise, shareable recipe required dedication. After she finally shared her wisdom in rather loose terms, I embarked on a series of tests to meticulously nail down the exact measurements, ingredient ratios, and optimal baking times. It was a labor of love, ensuring that everyone could recreate the magic of her plushki in their own homes. To make the shaping process even clearer, I’ve also created a step-by-step video tutorial, because sometimes, a visual guide truly is worth a thousand words.
Crafting Fluffy Perfection: How to Make Cinnamon Buns from Scratch
The secret to these incredibly fluffy cinnamon buns lies primarily in the yeast. My mother’s original recipe calls for a generous amount of yeast, which is key to their rapid rise and remarkable expansion in the oven, achieving impressive height and a feather-light texture. Traditionally, she uses fresh yeast, which contributes a distinct depth of flavor. However, I’ve carefully adapted her recipe to accommodate the more commonly available dry active yeast found in most supermarkets. Rest assured, you’ll achieve equally spectacular results with dry active yeast, though fresh yeast can certainly be used if you have access to it and prefer its nuances.
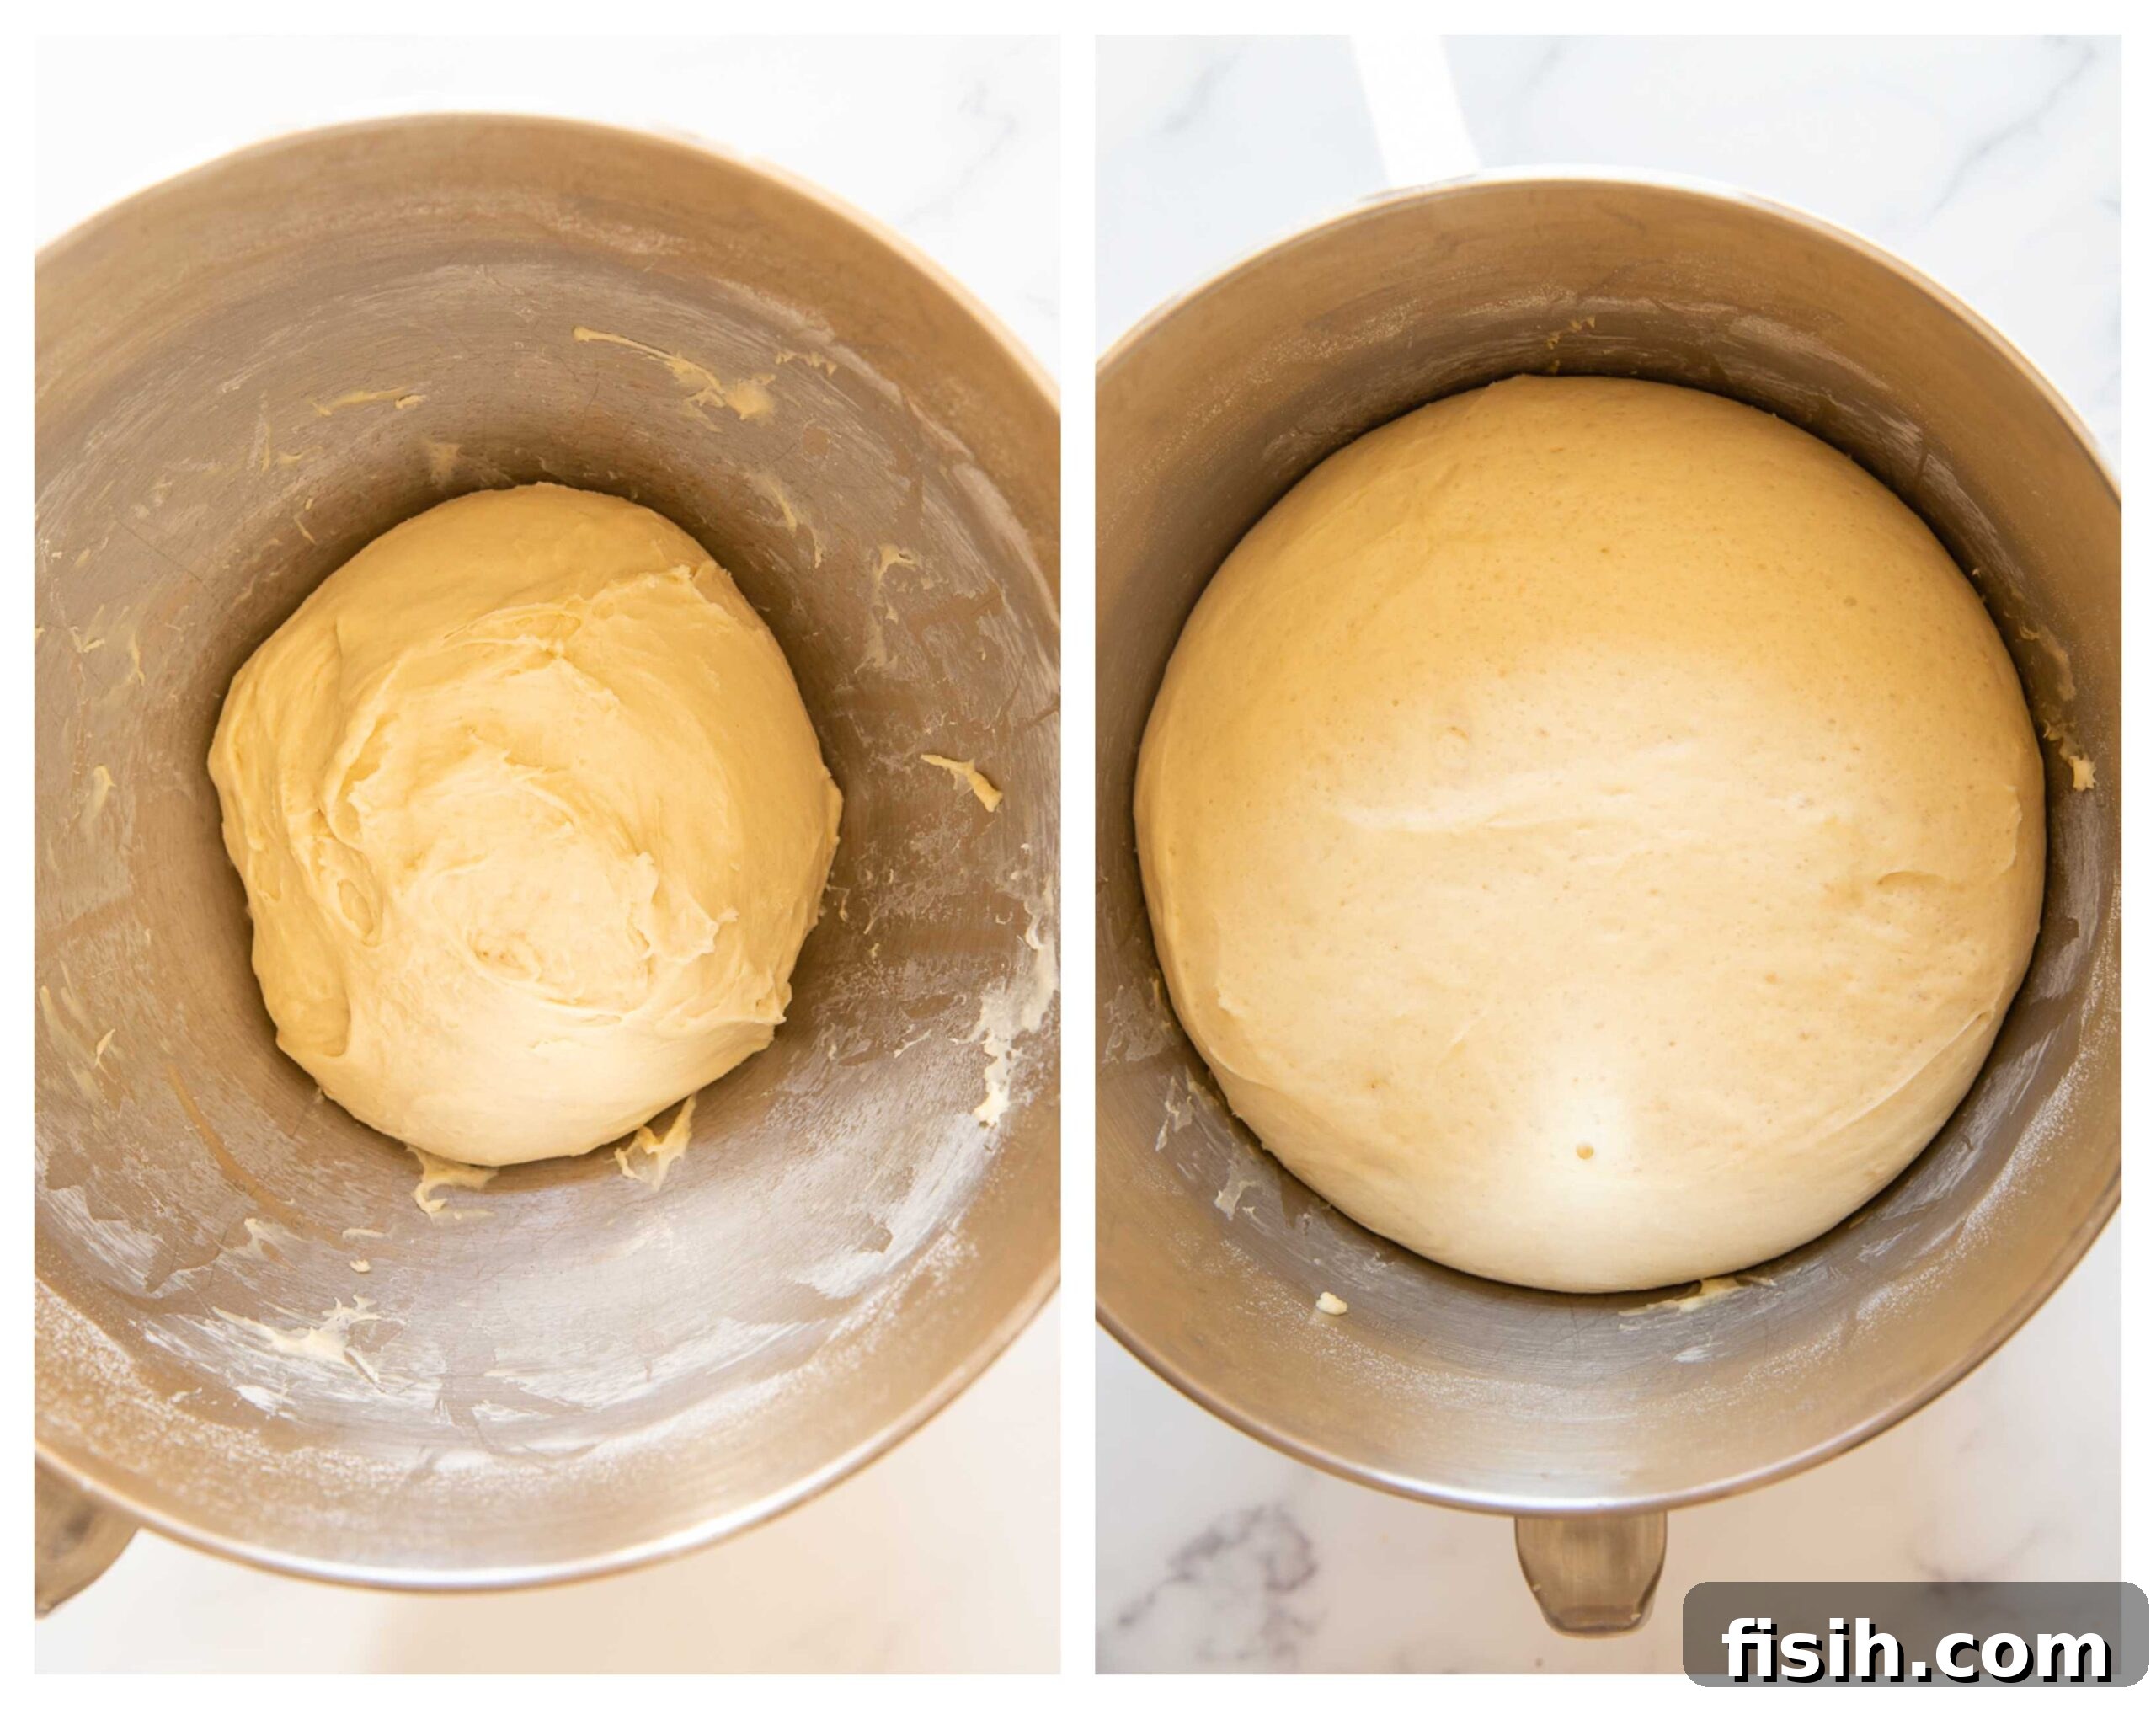
Beyond the yeast, the dough’s luxurious softness and rich, buttery flavor are attributed to a thoughtful blend of eggs, warm milk, and vegetable oil. These ingredients work in harmony to create a tender crumb that simply melts in your mouth. The overall process, despite the impressive outcome, remains remarkably straightforward. You begin by combining all the ingredients in a large bowl, then briefly kneading until you achieve a soft, pliable, and elastic dough. This hands-on process is incredibly satisfying and doesn’t require extensive experience. The dough then undergoes its first rise in a warm spot, where it will more than double in bulk, typically within 45 minutes to an hour. Following this crucial proofing period, you’ll proceed to shape the buns, allow for a shorter second rise, and then bake them to golden perfection. It’s a process that builds anticipation, culminating in truly exceptional homemade treats.
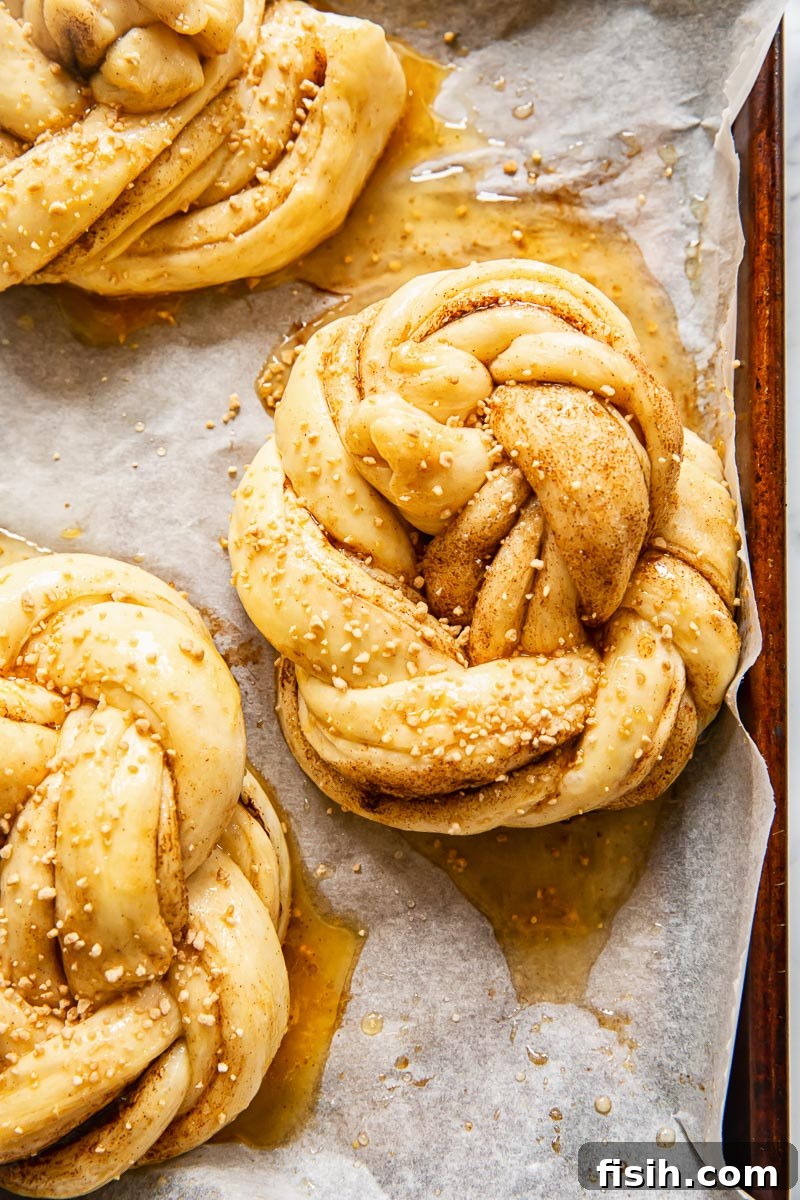
If you’re currently gazing at these beautifully crafted buns and thinking they look too daunting or challenging to create in your own kitchen, let me reassure you immediately: they are absolutely NOT difficult to make! The most intricate aspect of this recipe might seem to be the shaping, making them look as if they’ve come straight from a high-end bakery. This is precisely why I’ve provided a detailed video tutorial. The truth is, once you see the technique demonstrated, you’ll realize just how easy it is to roll and shape these elegant knots. A visual guide makes all the difference, transforming what seems complex into an enjoyable and achievable baking step.
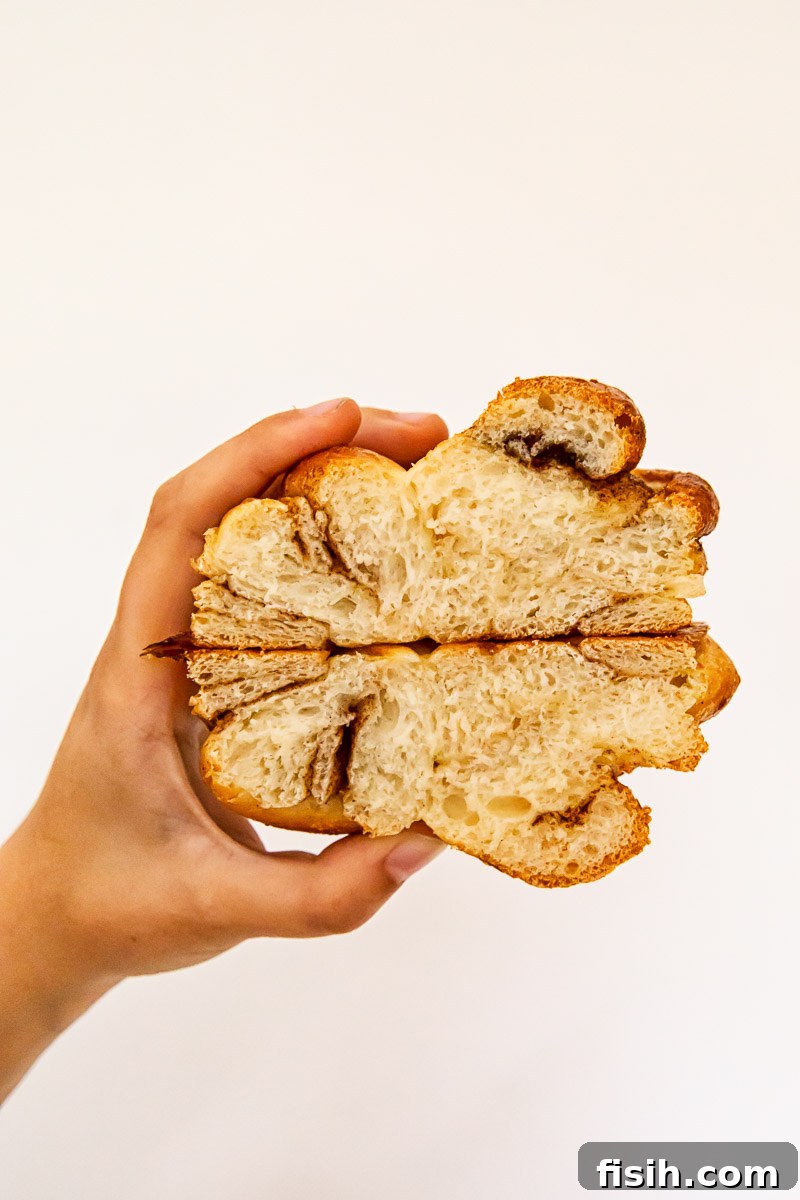
Shaping Your Cinnamon Masterpiece: Techniques for Beautiful Buns
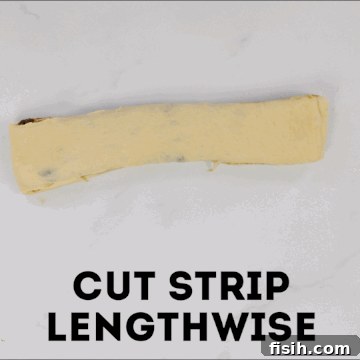
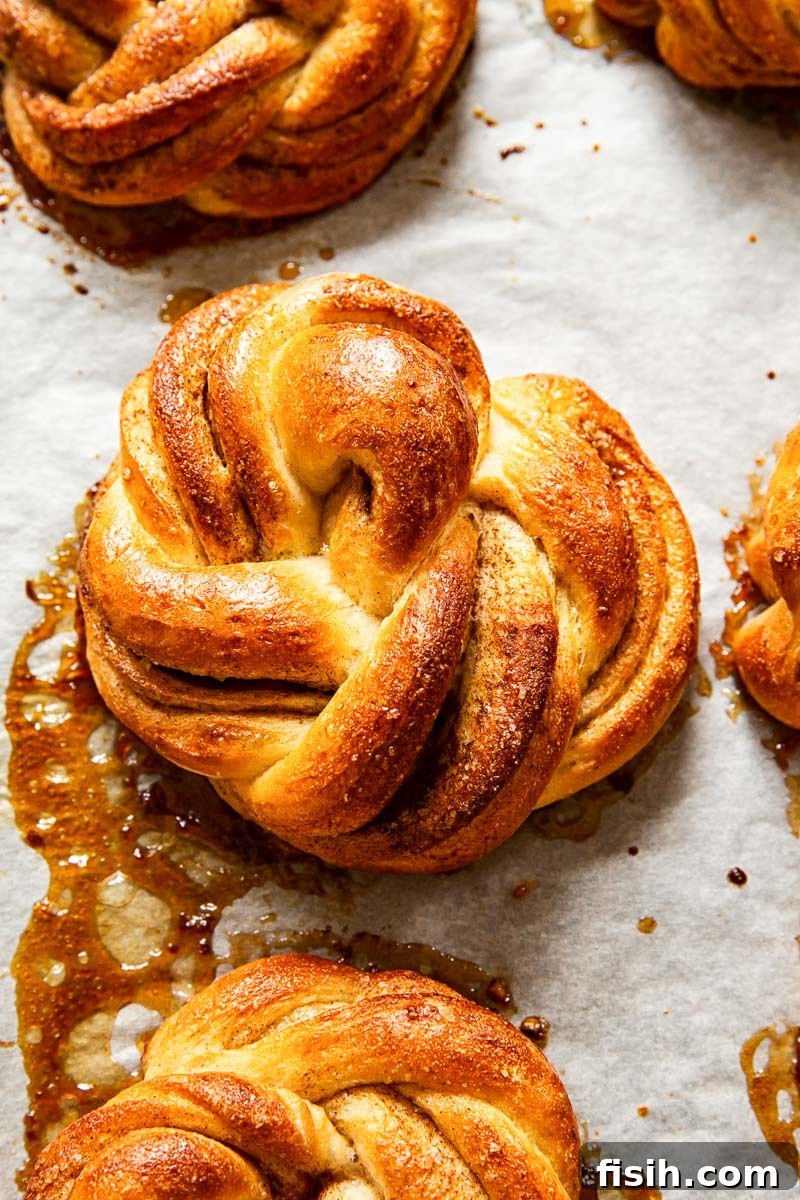
For me, transforming a simple piece of dough into an aesthetically pleasing creation is one of the most rewarding parts of baking cinnamon buns. There’s an abundance of ways to shape these sweet treats, with various countries and cultures boasting their own signature styles. My mother, for instance, traditionally shapes her plushki into charming roses, a beautiful and classic presentation. While undeniably pretty, I opted for a slightly different approach for this recipe, creating elegant twisted knots. This method not only looks sophisticated but also allows for a lovely distribution of the cinnamon filling throughout the bun. To visually guide you through this process, a quick GIF is included below, demonstrating how to achieve these gorgeous knots step by step.
Should you prefer a more traditional format, this versatile dough can easily be used to make classic cinnamon rolls. When baked together in a rectangular 9×13 inch pan, they emerge incredibly fluffy and tender. This recipe yields enough dough to fill two such pans, making it perfect for sharing or enjoying over several days. My children, in particular, absolutely adore the classic roll shape. Whichever method you choose for shaping your cinnamon buns, a crucial finishing touch is to brush them generously with an egg wash before baking. This simple step ensures they achieve that beautiful, golden-brown, glossy top that makes them truly irresistible.
Crafting the Irresistible Cinnamon Filling
The heart of any great cinnamon bun is its filling, and ours is a testament to simple perfection: a classic combination of softened butter, granulated sugar, and fragrant cinnamon. While my mother’s original “plushki” recipe traditionally used oil in her filling, I made a slight adaptation, opting for butter. This substitution enhances the overall flavor profile, imparting a richer, more luxurious taste to the buns. Furthermore, butter offers a practical advantage during the shaping process; its slightly firmer texture helps hold the dough strips together more securely when you’re twisting and tying them into knots, making the dough easier to work with compared to oil, which can sometimes make the dough too slippery. The butter-sugar-cinnamon mixture creates a sweet, spiced core that caramelizes beautifully during baking, infusing every bite with warmth and comfort.
While the classic cinnamon filling is a timeless favorite, don’t hesitate to experiment with variations if you’re looking to diversify your baking repertoire. For a truly authentic Russian twist, consider a filling made from a combination of sugar and finely ground poppy seeds – a traditional and delightful option for pastries. Alternatively, for a modern and kid-friendly indulgence, a generous spread of Nutella makes for a rich and decadent surprise inside these fluffy buns. The possibilities are endless, allowing you to tailor these European-style treats to your own taste preferences.
Expert Tips for Baking Success
- Flour Choice: For the best texture and structure, bread flour is ideal due to its higher protein content. However, if bread flour isn’t readily available, all-purpose flour can be used as a suitable substitute.
- Proofing Guide: You’ll know your dough has successfully risen and is ready for the next step when it has visibly doubled in volume. This indicates the yeast is active and the dough is well-aerated.
- Prevent Sticking: To ensure the dough doesn’t stick during rolling and shaping, always lightly dust your work surface and rolling pin with a small amount of flour. Avoid using too much, as this can make the dough tough.
- Softened Butter: For an even and effortless spread of the butter filling, remember to leave your butter out on the counter to soften sufficiently before mixing it with sugar and cinnamon. Room temperature butter is key for a smooth application.
- Warm Environment for Rising: Yeast dough thrives in warmth. Find a cozy spot in your kitchen for the dough to rise – near a sunny window, in a slightly warm (but not hot) oven (turned off!), or even simply on the counter in a warm room.
- Don’t Over-knead: While kneading is crucial for developing gluten, over-kneading can result in tough buns. Stop kneading once the dough is smooth, elastic, and passes the windowpane test (you can stretch a small piece thin enough to see light through it without tearing).
- Egg Wash Perfection: The egg wash isn’t just for color; it also contributes to the glossy, slightly crisp exterior of the buns. Ensure it’s applied evenly for a consistent golden finish.
Serving Suggestions: Enjoying Your Homemade Cinnamon Buns
These delightful cinnamon buns are incredibly versatile and perfect for any occasion. Enjoy them as an easy yet indulgent breakfast, paired with a fresh cup of coffee or tea for a truly comforting start to your day. They also make an ideal afternoon snack, a sweet pick-me-up that brightens any moment. While delicious at room temperature, I personally find them most exquisite when slightly warm. A quick reheat in an oven or even an air fryer can revive their fresh-from-the-oven softness and fragrance, making them taste as if they were just baked. Serve them plain to appreciate their delicate flavors, or if you like a little extra decadence, a simple dusting of powdered sugar or a light cream cheese glaze would be heavenly.
Storage and Leftovers: Keeping Your Buns Fresh
The good news is that these homemade cinnamon buns store remarkably well, allowing you to enjoy their deliciousness over several days. Once they have cooled completely to room temperature, transfer them to an airtight container or a securely sealed bag. They can be stored at room temperature for up to two days, retaining much of their softness. For extended freshness, keep them in the refrigerator for up to a week. If you wish to preserve them for an even longer period, these buns freeze beautifully for up to two months. To enjoy frozen buns, simply thaw them at room temperature, then warm them gently in the oven or microwave until soft and fragrant. This ensures you always have a delightful treat on hand, ready to enjoy whenever the craving strikes.
More Recipes Using Yeasted Dough
- Rhubarb Jam Swirled Bread
- No Knead Farmhouse Bread
- Rye Bread Recipe
- Strawberry Cheesecake Vatrushka Buns
Cinnamon Buns
Equipment
-
Baking dish
-
Pastry brush
-
Stand mixer (optional, hand kneading works too)
-
Mixing bowl
Ingredients
For the Dough:
- 14g / 1½ tbsp active dry yeast, or 50g fresh yeast if available
- 175ml / 3/4 cup warm water
- 3 tbsp granulated sugar
- 250ml / 1 cup warm milk
- 1 large egg
- 85ml / 1/3 cup vegetable oil
- 1 tsp salt
- 700g / 5⅓ cups strong bread flour
For the Filling:
- 125g / 1/2 cup unsalted butter, softened
- 100g / 1/2 cup granulated sugar
- 2 tbsp ground cinnamon
For Egg Wash:
- 1 egg, beaten, for brushing
Instructions
-
In a small bowl, combine the warm water, yeast, and 3 tablespoons of sugar. Let this mixture stand for 5 minutes until the yeast is foamy, indicating it’s active. Then, add the warm milk, vegetable oil, salt, and 1 large egg. Mix thoroughly with a fork until well combined.
-
Pour the liquid mixture into the flour in a large mixing bowl. Mix until a rough dough forms. Transfer the dough onto a lightly floured surface and knead for approximately 8-10 minutes, or until the dough is smooth, soft, and elastic. If using a stand mixer, attach the dough hook and knead on low speed for 1 minute, then increase to medium speed and continue kneading for another 4 minutes.
-
Lightly grease the mixing bowl with vegetable oil. Return the kneaded dough to the bowl, turning it once to coat. Cover the bowl tightly with plastic wrap and then with a clean kitchen towel. Let the dough rise in a warm place for 45 minutes to 1 hour, or until it has more than doubled in size.
-
While the dough is rising, preheat your oven to 180°C (350°F). In a separate bowl, combine the softened unsalted butter with the 100g (1/2 cup) granulated sugar and 2 tablespoons of ground cinnamon. Mix these ingredients thoroughly with a fork or mixer until you have a smooth, spreadable paste. Set aside.
-
Once the dough has risen, gently punch it down to release the air. Transfer the dough to a lightly floured work surface. Dust the top of the dough with a little flour and roll it out into a large rectangle, aiming for a thickness of no more than 1 inch. Generously dab the entire surface of the dough with the prepared butter, sugar, and cinnamon mixture, then spread it evenly all the way to the edges. Visually divide the dough into thirds. Carefully lift one-third of the dough from one side and fold it over the middle section. Then, take the opposite side and fold it over, creating three layers. (Refer to the video tutorial for a clear visual demonstration of this folding technique.) With your rolling pin, gently roll the folded dough out again to a thickness of about 1-1.5 inches.
-
Using a sharp knife or pastry wheel, divide the rolled-out dough into 12 equal strips. Take each individual dough strip and cut it lengthwise down the middle, stopping short of one end, so you have two thin strips still joined at the top. Twist these two thin strips together, then carefully tie the twisted strip into a neat knot. Place each shaped cinnamon bun on a parchment-lined baking sheet, ensuring they are spaced about 2 inches apart to allow for expansion. Cover the baking sheet with a clean tea towel and let the buns rise for a second time for 30 minutes.
-
Before baking, gently brush the tops of the risen cinnamon buns with the beaten egg wash. Bake in the preheated oven for 20-25 minutes, or until they turn a beautiful golden brown. Once baked, remove the buns from the oven and transfer them to a wire rack to cool slightly before serving.
Video Tutorial
Watch the detailed video tutorial for visual guidance on shaping these beautiful cinnamon buns!
Notes
- All-purpose flour can be used if strong bread flour is not available, though bread flour offers optimal texture.
- The dough is fully proofed when it has doubled in volume and springs back slowly when gently poked.
- Ensure your work surface and rolling pin are dusted with flour to prevent sticking during the rolling and shaping stages.
- Leaving butter out on the counter to soften will make it much easier to spread the filling evenly across the dough.
Nutrition Information (per serving)
Nutrition information is automatically calculated, so should only be used as an approximation.