
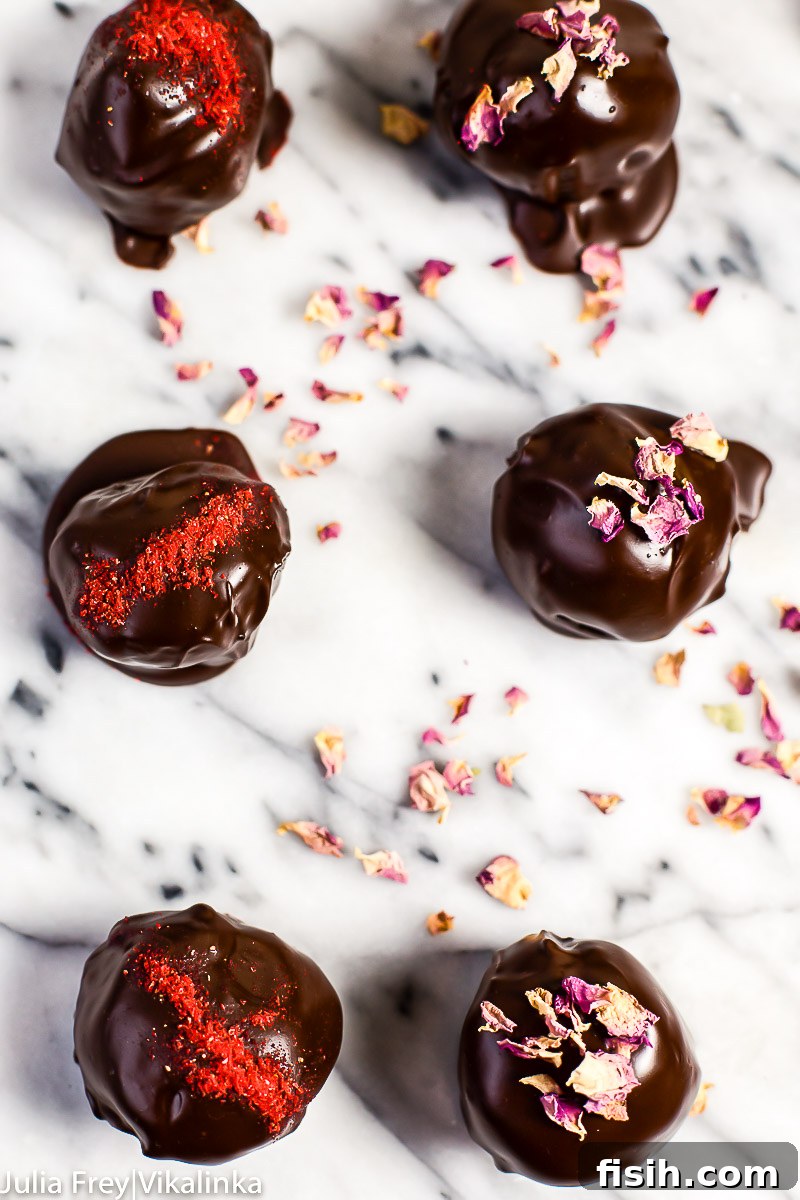
Welcome to a world where indulgence meets simplicity – where every bite is a tiny celebration. Forget the grandiose desserts that leave you feeling overly full after a delicious meal. Instead, imagine a sweet, delicate morsel, perfectly portioned and bursting with flavor. These aren’t just any treats; these are homemade chocolate cake truffles, lovingly dipped in rich chocolate and elegantly adorned with the vibrant zest of freeze-dried strawberry dust or the delicate beauty of dried rose petals. They are the ideal conclusion to any special dinner, especially a romantic Valentine’s Day feast, offering just the right amount of sweetness without overwhelming your senses.
For those who appreciate the art of confectionery in miniature form, these cake truffles are a revelation. They embody elegance and ease, proving that the most memorable desserts don’t always require hours of intricate work. Whether you’re a seasoned baker or a kitchen novice, this recipe is designed to bring joy and deliciousness to your table with minimal fuss.
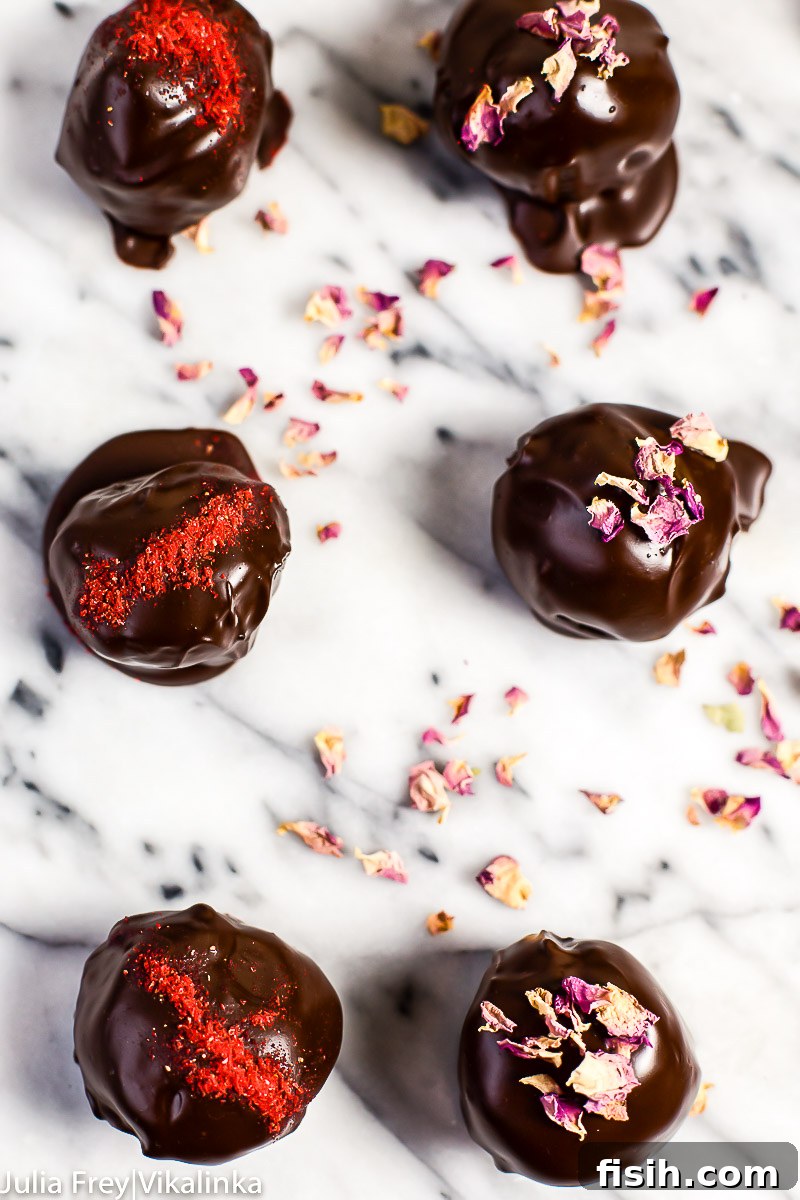
The Allure of Bite-Sized Desserts, Especially for Valentine’s Day
Valentine’s Day often conjures images of lavish dinners and equally lavish desserts. While the thought of a decadent multi-layered cake is appealing, the reality after enjoying starters, a main course, and perhaps a glass of bubbly, is often a feeling of delightful fullness. The last thing you want is a dessert that feels like a chore to finish.
This is precisely where the charm of chocolate cake truffles shines. They offer the perfect sweet ending – a concentrated burst of flavor and texture that satisfies your craving for something special without leaving you feeling overstuffed. Their small size makes them inherently elegant and easy to enjoy, allowing you to savor every moment of your romantic evening.
Moreover, these truffles are incredibly versatile. While perfect for Valentine’s Day, their charm extends to any celebration, a casual gathering, or simply as a delightful homemade treat to enjoy with a cup of coffee. They are a testament to the fact that sometimes, the most sophisticated pleasures come in the smallest packages.
What Exactly Are Cake Truffles? A Culinary Journey from Humble Origins
Cake truffles, often affectionately known as cake balls, may exude an air of gourmet luxury, but their origins are surprisingly humble and brilliantly resourceful. This ingenious concept was born in commercial bakeries, where bakers faced the challenge of minimizing waste. Instead of discarding day-old cakes or leftover cake scraps, they devised a clever method to repurpose them. By crumbling the cake and mixing it with frosting, they created a pliable, delicious mixture that could be rolled into bite-sized spheres, effectively transforming what might have been waste into a new, desirable product. It was a simple yet genius innovation that boosted their profit margins and gave birth to a beloved treat.
My own childhood memories are filled with similar pastries known as ‘Kartoshka’ in Russia. The name, which amusingly translates to ‘little potato,’ perfectly describes their rustic appearance, usually rolled in cocoa powder to resemble small potatoes. I fondly recall stopping at a small tea house and bakery near my bus stop after speed skating practice, eager to purchase one of these incredibly affordable yet utterly delicious treats once a week. They were a simple pleasure, a small reward that brightened my journey home, much like these chocolate cake truffles promise to brighten your day.
The beauty of cake truffles lies in their adaptable nature. They can be made with virtually any cake and frosting combination, allowing for endless flavor possibilities. This makes them a fantastic way to experiment with different tastes and textures, ensuring that each batch can be a unique culinary adventure.
Crafting the Perfect Cake Truffle: A Step-by-Step Guide
While traditionally, cake truffles often feature a plain white sponge cake and classic buttercream, then coated in cocoa powder, my recipe elevates this concept for a truly special occasion. For Valentine’s Day, I opted for a richer, more decadent approach. We’ll be using my favorite chocolate cake recipe as the base, ensuring a deep, satisfying flavor profile. Instead of cocoa powder, these beauties are dipped in luscious melted chocolate, providing a glossy, smooth finish. The final touch? A delicate dusting of freeze-dried strawberry powder, adding a vibrant pop of color and a delightful fruity tang.
The initial taste testers for this particular creation were my children, and their immediate enthusiasm for the strawberry dusting confirmed it was a winner. They loved how it perfectly balanced the rich chocolate flavor with a fresh, bright strawberry taste. Beyond the deliciousness, what truly makes this recipe stand out is its incredible ease. Even little hands can join in the fun, making the rolling of these beautiful treats a joyful activity for the whole family.
The Cake Base: Building Blocks of Flavor
Our journey begins with a magnificent chocolate cake. The choice of cake is crucial, as it forms the very foundation of our truffles. Using a rich, moist chocolate cake ensures that our truffles are not only flavorful but also have the perfect texture when combined with the frosting. This recipe calls for a simple yet deeply chocolatey cake that bakes beautifully and crumbles effortlessly, setting us up for success. The harmonious blend of cocoa, sugar, and vanilla in the cake provides a robust base that can stand up to the decadent coating.
The Frosting: The Binder of Deliciousness
The frosting is the magical element that binds our cake crumbs together, transforming them into a workable dough for our truffles. My preferred frosting for this recipe is a simple yet effective sweetened condensed milk buttercream. It offers a creamy texture and a sweet, milky flavor that complements the chocolate cake without overpowering it. The key is to whip the butter until it’s soft and fluffy before incorporating the condensed milk and vanilla, creating a velvety consistency. Even if the frosting separates slightly, as can happen with varying butter consistencies, rest assured it will still work perfectly for binding the cake crumbs.
The Chocolate Glaze: A Luxurious Outer Layer
The final layer of pure indulgence comes from our chocolate glaze. Using good quality dark chocolate is essential here, as it provides a deep, slightly bitter note that beautifully contrasts with the sweetness of the cake and frosting. Melting the chocolate with a touch of butter creates a smooth, glossy coating that hardens to a satisfying snap. This glaze isn’t just about appearance; it adds another layer of rich chocolate flavor and a delightful textural contrast to the soft interior of the truffle.
Tips for Perfection: Elevating Your Cake Truffle Experience
Creating these delightful cake truffles is a rewarding experience, and with a few key tips, you can ensure they turn out absolutely perfect every time. From creative decorations to clever serving suggestions, these insights will help you make the most of your homemade treats.
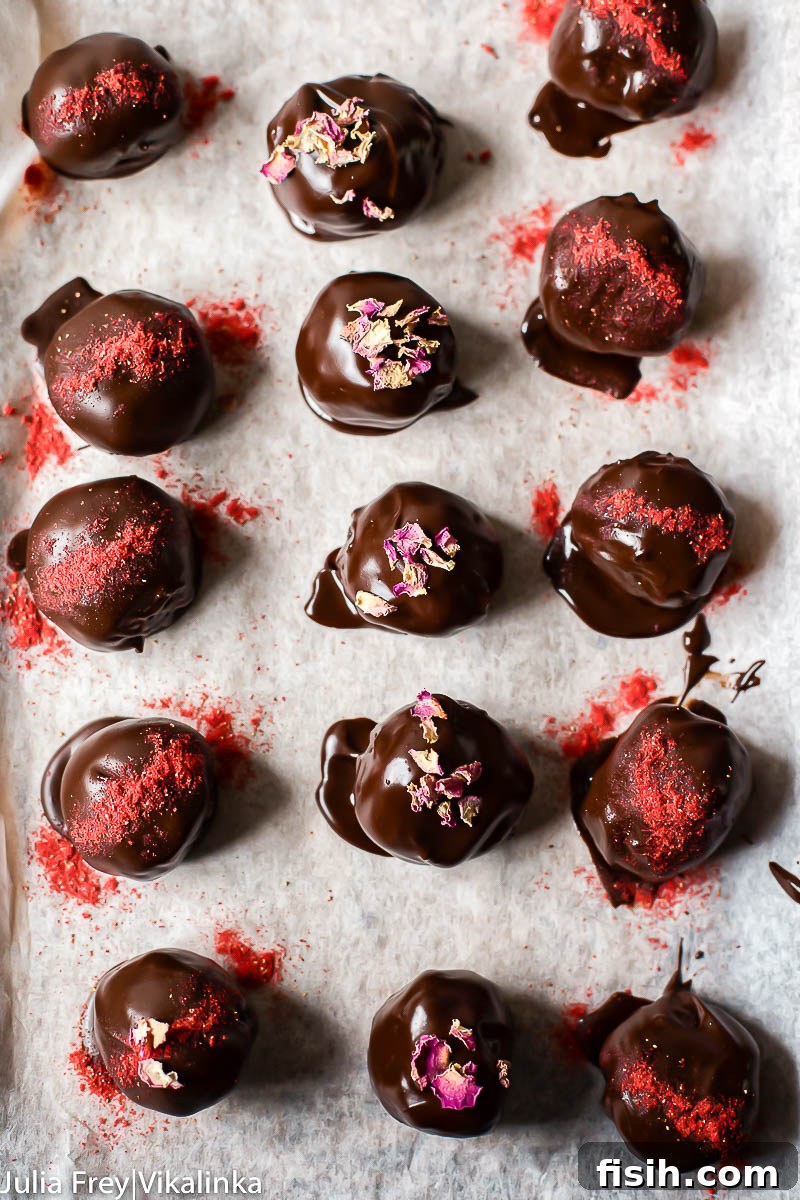
- **Creative Toppings and Decorations:** While freeze-dried strawberry powder and dried rose petals offer a stunning and romantic aesthetic for Valentine’s Day, the possibilities for decorating your truffles are endless. Consider rolling them in desiccated coconut for a tropical twist, or finely chopped nuts like pistachios or almonds for added crunch and flavor. A sprinkling of sea salt can be a wonderful way to cut through the sweetness, offering a sophisticated flavor contrast. Edible glitter, cocoa powder, or even a drizzle of white chocolate can also create beautiful and delicious variations.
- **Kid-Friendly Fun: Cake Pops!** If you’re making these for younger enthusiasts or a casual party, transform them into fun cake pops! Simply insert lollipop sticks into the chilled truffle balls before dipping them in chocolate. Decorate with an array of colorful sprinkles for a playful touch that children will adore. This adaptation makes them even easier to eat and adds an element of whimsical charm.
- **The Perfect Gift:** These homemade chocolate cake truffles are almost too good to share, but they make an absolutely fantastic gift. Arrange them elegantly in a small box, perhaps with some decorative tissue paper, and tie it with a ribbon. They are a thoughtful, personalized present that speaks volumes of your care and effort, ideal for birthdays, anniversaries, or as a simple token of appreciation.
- **Temperature is Key:** Ensure your cake is completely cooled before crumbling, and your frosting is at a soft but firm consistency. When forming the balls, if the mixture becomes too sticky, refrigerate it for a short while. Similarly, chilling the formed truffles before dipping is crucial; this helps them maintain their shape and prevents the chocolate coating from becoming too thin or messy.
- **Melting Chocolate Like a Pro:** When melting your chocolate for the glaze, do so gently over very low heat or in a double boiler. Overheating chocolate can cause it to seize, becoming grainy and unusable. Stir continuously until smooth and glossy. If it appears too thick, a tiny bit more butter or a neutral oil can help thin it slightly.
Storage and Leftovers: Enjoying Your Truffles Longer
This wonderful recipe yields approximately 20 chocolate cake truffles, a generous amount that’s perfect for sharing, gifting, or simply enjoying over several days. Luckily, these delightful treats store beautifully, ensuring you can savor them long after they’re made.
For longer storage, cake truffles freeze exceptionally well, maintaining their deliciousness for up to a month. To prevent them from sticking together in the freezer, first arrange the freshly dipped truffles on a parchment-lined baking sheet and freeze them until solid, typically for about an hour or two. Once firm, transfer them to a sealed airtight container or a freezer-safe bag. This method ensures each truffle remains separate and easy to grab when a craving strikes.
If you plan to enjoy them within a few days, refrigeration is the ideal option. Store the truffles in an airtight container in the fridge for up to 3 days. It’s crucial to seal them tightly to prevent them from absorbing any unwanted odors from other items in your refrigerator, which could compromise their delicate flavor. A small piece of parchment paper between layers can also help prevent sticking.
Whether stored in the freezer or refrigerator, remember a key serving tip: allow your truffles to come to room temperature for about 15-20 minutes before serving. This brief warm-up period enhances their texture, making the cake interior softer and the chocolate coating less brittle, delivering the best possible flavor and mouthfeel.
More Sweet Inspirations: Valentine’s Day Dessert Recipes
If you’re looking for more ways to sweeten your Valentine’s Day or any special occasion, explore these other delightful dessert recipes:
- Be my Valentine Red Velvet Truffle Cake
- Classic Chocolate Truffles
- Chocolate Orange Hazelnut Tart
- My Honey Valentine Russian Honey Cake Medovik
Chocolate Cake Truffles Recipe
By Julia Frey of Vikalinka
Prep Time: 1 hr 20 mins
Cook Time: 1 hr
Total Time: 2 hrs 20 mins
Servings: 20 truffles
Equipment
- Hand mixer
- 9×13 baking pan
- Mixing bowls
- Saucepan (for double boiler)
Ingredients
For the Cake
- 220g / 1¾ cups all-purpose flour
- 300g / 1½ cups granulated sugar
- 90g / ¾ cup unsweetened cocoa powder
- 1½ tsp baking powder
- 1½ tsp baking soda
- 1 tsp salt
- 2 large eggs
- 250ml / 1 cup milk
- 125ml / ½ cup vegetable oil
- 2 tsp vanilla extract
For the Frosting
- 300g / 1½ cups unsalted butter, softened
- 1 x 397g / 1¼ cup sweetened condensed milk
- 2 tsp vanilla extract
- 2 tbsp rum or rum flavoring, optional (for cake/frosting mixture)
For the Chocolate Glaze & Decoration
- 300g / 10½ oz dark chocolate, chopped
- 120g / ½ cup unsalted butter
- 2 tbsp freeze-dried strawberry powder
- 2 tbsp dried rose petals, optional
Instructions
For the Cake
- Preheat your oven to 350°F (180°C).
- In a large mixing bowl, combine the sifted flour, cocoa powder, sugar, baking powder, baking soda, and salt.
- Add the eggs, milk, vegetable oil, and vanilla extract. Beat the mixture on medium speed for 2 minutes until well combined and smooth.
- Pour the batter into a greased and floured 9×13-inch rectangular baking pan. Bake for 50 minutes, or until a cake tester inserted into the center comes out clean.
- Allow the cake to cool completely in the pan before proceeding.
For the Frosting
- In a medium bowl, whip the softened butter until light and fluffy. The butter should be soft enough to indent easily but still hold its shape.
- Gradually add the sweetened condensed milk and vanilla extract to the whipped butter, continuing to whip until the mixture is well combined and creamy. If the frosting appears to separate, don’t worry; it will still work perfectly when mixed with the cake crumbs. (Alternatively, you can use 1½ cups of your favorite prepared frosting.)
For the Chocolate Cake Truffles Assembly
- Once the cake is completely cooled, crumble it directly into the baking pan using your fingers. Ensure there are no large lumps.
- Transfer the cake crumbs to a large mixing bowl. Add the prepared frosting and, if desired, the rum or rum flavoring. Mix thoroughly with your hands or a sturdy spoon until you achieve a homogeneous mass that holds together when pressed.
- Using a small ice cream scoop (about 1.5-inch diameter) or a tablespoon, measure out portions of the cake mixture, approximately the size of golf balls. Roll them firmly between your palms to form smooth, round truffles.
- Place the rolled truffles on a parchment-lined cookie sheet. Refrigerate for at least 1 hour to allow them to firm up, which is essential for easy dipping.
For the Chocolate Glaze
- Prepare a double boiler by setting a heatproof bowl over a saucepan of simmering water, ensuring the bottom of the bowl does not touch the water. Alternatively, use a thick-bottomed saucepan over very low heat.
- Add the chopped dark chocolate and butter to the bowl or saucepan. Stir continuously until the chocolate and butter are completely melted and smooth, forming a glossy glaze. Be careful not to overheat the chocolate.
To Assemble and Decorate the Chocolate Cake Truffles
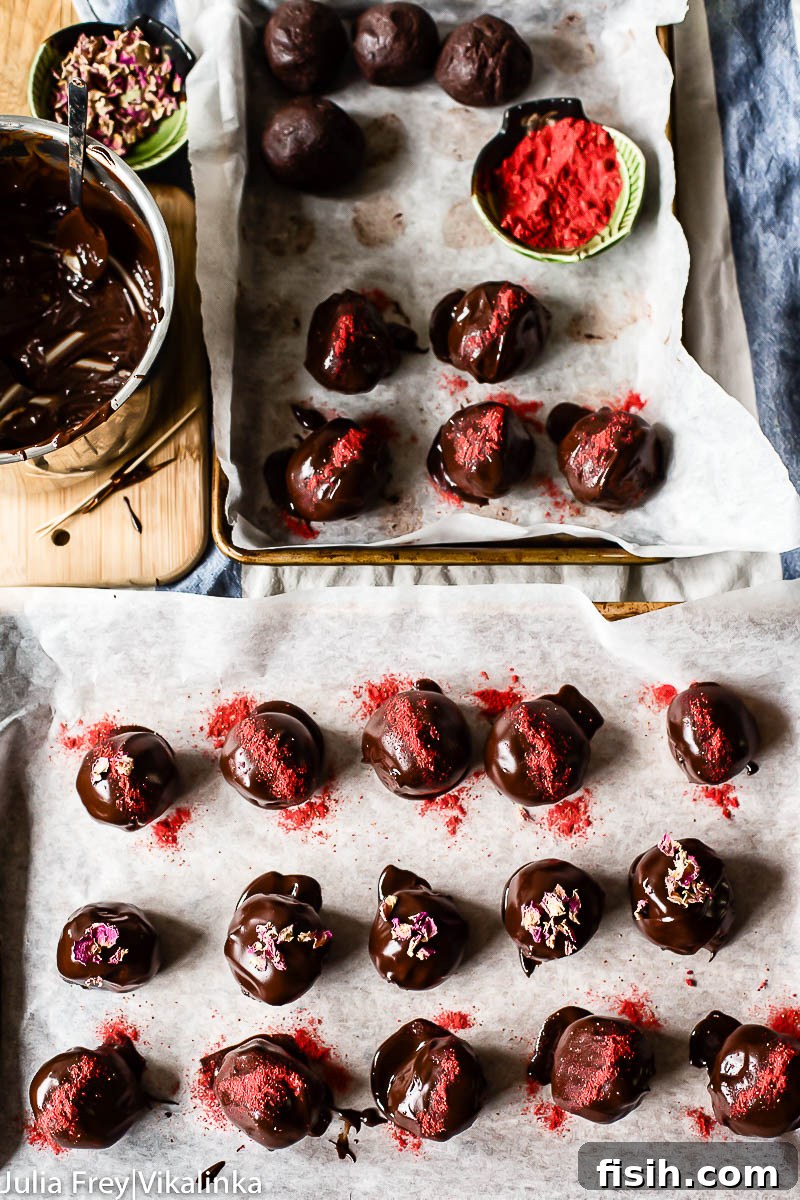
- Remove the chilled truffles from the refrigerator. One by one, dip each truffle into the warm chocolate glaze. Use a fork to gently lower and lift the truffle, allowing excess glaze to drip off.
- Place each dipped truffle back onto the parchment-lined cookie sheet.
- Immediately after dipping and while the chocolate glaze is still wet, sprinkle generously with freeze-dried strawberry powder or dried rose petals, as desired. This ensures the decorations adhere well.
- Once all truffles are dipped and decorated, refrigerate them again for at least 30 minutes, or until the chocolate glaze is completely set.
Note: Nutrition information is automatically calculated and should only be used as an approximation.