
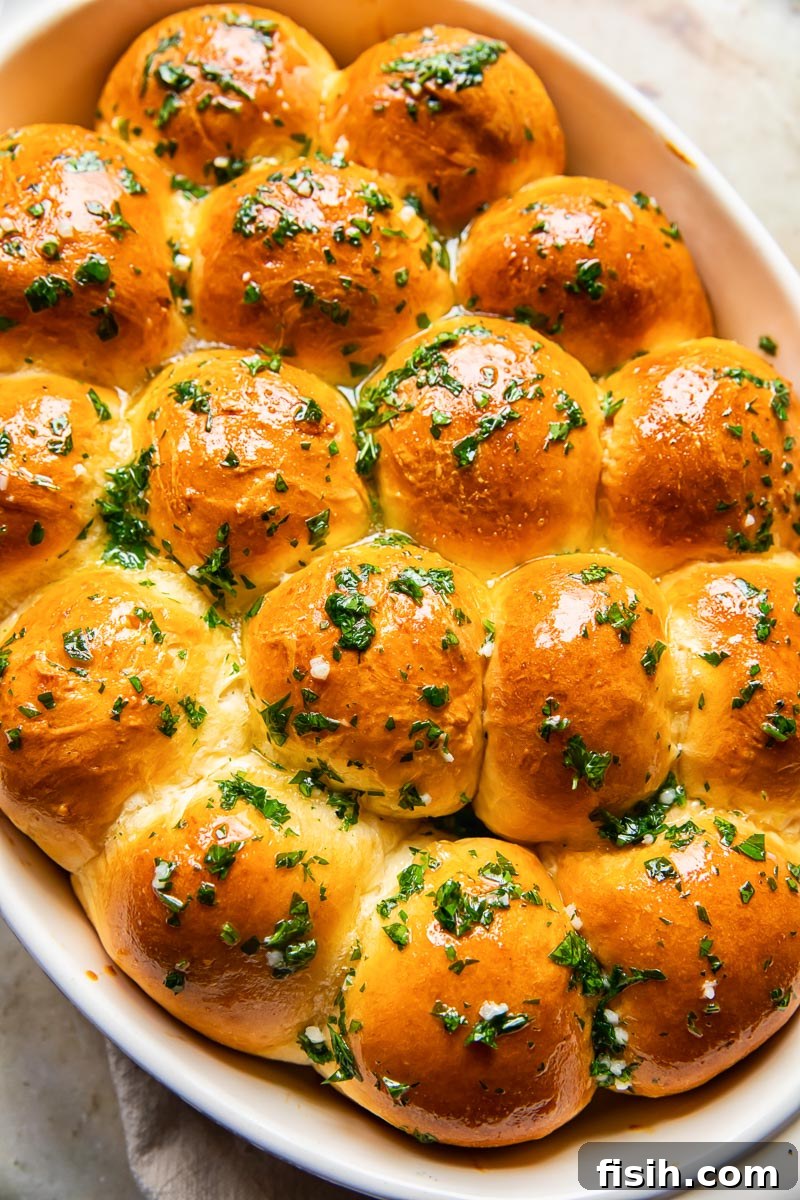
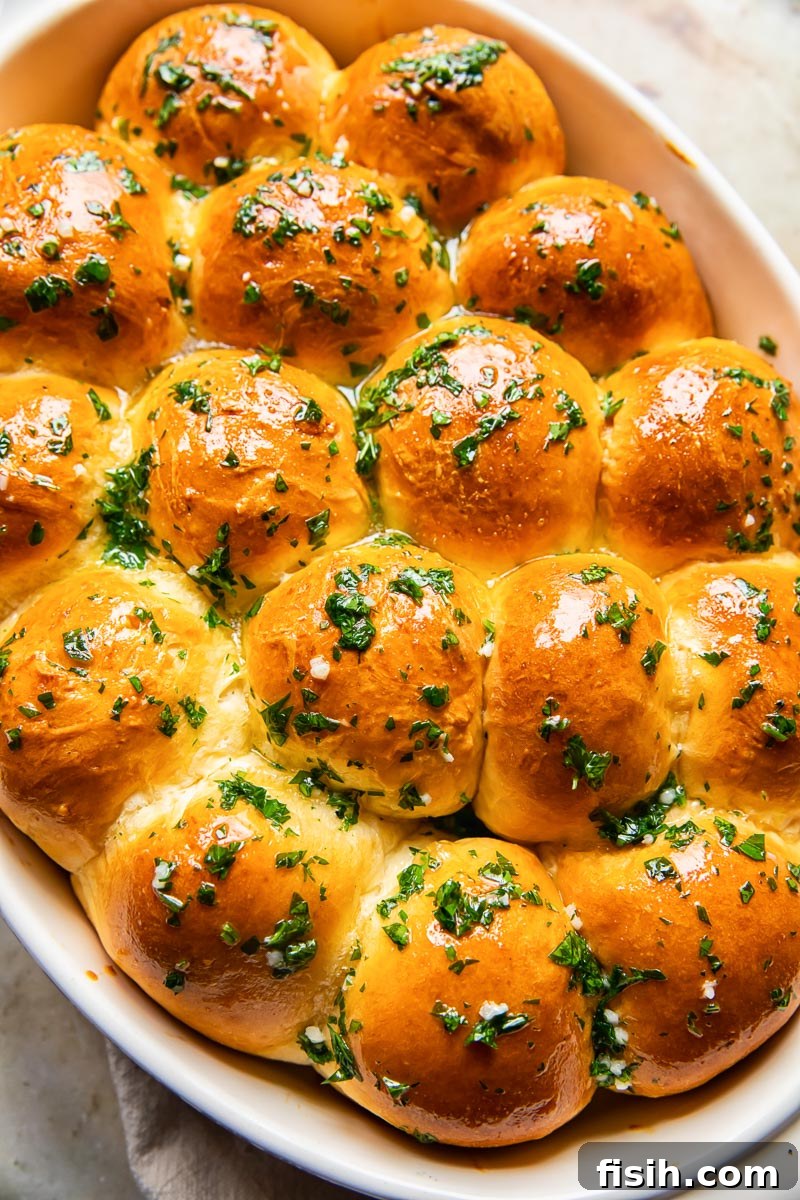
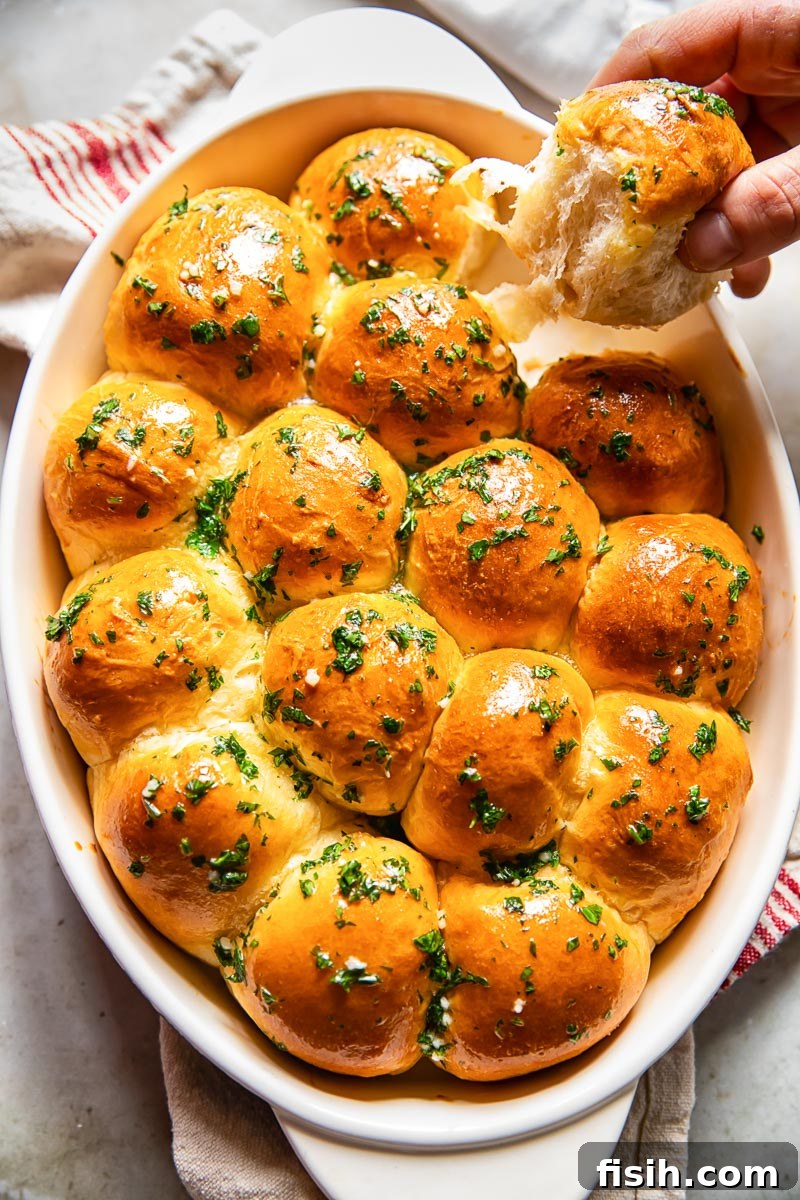
Imagine pulling a tray of golden-brown, irresistibly soft dinner rolls from your oven, their warmth filling your kitchen. Each one is generously brushed with fragrant herb and garlic butter, creating a symphony of flavors and textures that promises to elevate any meal. These aren’t just any rolls; they are an experience in comfort food, remarkably easy to create, even for the most novice baker. Get ready to transform your dinner table with these heavenly, fluffy delights.
A staple for any celebratory spread, these homemade dinner rolls are more than just a side dish—they are a cherished tradition waiting to be made. Whether you’re planning an elaborate Thanksgiving feast, a joyous Easter brunch, or simply a special family dinner, these rolls will undoubtedly complete your festive meal with a touch of homemade elegance and unparalleled taste.
The Ultimate Buttery Roll Experience
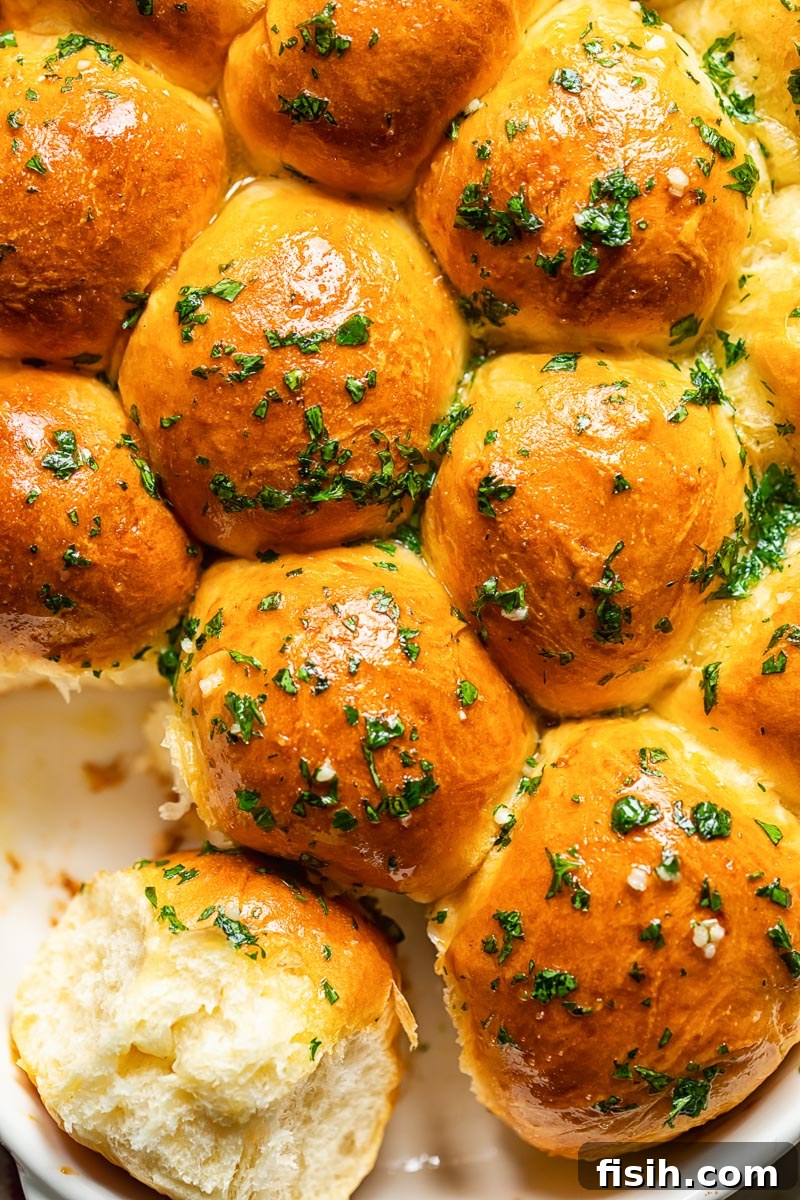
Are you one of those individuals whose meal feels incomplete without the satisfying indulgence of a warm, buttery roll? If so, this recipe is crafted specifically for you. These garlic butter dinner rolls are nothing short of incredible, offering a flavor profile that tantalizes the taste buds. Imagine the rich, savory notes of classic garlic bread seamlessly blended with the tender, slightly sweet essence of brioche buns, all rolled into one perfect bite. They are airy, pillowy, and utterly addictive, making them an instant favorite at any gathering.
Demystifying Bread Baking: Your Path to Homemade Perfection
For many, the thought of baking homemade bread can be daunting. If you’ve always yearned to create your own soft, warm rolls but felt intimidated by the process, rest assured, you’re not alone. I once felt the same way, watching my grandmother and mother effortlessly craft loaves throughout my childhood, believing it required arcane skills, extensive knowledge, and years of experience.
While some aspects of baking do benefit from practice, the art of bread making has evolved. Our ancestors baked without the precise recipes and clear instructions we have today, leaving much to trial and error. Thankfully, those days are long gone. This guide is designed to equip you with all the essential information and simple steps needed to succeed, transforming you into a confident bread baker in no time. Forget the guesswork; we’ll provide the roadmap to perfect dinner rolls.
Dinner Rolls vs. Traditional Bread: The Secret to Superior Softness
Over the years, I’ve shared numerous bread recipes, each with its unique charm. My No-Knead Dutch Oven bread, for instance, is incredibly popular due to its straightforward preparation. For those seeking a deeper dive into artisanal baking, my Sourdough Bread for Beginners offers a rewarding challenge, with a comprehensive guide and shaping video to assist you. If you’re short on time, my easy flatbread recipe requires no yeast, just four ingredients, and is ready in a mere 30 minutes.
While the fundamental methods of bread making remain consistent, dinner rolls stand apart due to the composition of their dough. Traditional, rustic bread typically relies on just flour, water, and yeast, resulting in a hearty, crusty loaf. Dinner rolls, however, are made from an “enriched dough,” a key distinction that grants them their signature soft, buttery, and fluffy texture. This enrichment is the secret to their melt-in-your-mouth quality, making them a more indulgent and luxurious choice for any meal.
Crafting the Perfect Enriched Dough: Essential Ingredients
To achieve the coveted softness and richness of these dinner rolls, we simply enhance a basic bread dough with a few crucial ingredients. These additions transform the texture and flavor, yielding rolls that are tender, moist, and delightfully rich. The core components of an enriched dough typically include:
- Milk: Provides moisture and contributes to a softer crumb and richer flavor compared to water. Warm milk is also vital for activating the yeast.
- Sugar: Feeds the yeast, aiding in its activation and rise, while also adding a subtle sweetness that balances the savory notes and enhances browning.
- Yeast: The magical leavening agent responsible for the rolls’ airy, fluffy texture. Active dry yeast is used here for reliable results.
- Butter or Oil: Introduces essential fat into the dough, leading to a tender crumb and a moist, buttery taste. This is fundamental to an “enriched” dough.
- Eggs: Contribute to the dough’s richness, color, and structure, making the rolls softer and more pliable. They also help create a beautiful golden crust.
- Salt: A crucial flavor enhancer that also controls yeast activity and strengthens the gluten structure, ensuring a well-formed roll.
- Flour: The backbone of the dough. Bread flour, with its higher protein content, yields a chewier, more structured roll, while all-purpose flour offers a slightly softer result.
Once you’ve mastered this fundamental dinner roll recipe, you’ll possess the skills to create a variety of other enriched baked goods, such as fluffy Hamburger Buns, decadent European Style Cinnamon Buns, or even luxurious Nutella Rolls. For a delightful savory twist, consider mixing in about 80g (1 cup) of grated cheese directly into the dough before the second proofing—a cheesy, savory roll perfect for any occasion!
Expert Tips for Flawless Dinner Rolls
- Accurate Measurements Are Key: Baking is a science. Ensure all ingredients are measured precisely for optimal results. Using a kitchen scale for flour is highly recommended for accuracy.
- Kneading for Perfection: While a stand mixer with a dough hook makes kneading effortless, this soft dough is also very manageable to knead by hand. Aim for 8-10 minutes of hand kneading, or 1 minute on low then 4 minutes on medium speed with a stand mixer, until the dough is smooth, elastic, and no longer sticky to the touch with clean hands.
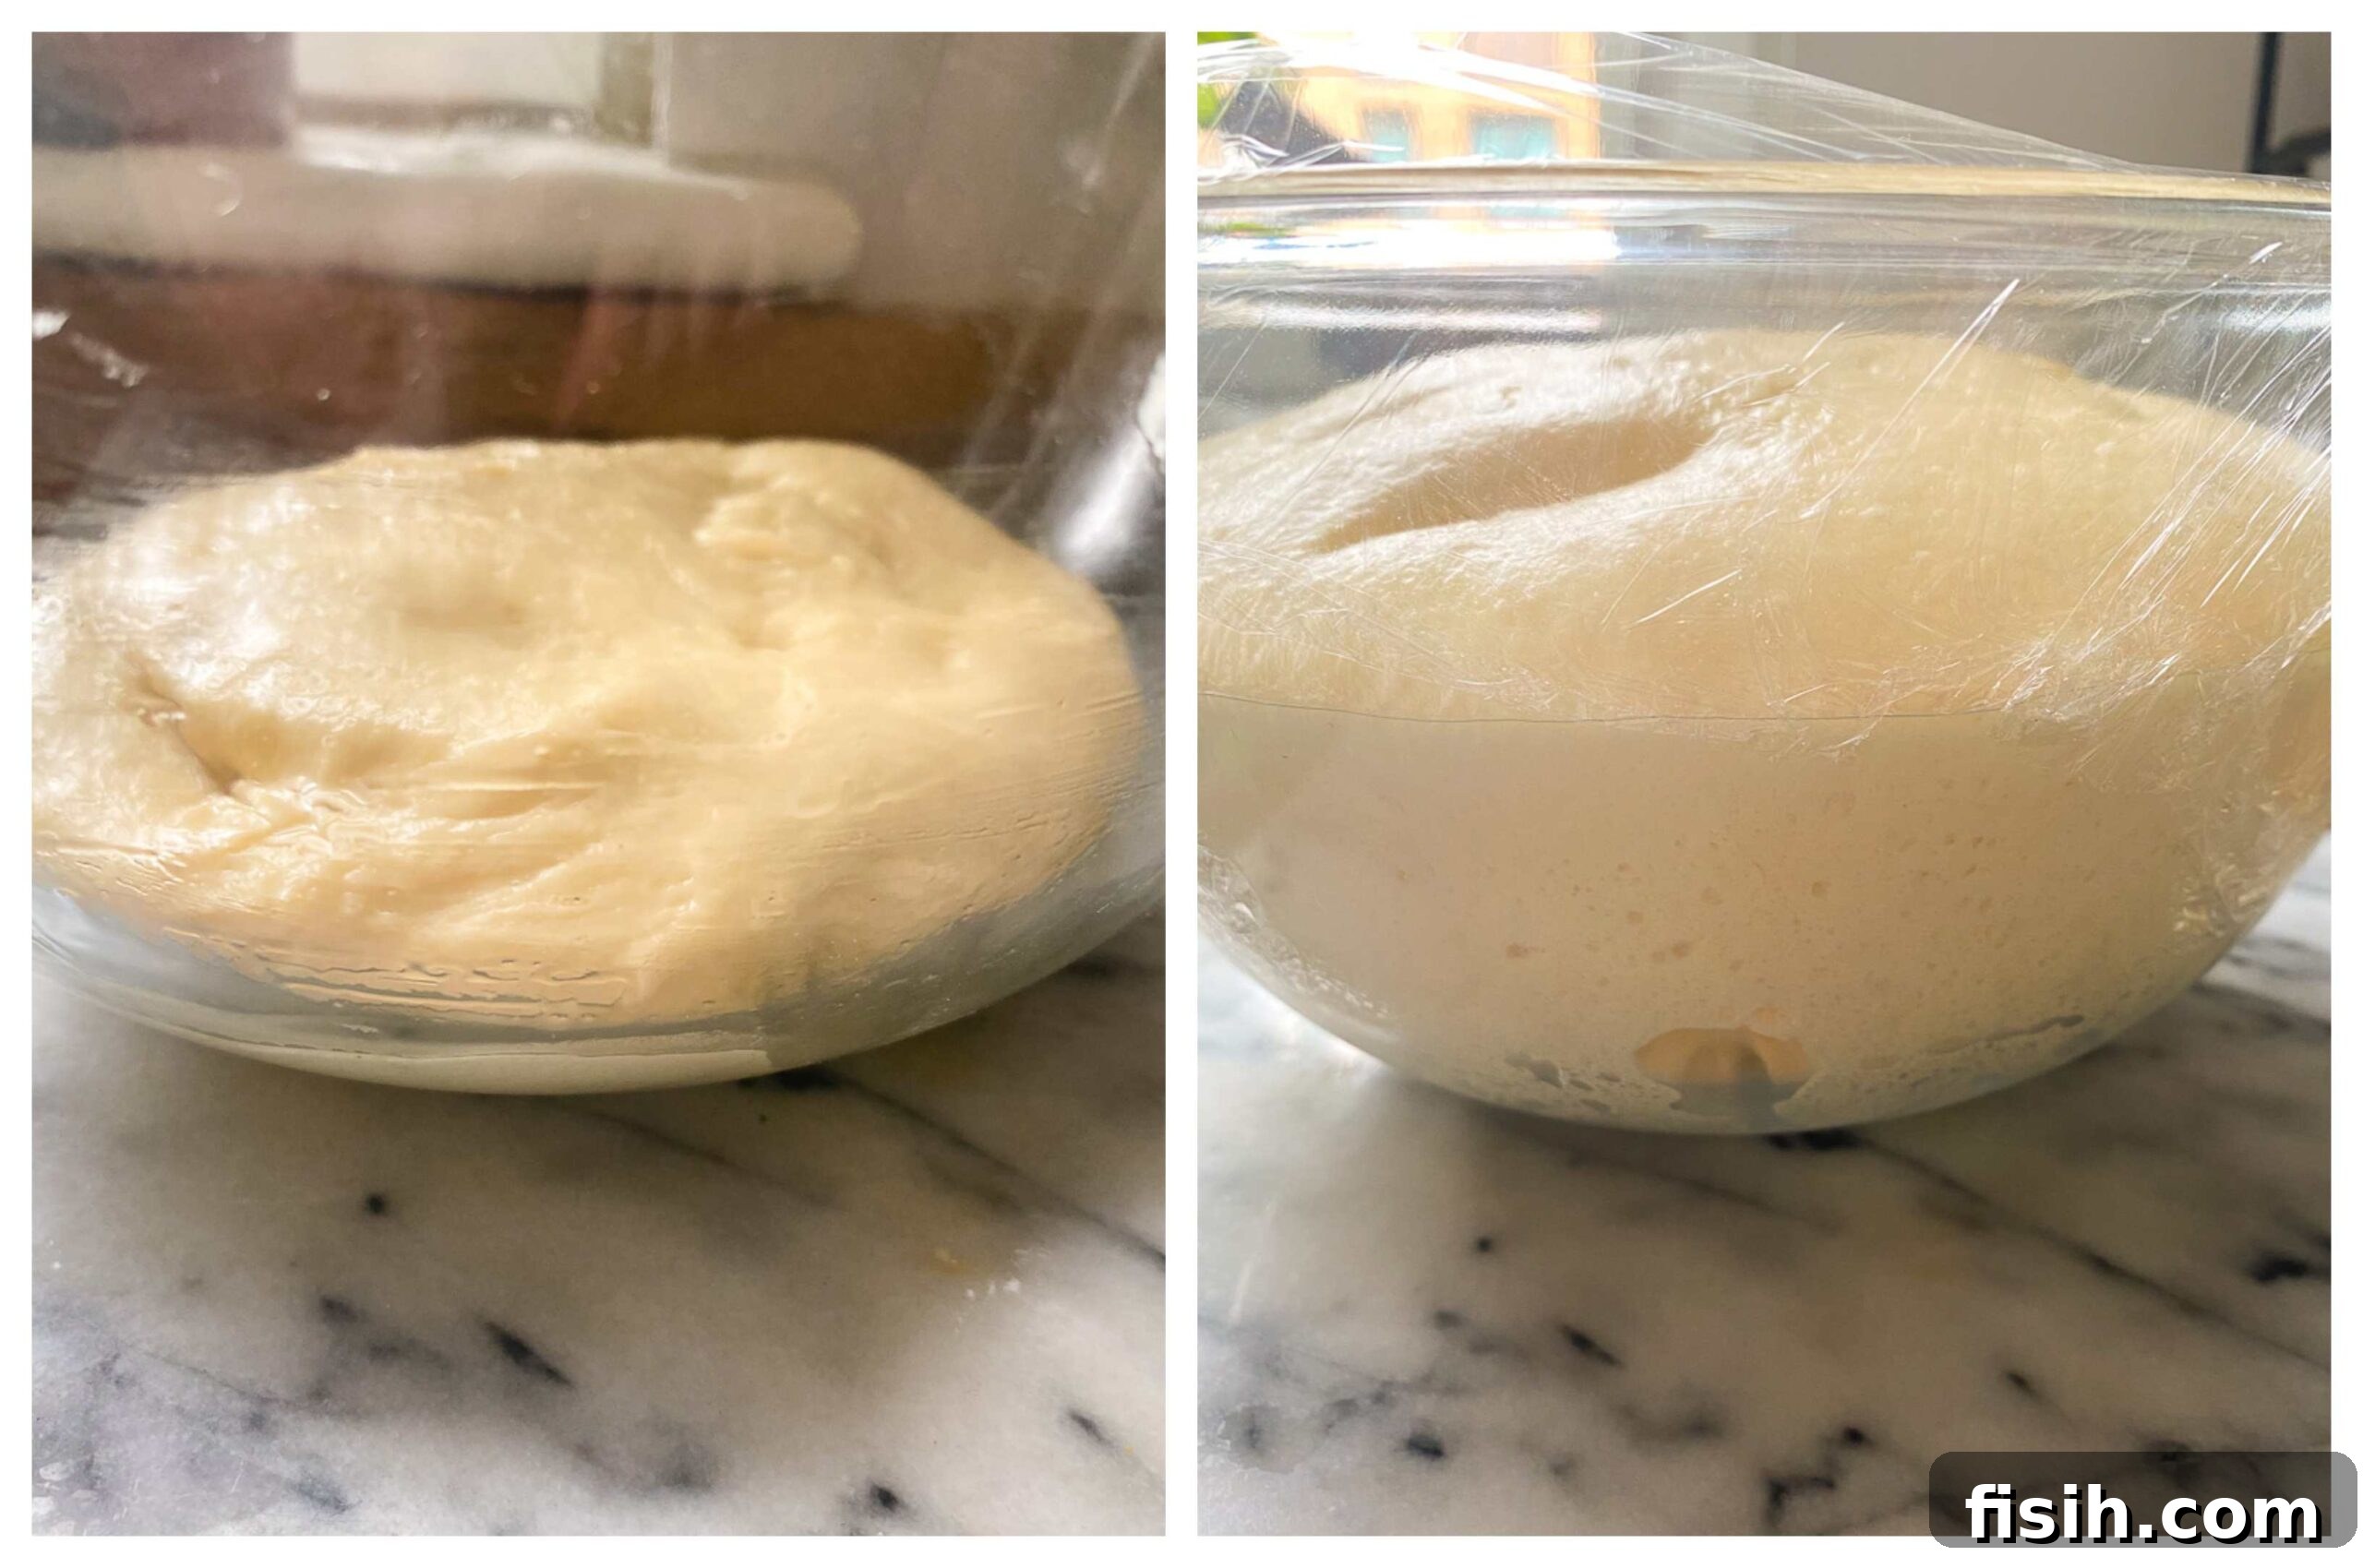
- The Art of Proofing: Dough proofing time can vary significantly based on your kitchen’s ambient temperature. While the recipe suggests 1 to 1.5 hours for the first rise, your primary indicator of readiness is the dough’s volume—it should visibly triple in size. Trust your eyes over the clock.
- Choosing Your Flour: For the most tender and structured rolls, bread flour is ideal due to its higher protein content. However, all-purpose flour will also yield delicious results, offering a slightly softer texture. For those who prefer a heartier option, whole wheat flour can be used, though it may result in a denser roll.
- The Signature Garlic Butter Brush: The magic truly happens when these rolls emerge from the oven. Immediately brush them with the melted garlic herb butter. This crucial step allows the rolls to absorb all the aromatic flavors, while the butter simultaneously softens the crust, creating an incredibly tender and flavorful exterior. The flavor profile is reminiscent of classic garlic bread, ensuring a universally loved taste!
Versatile Serving Suggestions for Your Fluffy Rolls
The beauty of these garlic butter dinner rolls lies in their incredible versatility. While they are a non-negotiable for holiday spreads, their charm extends far beyond. Imagine them nestled alongside your magnificent Christmas turkey, a succulent honey-mustard crusted beef roast, or a delectable slow cooker glazed ham. Their soft interior is perfect for soaking up every last drop of rich gravy, enhancing every savory bite.
But don’t limit them to grand occasions! These rolls are fantastic for transforming leftovers into exciting new meals. Picture creating mini French Dip Sandwiches with slices of roast beef and a side of au jus, or crafting charming sliders with pulled pork or chicken. Their tender crumb provides the ideal canvas for a variety of fillings.
Beyond main courses, these rolls are a welcome addition to countless dishes. Serve them with comforting soups on a chilly evening, hearty stews that beg for a bread accompaniment, or any creamy dish where a warm, fluffy bun can add a layer of pure delight. Truly, anytime a soft, buttery roll will bring a smile to your face, these garlic butter dinner rolls are the perfect choice.
Storage and Enjoying Leftovers: Keeping Rolls Fresh
One of the many benefits of these dinner rolls is how beautifully they store, allowing you to enjoy their deliciousness for days, or even months, to come. For optimal freshness and texture, allow the rolls to cool completely after baking before storing them.
- Freezing: Once fully cooled, transfer the rolls to an airtight freezer-safe container or a heavy-duty freezer bag. They will maintain their quality in the freezer for up to 2-3 months. When ready to enjoy, simply thaw at room temperature and warm gently in the oven for a freshly baked experience.
- Refrigeration: For shorter-term storage, place the cooled rolls in a sealed container or bag. They will keep well in the refrigerator for up to a week. While they are undeniably best when fresh from the oven, warming them slightly before serving will refresh their texture and bring out their flavors.
More Irresistible Bread Recipes to Explore
If you’ve enjoyed the journey of making these garlic butter dinner rolls, I encourage you to delve deeper into the world of homemade bread. Here are a few more popular recipes from my collection that you might love:
- Sourdough Bread for Beginners
- No Knead Farmhouse Bread
- Sourdough Focaccia Bread
- 2 Hour Hamburger Buns
Rating: 5 from 10 votes
Garlic Butter Dinner Rolls
Julia Frey of Vikalinka
25 mins
20 mins
2 hrs 15 mins
16
Equipment
-
Stand mixer
-
Pastry brush
Ingredients
- 220ml / 1 cup warm milk, whole or skimmed
- 1½ tsp sugar
- 7g / 1 tbsp active dry yeast
- 3 tbsp vegetable oil
- 1 large egg
- 1 tsp salt
- 400g / 3 cups bread flour, or all-purpose flour
- 1 egg for brushing
- 1 tbsp butter, melted
- 1 clove garlic, pressed or minced
- 1 tbsp fresh parsley, chopped
Instructions
-
In a small bowl, combine the warm milk, sugar, and active dry yeast. Stir gently and let the mixture sit for about 5-7 minutes until the yeast becomes foamy and visibly “blooms” on the surface. This indicates it’s active. Then, add the vegetable oil, salt, and one large egg to the yeast mixture. Whisk everything together lightly with a fork until well combined.
-
Pour the liquid mixture into a large bowl containing the flour. Mix with a spoon or your hands until a rough, shaggy dough forms. Transfer this dough onto a lightly floured surface. Knead the dough vigorously for approximately 8-10 minutes by hand until it transforms into a smooth, elastic, and pliable ball. If using a stand mixer, attach the dough hook and knead on low speed for 1 minute, then increase the speed to medium and continue kneading for an additional 4 minutes. The dough should pull away from the sides of the bowl and be soft but not sticky.
-
Lightly grease the inside of the large bowl with a little vegetable oil. Return the kneaded dough to the oiled bowl, turning it once to coat all sides. Cover the bowl tightly with plastic wrap or a clean kitchen towel. Place it in a warm, draft-free spot to rise for 1 to 1.5 hours, or until the dough has impressively tripled in volume. This is your first proof. While the dough is rising, preheat your oven to 180°C (350°F).
-
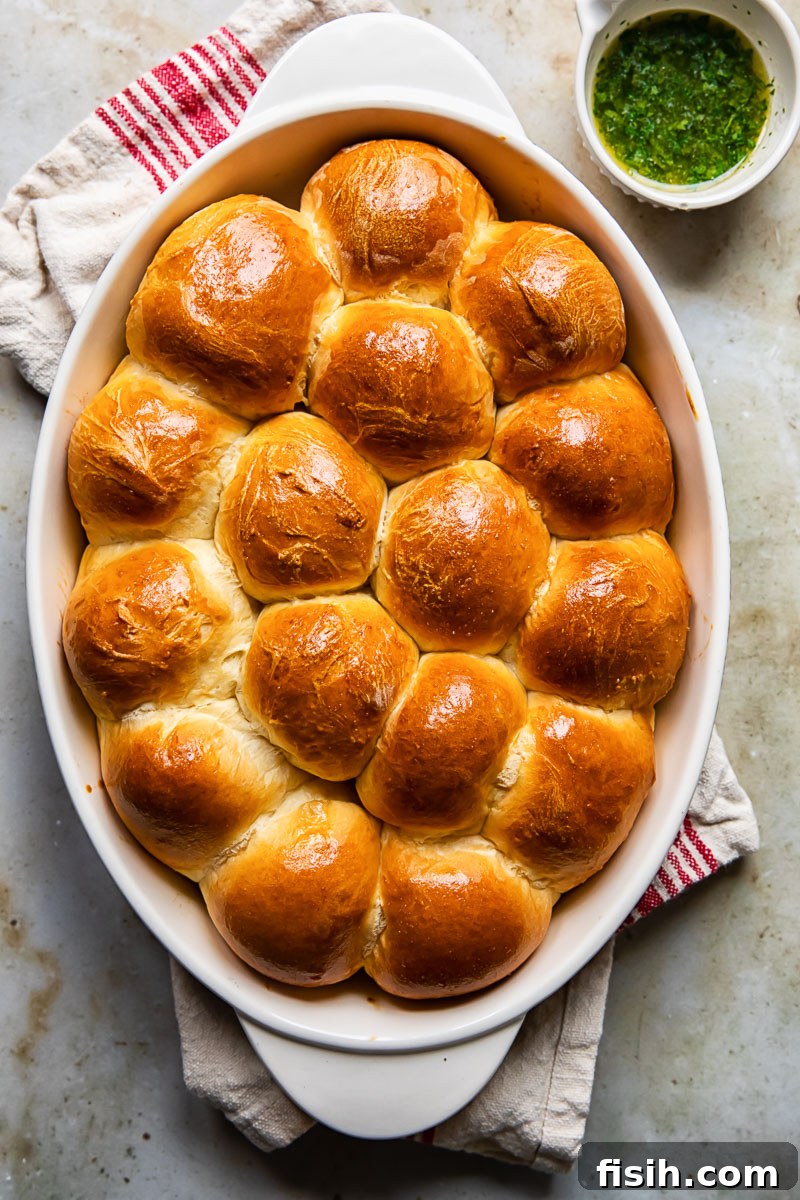
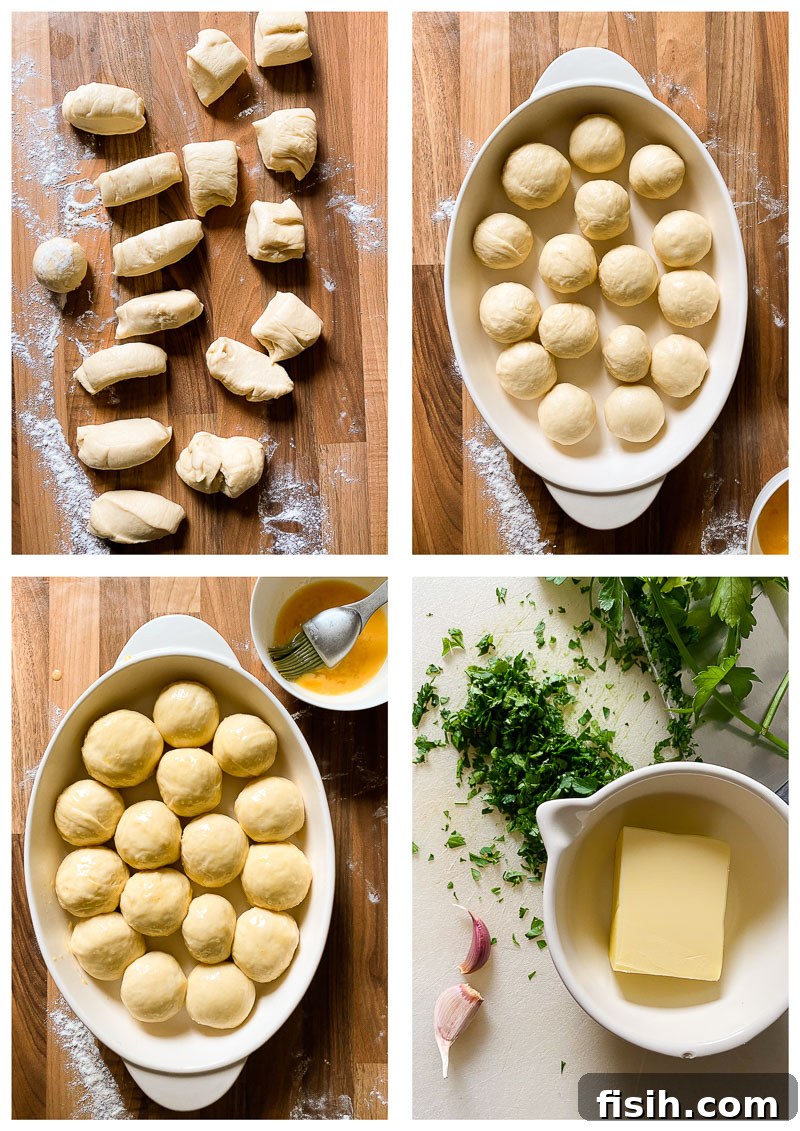
Once the dough has tripled, gently punch it down to release the air. Transfer the dough onto a lightly floured surface and divide it into 16 equal portions. For perfectly uniform rolls, you can weigh each piece; otherwise, eyeballing is perfectly fine. Roll each portion into a smooth, tight ball. Generously butter a 9×13 inch baking pan. Arrange the dough balls in the prepared pan, leaving about an inch of space between each roll to allow for expansion. Cover the pan loosely with a tea towel and let the rolls rise again for 30 minutes for their second proof.
-
Before baking, gently brush the tops of the rolls with a beaten egg. Bake for 20-25 minutes in the preheated oven, or until the rolls are beautifully golden brown on top and cooked through. While the rolls are baking, prepare the aromatic garlic butter. In a small microwave-safe bowl or saucepan, melt 1 tablespoon of butter. Stir in the pressed or minced garlic, then fold in the fresh chopped parsley.
-
As soon as the golden rolls come out of the oven, immediately brush the entire surface of each roll with the fragrant garlic butter mixture. This step is crucial for infusing them with flavor and creating that irresistible soft, glossy crust. Serve warm and enjoy!
Notes
- For the best outcome, adhere closely to the recipe and ensure precise measurement of all ingredients.
- A stand mixer with a dough hook simplifies the kneading process, but this soft dough is also easy to knead effectively by hand.
- The dough is perfectly kneaded when it feels soft and is no longer sticky to clean hands.
- Dough proofing times are approximate; the exact time depends on your room temperature. Focus on the dough tripling in volume as your key indicator, not just the clock.
- Bread flour yields superior results for structure and chewiness, but all-purpose flour is a suitable alternative for a softer roll. Whole wheat flour can also be used for a heartier, denser option.
- Brushing the hot rolls straight from the oven with melted garlic butter ensures maximum flavor absorption and a wonderfully soft crust.
Nutrition
Carbohydrates: 19g |
Protein: 4g |
Fat: 2g |
Saturated Fat: 1g |
Polyunsaturated Fat: 0.3g |
Monounsaturated Fat: 1g |
Trans Fat: 0.03g |
Cholesterol: 24mg |
Sodium: 92mg |
Potassium: 60mg |
Fiber: 1g |
Sugar: 1g |
Vitamin A: 96IU |
Vitamin C: 0.4mg |
Calcium: 25mg |
Iron: 0.4mg
Nutrition information is automatically calculated, so should only be used as an approximation.