
Nanaimo Bars: The Quintessential Canadian No-Bake Dessert You Must Try
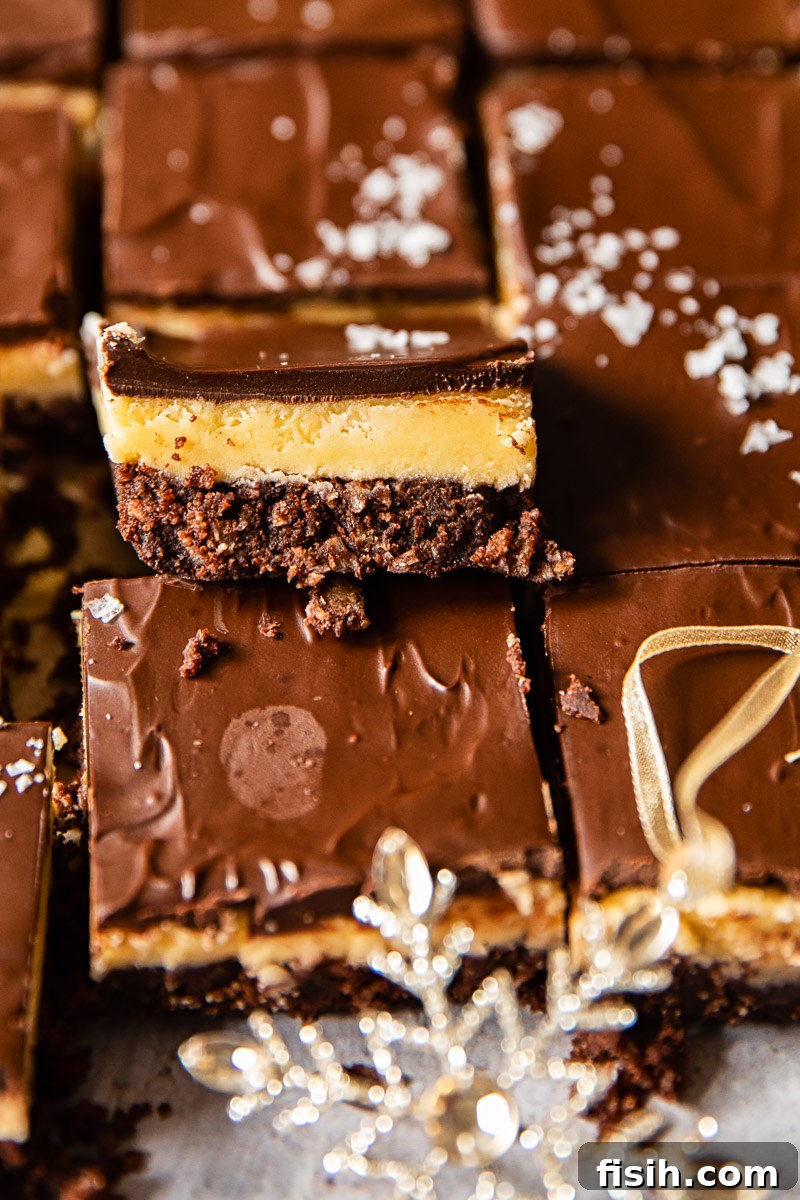
Prepare to be enchanted by Nanaimo Bars, a beloved classic Canadian treat that captures hearts with its irresistible three-layer symphony of flavors and textures. This no-bake marvel features a rich, crumbly chocolate coconut base, crowned with a lusciously creamy custard-flavored filling, and finished with a decadent chocolate ganache. More than just a dessert, Nanaimo Bars are a cherished part of Canadian culinary heritage, especially during the holidays, and they’re poised to become your new favorite sweet indulgence.
Craving more iconic Canadian flavors? Discover our delightful Maple Butter Tarts, another staple from Canada’s vibrant baking scene. For a broader array of festive sweets, explore our extensive Holiday Dessert Collection, packed with recipes perfect for any celebration.
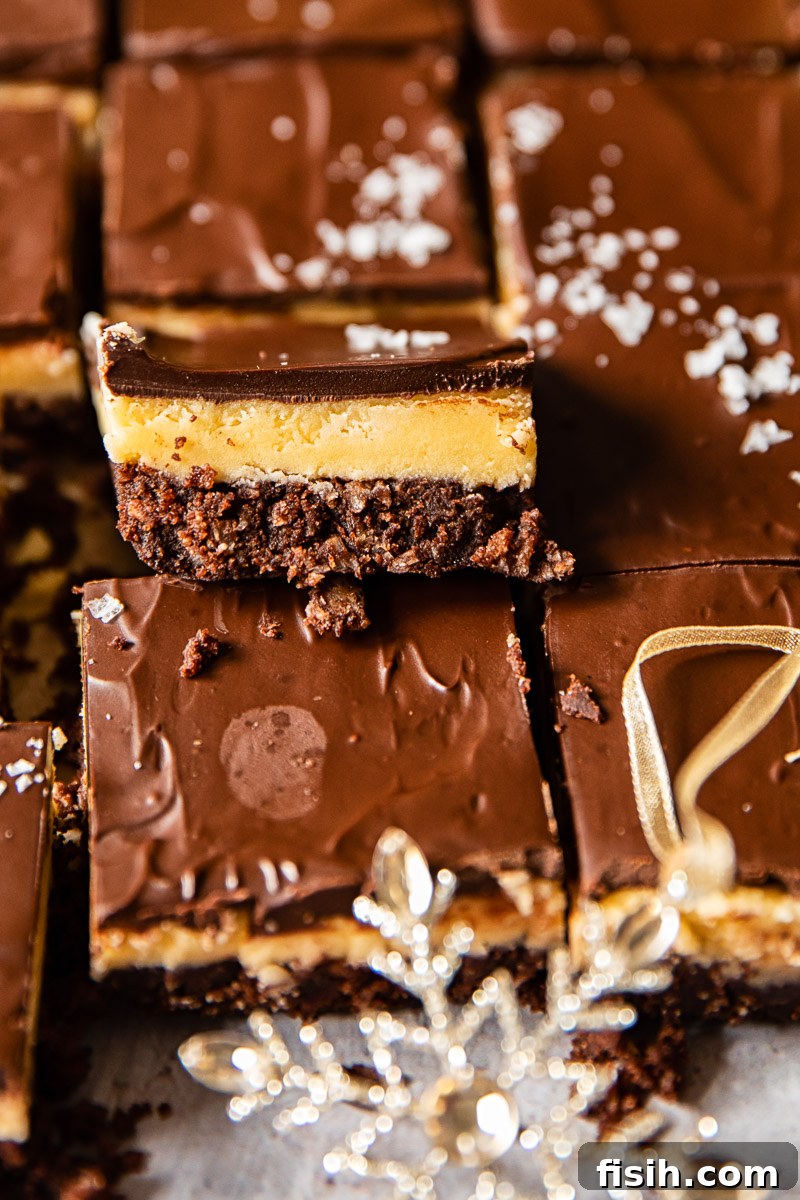
Imagine biting into a soft, sweet treat, each layer offering a unique experience that melts together in perfect harmony. That’s the magic of Nanaimo Bars. Even if you’re new to this Canadian classic, don’t hesitate! These bars are surprisingly simple to create, promising a delightful culinary adventure right in your own kitchen.
Much like Butter Tarts, Nanaimo Bars embody the essence of Canadian comfort food. For those of us living away from our Canadian roots, recreating these traditional sweets brings a much-needed taste of home and a wave of comforting nostalgia during festive seasons. They are more than just dessert; they are a connection to cherished memories and family traditions.
What Exactly Are Nanaimo Bars?
At their core, Nanaimo Bars are a decadent, triple-layered confection that requires no oven, apart from a brief bake for the base. Each layer plays a crucial role in creating their iconic taste and texture:
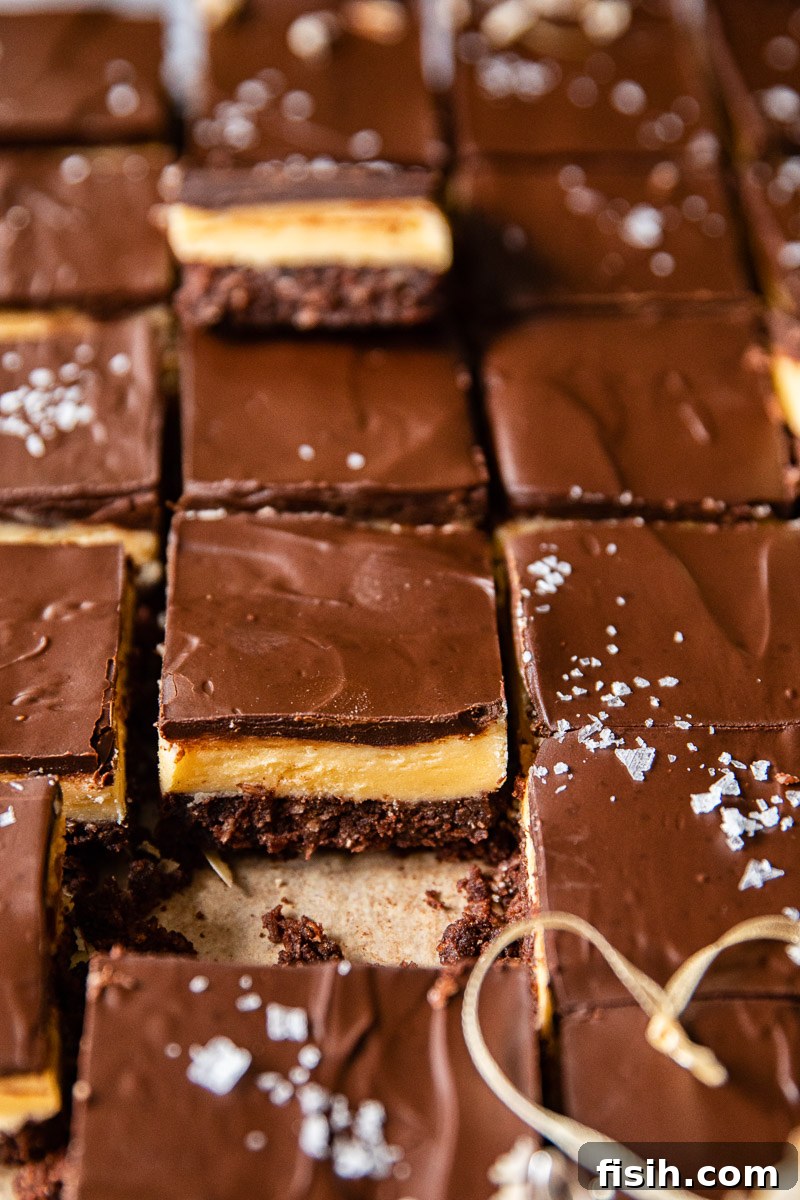
- The Base: A rich, chocolatey, crumbly foundation made from graham cracker crumbs (or digestive biscuits), cocoa, coconut, sugar, and butter. This layer offers a delightful chew and a deep chocolate flavor.
- The Middle Layer: A thick, sweet, and incredibly smooth custard cream filling. This signature layer gets its distinctive yellow hue and classic flavor from custard powder, making it uniquely Nanaimo.
- The Top Layer: A glossy, perfectly set chocolate ganache, providing a satisfying snap and a final burst of cocoa goodness that ties all the layers together.
The Fascinating Origin Story: Where Do Nanaimo Bars Come From?
These legendary bars are proudly named after Nanaimo, a scenic city on Vancouver Island in British Columbia, Canada. While the exact origins are shrouded in delightful mystery and various claims have been made over the years, the most popular rumour suggests they were first perfected in a local bakery in Nanaimo itself. What is certain is their meteoric rise to popularity in the 1950s.
This post-war era saw an end to years of rationing and shortages, bringing back an abundance of previously scarce ingredients like butter and sugar. Canadians, eager to celebrate newfound prosperity and indulge their sweet tooth, embraced rich, buttery, and sugary treats with open arms. The Nanaimo Bar, with its luxurious layers, was a perfect embodiment of this desire for indulgence and quickly became a national favorite.
Why Nanaimo Bars Are a Canadian Icon
Nanaimo Bars enjoy a truly devoted following across Canada. Once you taste one, you’ll instantly understand why. Their unparalleled richness, balanced sweetness, and intriguing textures create an unforgettable experience. In Canada, it’s rare to go through the holiday season without encountering these bars at virtually every potluck, family gathering, or festive event. They are a true symbol of hospitality and celebration.
While I used to enjoy them as a guest, rarely feeling the need to bake them myself when living in Canada, my move to England changed things. Now, the yearning for these comforting flavors and the connection to home makes baking Nanaimo Bars an essential part of our holiday traditions. They offer more than just a sweet bite; they offer a taste of nostalgia and a cherished link to our Canadian heritage.
How to Make Perfect Nanaimo Bars: A Step-by-Step Guide
Despite their sophisticated appearance, Nanaimo Bars are remarkably straightforward to prepare, making them an ideal project for bakers of all skill levels, and even a fun activity to share with children. The most challenging aspect isn’t the technique, but the patience required for each layer to set! The process mirrors that of many no-bake cheesecakes, focusing on chilling rather than extensive baking.
Crafting the Delicious Layers
Here’s how to build your Nanaimo Bar masterpiece:
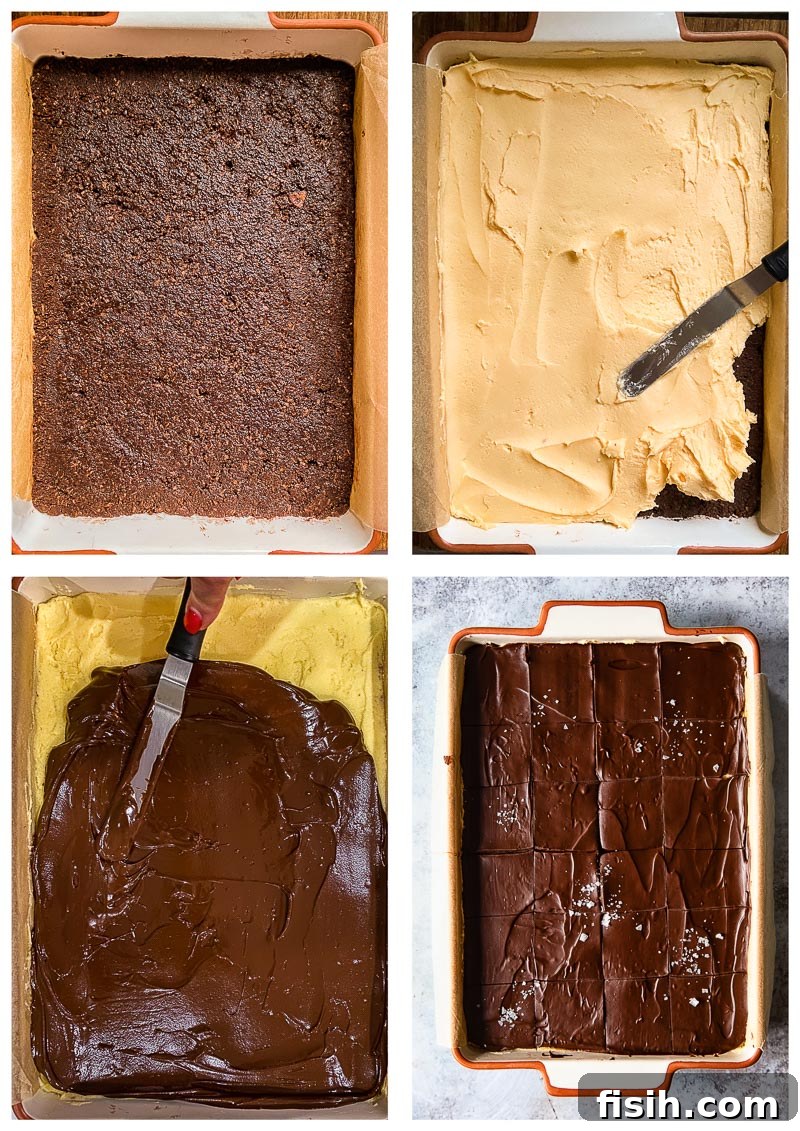
- The Flavorful Base: Begin by combining crushed graham cracker crumbs (or digestive biscuits if you’re in the UK), rich cocoa powder, granulated sugar, melted butter, a hint of vanilla, and an egg. This mixture forms the delightful crumbly base. It’s then pressed firmly into a parchment-lined pan and given a quick, light bake for about 10 minutes to help it set and become aromatic. After baking, allow it to cool completely.
- The Creamy Custard Filling: While your base cools, prepare the star of the show – the creamy middle layer. This involves beating softened butter with milk, the essential custard powder, and a generous amount of icing sugar until smooth and airy. Once the base is cool, spread this creamy filling evenly over it. This layer then goes into the refrigerator to chill and firm up for at least an hour.
- The Decadent Chocolate Topping: The grand finale involves melting chopped dark or milk chocolate with a touch of butter. A double boiler is ideal for this, but a heatproof bowl set over a pot of simmering water works just as well. Once melted and smooth, gently pour and spread the chocolate over the chilled custard layer.
Expert Tips for Nanaimo Bar Success
- The Essential Custard Powder: For an authentic Nanaimo Bar experience, custard powder is non-negotiable. It imparts the signature golden-yellow color and distinct creamy flavor. While vanilla pudding mix can be a substitute, it won’t yield the exact traditional taste. If local stores don’t carry it, consider sourcing This is an affiliate link.Bird’s custard powder online.
- Graham Crackers vs. Digestive Biscuits: The traditional base uses crushed graham crackers. However, if you’re in a region where they’re hard to find (like the UK), digestive biscuits are an excellent and highly recommended alternative that produces a similarly delicious crumbly texture.
- Patience is Key for Setting Layers: While tempting to rush, allowing each layer to properly chill and set before adding the next is crucial. This prevents the layers from bleeding into each other, ensuring those beautiful, distinct strata that Nanaimo Bars are known for.
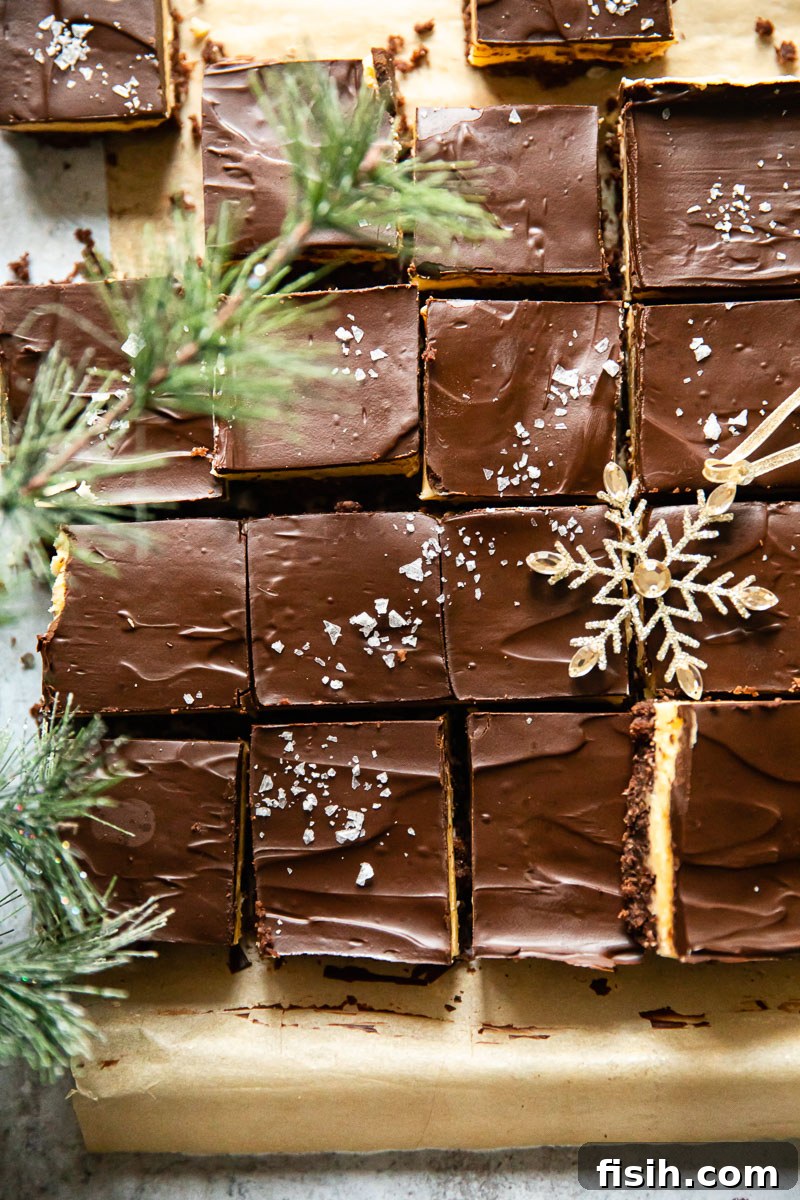
- The Crucial Pre-Cut: Approximately 30-40 minutes after applying the final chocolate layer, when it’s partially set but still pliable, take a moment to lightly score or pre-cut your bars. This vital step prevents the chocolate topping from cracking and splintering once it has fully hardened and been chilled, ensuring clean, perfect squares.
- A Sprinkle of Sea Salt (Optional but Recommended): For an elevated touch, sprinkle a pinch of flaked sea salt over the chocolate topping before it fully sets. The subtle salinity beautifully balances the inherent sweetness of the bars, creating a more complex flavor profile. Plus, the delicate flakes resemble a dusting of snow, adding a gorgeous visual appeal.
Serving and Storage Tips for Nanaimo Bars
Perfect Serving Suggestions
Nanaimo Bars are undeniably sweet and incredibly rich, meaning a little goes a long way! To truly savor their deliciousness without feeling overwhelmed, it’s best to cut them into manageable, bite-sized portions. I typically recommend squares no larger than 5 cm (2 inches). Even smaller pieces are perfectly acceptable and often preferred, especially when serving as part of a larger dessert spread.
As someone who doesn’t have the sweetest tooth, I find these bars pair wonderfully with a simple, unsweetened beverage. A freshly brewed cup of hot coffee or a comforting mug of hot tea provides the perfect counterpoint to their richness, allowing you to appreciate every layer without it being too cloying. A glass of cold milk is also a classic and refreshing pairing.
Storage and Leftovers Made Easy
One of the many benefits of Nanaimo Bars is how well they store, particularly in the freezer – a common practice in Canadian households! To store, simply arrange the cut bars in an This is an affiliate link.airtight container, separating layers with parchment or wax paper to prevent sticking. They can be frozen for several weeks, ready to be enjoyed whenever a craving strikes.
When you’re ready to serve, transfer them from the freezer to the refrigerator or counter about 30-40 minutes before serving. This allows them to thaw gently and come to room temperature, which is when their flavors and textures are at their absolute best. The base will be perfectly crumbly, the custard lusciously creamy, and the chocolate topping smooth and delightful.
Creative Variations and Customizations
While the classic Nanaimo Bar recipe is perfect as is, there’s always room for a little creativity! Here are a few ideas to personalize your batch:
- Chocolate Choices: Experiment with different types of chocolate for the top layer. A rich dark chocolate will offer a more intense cocoa experience, while milk chocolate provides a creamier, sweeter finish. White chocolate could also be used for a visually striking contrast.
- Flavor Boosts: Add different extracts to the middle custard layer. A hint of almond extract, peppermint extract (especially for holidays), or even a touch of orange zest could introduce exciting new dimensions of flavor.
- Nutty Additions: For an extra crunch, consider adding finely chopped toasted pecans, walnuts, or almonds to the base mixture.
- Decorations: Beyond sea salt, you can sprinkle festive sprinkles, a dusting of cocoa powder, or even finely grated chocolate over the top layer before it sets for an extra touch of elegance.
- Gluten-Free Option: To make these bars gluten-free, simply substitute the graham cracker crumbs (or digestive biscuits) with a gluten-free cookie or cracker alternative. Ensure all other ingredients are also certified gluten-free.
No matter how you choose to make them, Nanaimo Bars are a testament to simple ingredients coming together to create something truly extraordinary. They are a celebration of flavor, texture, and Canadian tradition, perfect for sharing with loved ones or enjoying as a well-deserved personal indulgence.
More Holiday Bar Recipes to Explore
- English Fridge Cake Bars
- Raspberry Cheesecake Bars
- Blackberry Crumble Bars
- Slow Cooker Chocolate Butterscotch Cookie Bars
Nanaimo Bars
Equipment
-
This is an affiliate link.Mixing bowl
-
This is an affiliate link.9×13 baking pan
Ingredients
Base
- 190g / 3/4 cup butter, melted
- 50g / 1/4 cup sugar
- 6 tbsp cocoa powder
- 1 egg, large
- 1 tsp This is an affiliate link.vanilla
- 220g / 2 cups graham cracker crumbs, I used Digestive biscuits in the UK
- 100g / 1 cup dried coconut
Middle Layer
- 125g / 1/2 cup butter, softened
- 6 tbsp milk
- 4 tbsp This is an affiliate link.custard powder, I used Bird’s Custard powder
- 520g / 4 cups icing sugar
Top Layer
- 250g / 8 oz dark or milk chocolate, chopped
- 2 tbsp butter
Instructions
-
Preheat your oven to 350F/180C. Line your 9 inch X 13 inch pan with parchment paper. In a large bowl, mix all ingredients for the base: melted butter, sugar, cocoa powder, large egg, vanilla, graham cracker crumbs (or digestive biscuits), and dried coconut. Press this crumb mixture firmly into the prepared pan. Bake for 10 minutes, then set aside in the pan to cool completely.
-
While the base is chilling, prepare the middle layer. In a mixing bowl, beat the softened butter with milk, custard powder, and icing sugar until the mixture is smooth and creamy. Spread this luscious custard layer evenly over the cooled base. Chill the bars in the refrigerator for at least 60 minutes to allow this layer to set firmly.
-
For the top layer, melt the chopped dark or milk chocolate with a tablespoon of butter. You can do this in a double boiler, or by placing a heatproof bowl with the chocolate and butter over a pot of simmering water, stirring until smooth.
-
Carefully spread the melted chocolate over the chilled cream layer. Allow the chocolate to set for about 30-40 minutes at room temperature, until it’s firm but not fully hardened. This is the perfect time to pre-cut the bars into squares or rectangles. Cutting them now will prevent the chocolate topping from cracking once it becomes completely firm. Chill the bars until firm for several hours or, ideally, overnight.
Nutrition
Carbohydrates: 38g |
Protein: 2g |
Fat: 19g |
Saturated Fat: 12g |
Cholesterol: 44mg |
Sodium: 163mg |
Potassium: 108mg |
Fiber: 2g |
Sugar: 29g |
Vitamin A: 379IU |
Vitamin C: 1mg |
Calcium: 25mg |
Iron: 1mg
Nutrition information is automatically calculated, so should only be used as an approximation.
Tried this recipe?
Let us know how it was!