
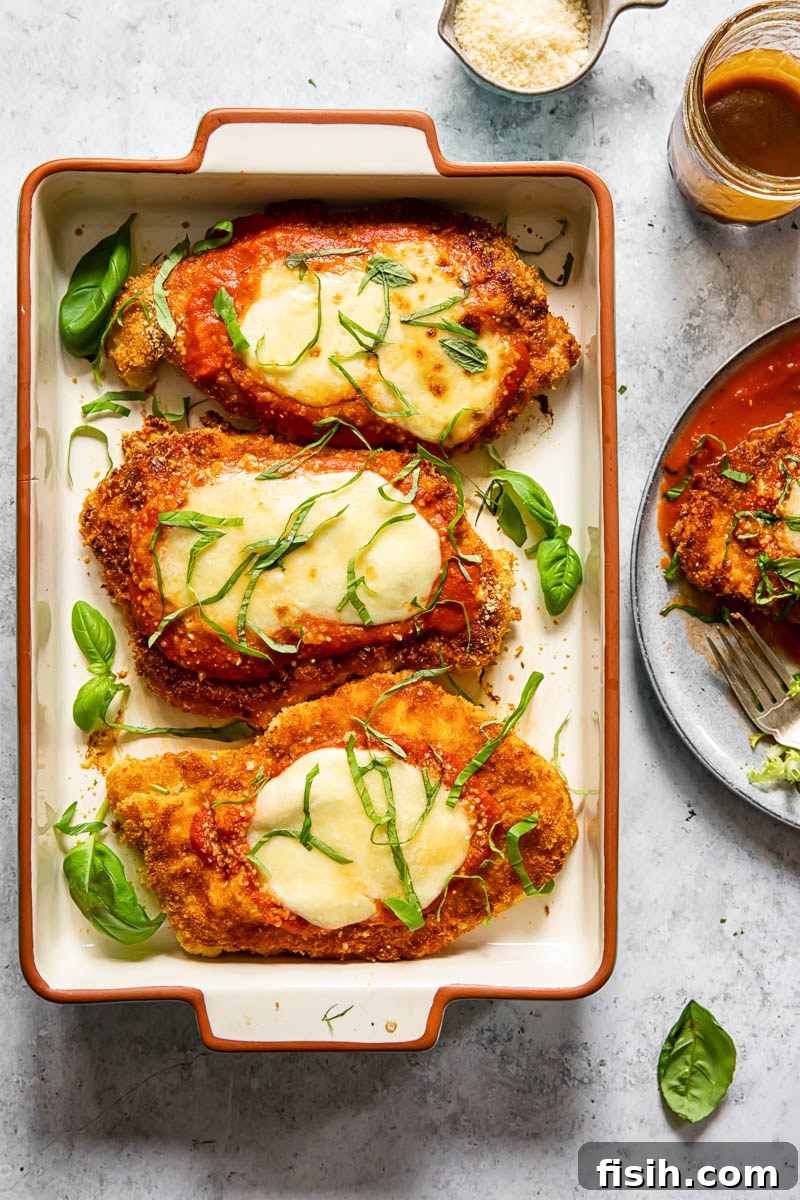
Craving a hearty, satisfying meal that’s both comforting and packed with flavor? Look no further than this classic Chicken Parmesan recipe. Featuring perfectly crispy chicken cutlets, enveloped in a rich, tangy tomato sauce, and crowned with a luscious layer of melted cheese, this iconic dish is a guaranteed crowd-pleaser. Whether you’re planning a cozy family dinner or a special occasion feast, our foolproof method ensures a delightfully crispy crust every time.
For a lighter, yet equally delicious accompaniment, consider serving your Chicken Parmesan with our vibrant Tomato Salad with Herb Vinaigrette and Feta.
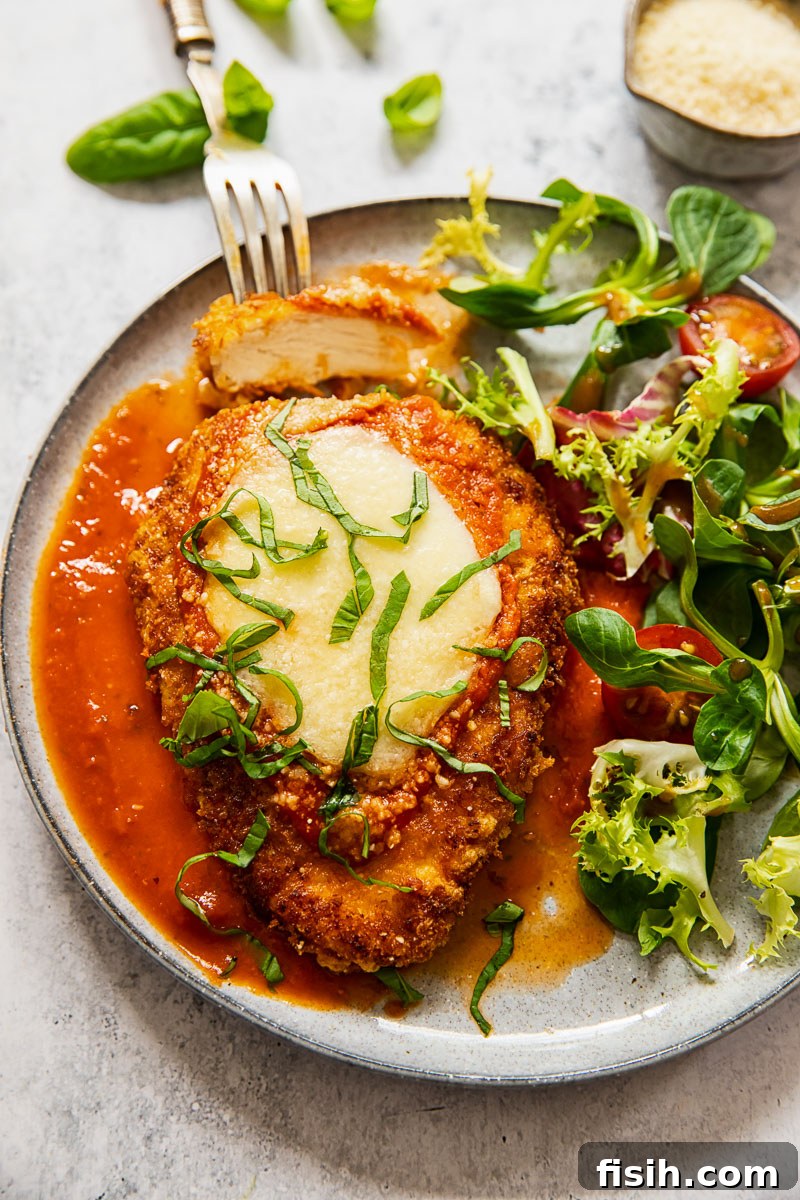
Few dishes encapsulate the essence of Italian-American comfort food quite like Chicken Parmesan. Despite its deep-rooted presence in American culture, it’s a delightful paradox – a dish so widely associated with Italy, yet entirely a creation of Italian immigrants in America. While you might search extensively throughout Italy, you won’t find this exact rendition on traditional menus. Instead, Chicken Parmigiana, as it’s also known, proudly stands as an American culinary innovation, born from a fusion of Old World flavors and New World ingenuity.
The Origins of Chicken Parmesan: An Italian-American Classic
The story of Chicken Parmesan is a fascinating one, highlighting the evolution of cuisine through immigration and adaptation. While it feels timeless, Chicken Parm is a relatively modern invention, less than a century old. It was inspired by two distinct and ancient Italian recipes: Melanzane alla Parmigiana (Eggplant Parmesan) and Cotoletta, a flattened, breaded, and fried piece of meat, most commonly veal or pork. Italian immigrants, settling in America, began to adapt their traditional dishes using readily available ingredients and appealing to local palates. The switch from veal or eggplant to chicken, a more affordable and popular protein in the US, was a natural progression. This delicious adaptation quickly gained traction, becoming a staple in homes and restaurants across the nation.
What Makes the Perfect Chicken Parmesan: Crispy, Saucy, and Cheesy
When you picture the ultimate Chicken Parmesan, what qualities immediately come to mind? For many, it’s the contrast of textures and a symphony of flavors. Is it the satisfying “crisp” of the breading, the rich and aromatic “sauce,” or the luxurious “gooey” melted cheese? Remarkably, a truly exceptional Chicken Parm manages to be all three simultaneously, striking a perfect balance that elevates it beyond a simple chicken dish.
At its heart, this recipe features tender chicken cutlets coated in golden, crunchy breadcrumbs, smothered in a vibrant, basil and garlic-infused tomato sauce, and crowned with a generous blanket of melted mozzarella and Parmesan cheese. Each element plays a crucial role in creating the iconic taste and texture that has made this dish a beloved staple. The chicken needs to be juicy, the breading needs to retain its crunch, the sauce should be robust yet not overwhelming, and the cheese must melt into a savory, stretchy dream.
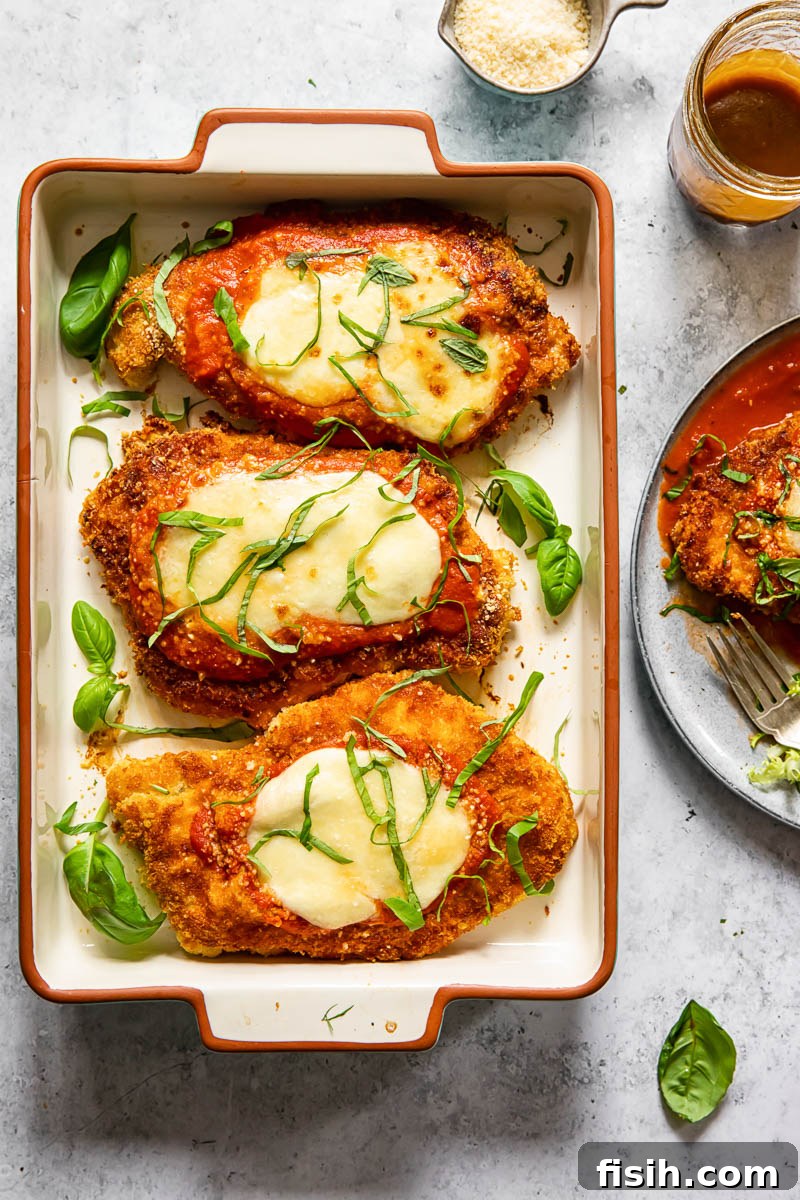
The Secret to Truly Crispy Chicken Parm: No More Soggy Breading!
Many home cooks and even some restaurants struggle with one common challenge when making Chicken Parmesan: achieving that coveted crispy breading. It seems like a contradiction, doesn’t it? We want a golden, crunchy exterior on our chicken, yet the dish is designed to be baked in a rich, simmering tomato sauce. The result, all too often, is a delicious but ultimately soggy piece of breaded chicken that tastes heavy and loses its textural appeal. This common pitfall has deterred many from attempting this classic at home, or left them underwhelmed by their efforts.
But what if there was a way to enjoy the best of both worlds? What if you could have incredibly juicy chicken with a perfectly crisp breading, alongside a flavorful tomato sauce, without compromise? The good news is, you can! The key lies in a simple, yet game-changing technique that ensures your chicken stays delightfully crunchy, even when paired with sauce.
My version of Chicken Parmesan solves the soggy dilemma by introducing a touch of strategic restraint with the sauce. Instead of baking the chicken directly *in* a large quantity of sauce, which inevitably steams the breading into submission, we apply just enough sauce to the chicken cutlet during the baking process to infuse flavor and melt the cheese. The bulk of the rich tomato sauce is reserved and added right before serving. This clever method ensures that the breading maintains its crisp integrity until the moment it reaches your plate. You get all the flavor and moisture from the sauce, but none of the sogginess. This simple tweak transforms a potentially heavy dish into a perfectly balanced culinary experience, truly delivering what a classic Chicken Parmesan promises.
Essential Tips for the Best Homemade Chicken Parmesan
- **Crafting Your Sauce:** Always begin by preparing your tomato sauce. A simple, homemade red sauce, infused with fresh garlic and basil, provides the perfect foundation. This versatile sauce can be used for many Italian-inspired dishes, including Eggplant Parmesan. Allowing it to simmer gently develops its depth of flavor.
- **Preparing the Chicken:** For tender, juicy results, avoid butterflying the chicken breasts. Instead, take each entire breast and pound the thicker end until it’s of uniform thickness with the thinner parts. A meat mallet works best for this, but a heavy rolling pin can also do the trick. This technique ensures even cooking and prevents the chicken from drying out during frying and baking. Seasoning the chicken directly with salt and pepper, not just the breading, is crucial for well-rounded flavor.
- **The Magic of Panko Breadcrumbs:** When it comes to achieving that ultimate crispiness, Panko breadcrumbs are indispensable. Their unique flaky texture, a result of their distinct manufacturing process, yields a far crispier coating than traditional breadcrumbs. Mix them with grated Parmesan cheese to add an extra layer of savory depth and flavor to the crust.
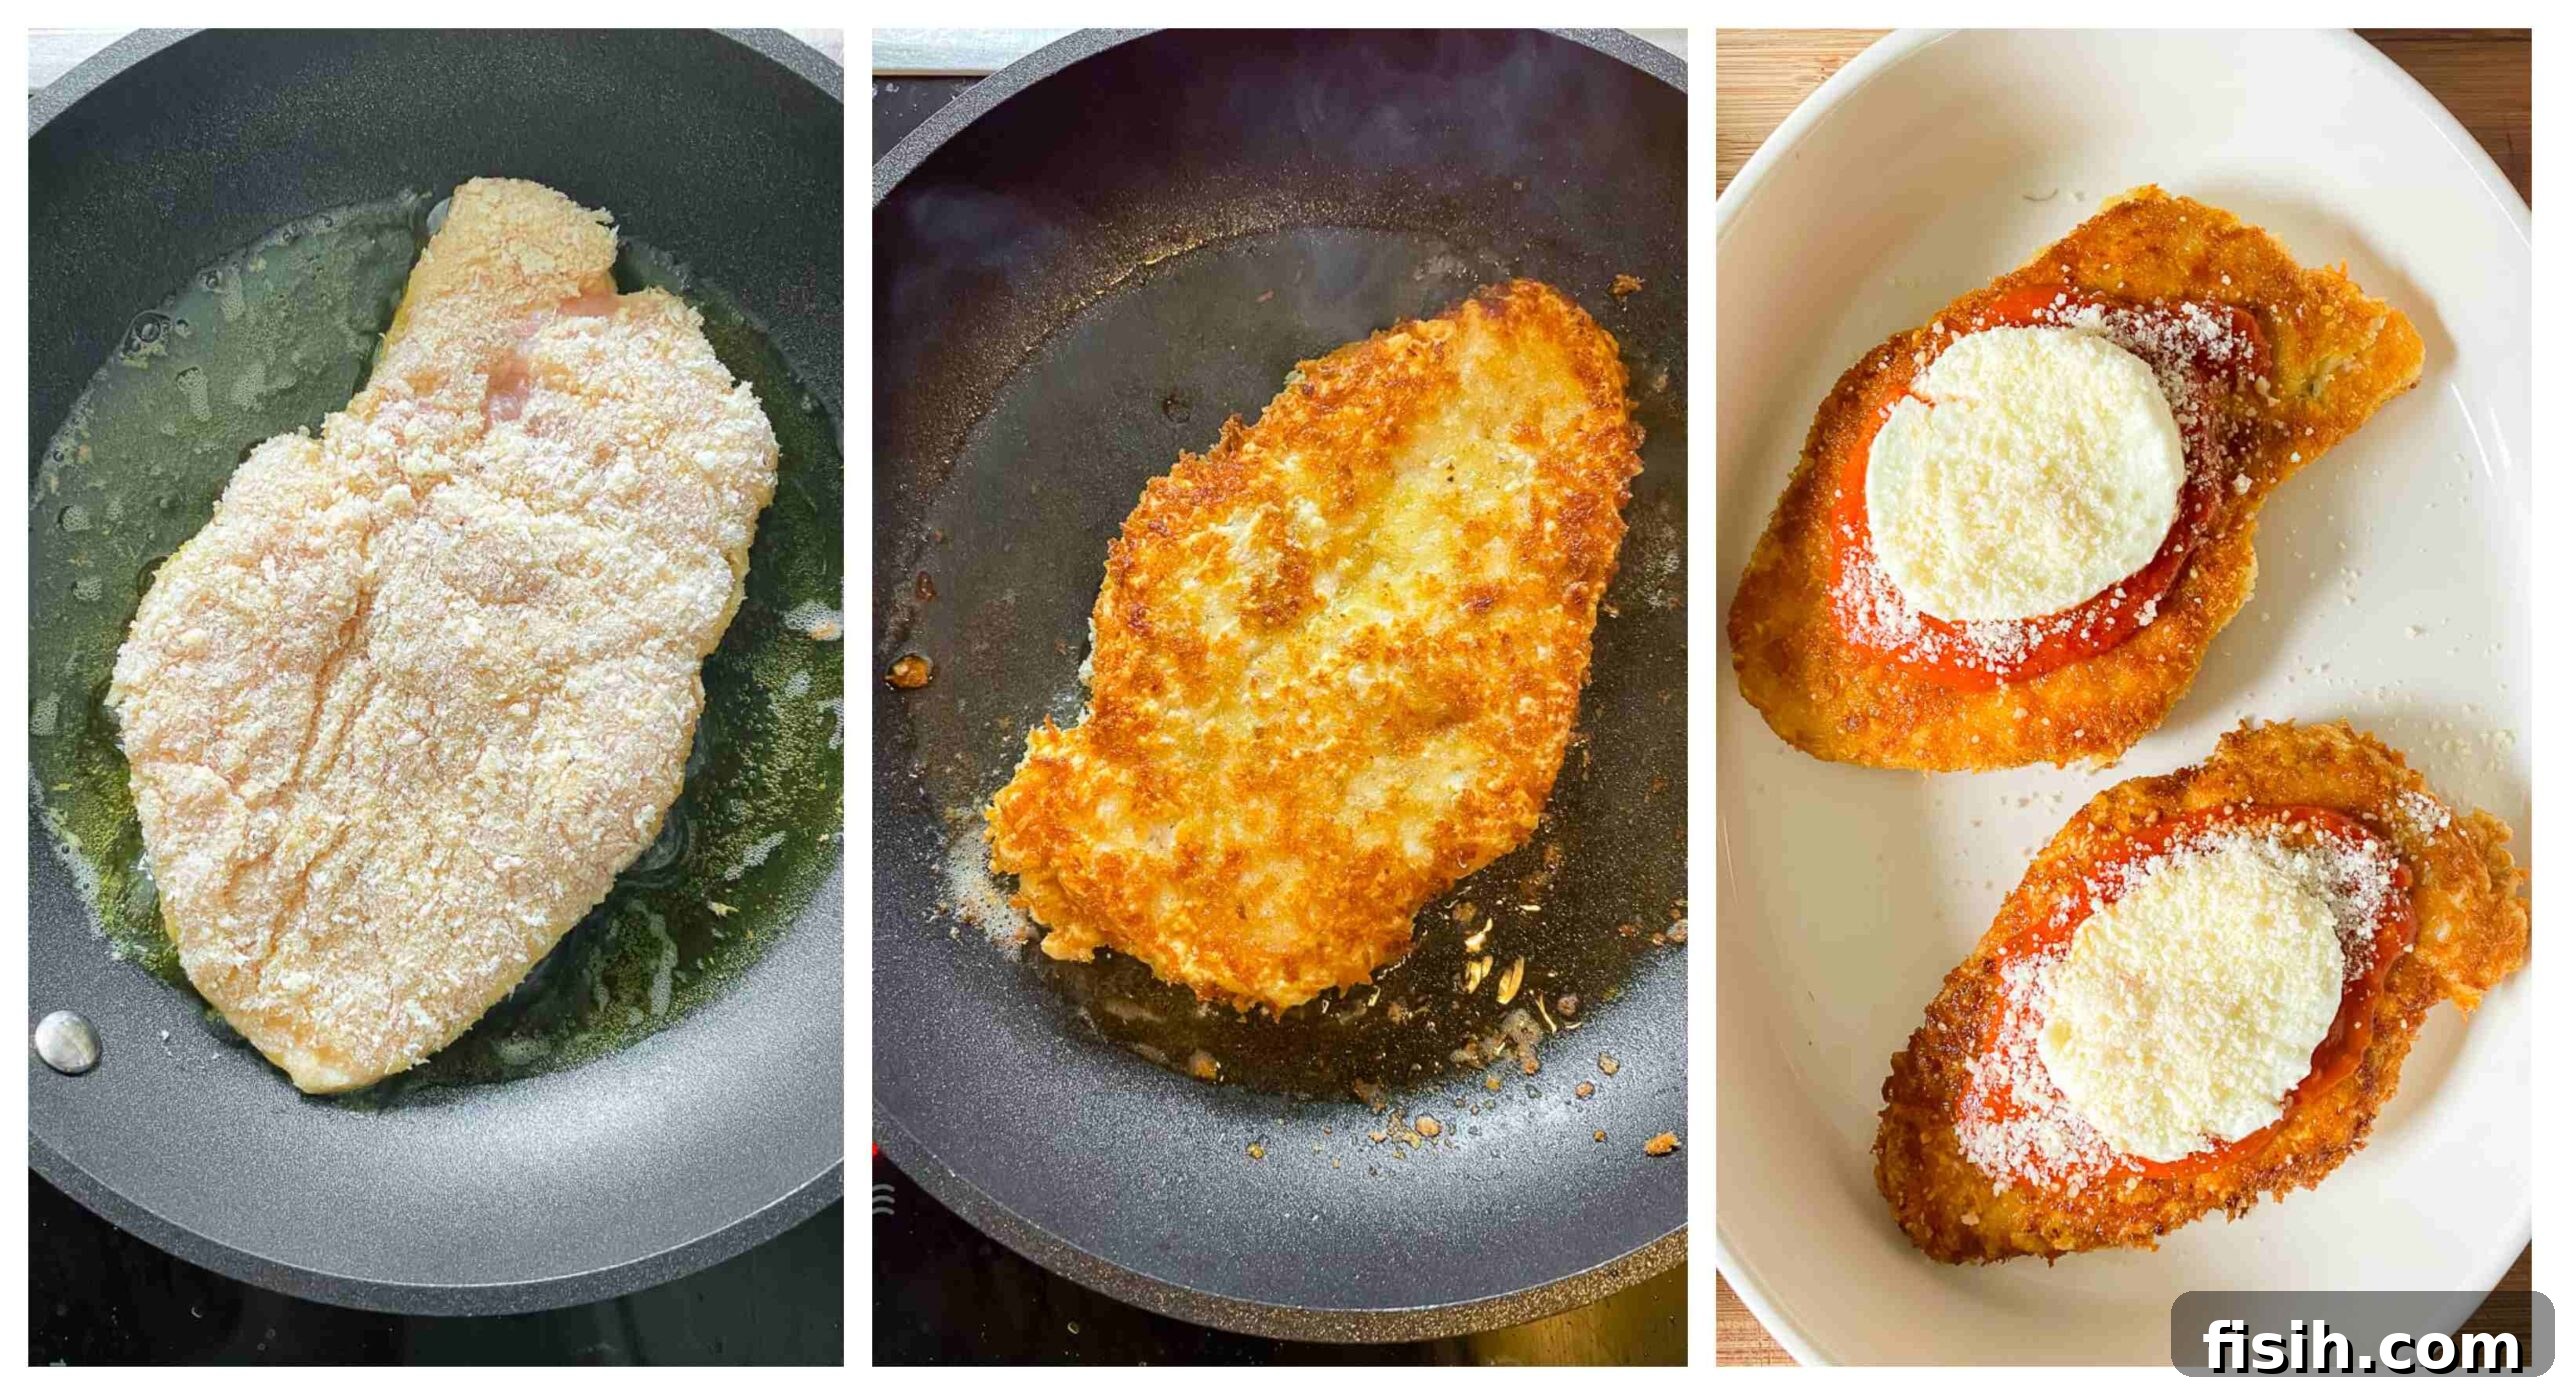
- **Perfect Pan Frying:** After dredging the seasoned chicken in flour, dipping it in beaten eggs, and then coating it thoroughly in the Panko-Parmesan mixture, it’s time to pan-fry. Heat extra virgin olive oil (or butter for a richer taste) in a large frying pan until shimmering. Fry the chicken until golden brown on both sides. Remember, the goal here is not to fully cook the chicken, but to build that beautiful, crispy crust that will continue to cook in the oven. Gently pressing down on the chicken during the initial seconds of frying helps ensure full contact with the pan, leading to an even golden color.
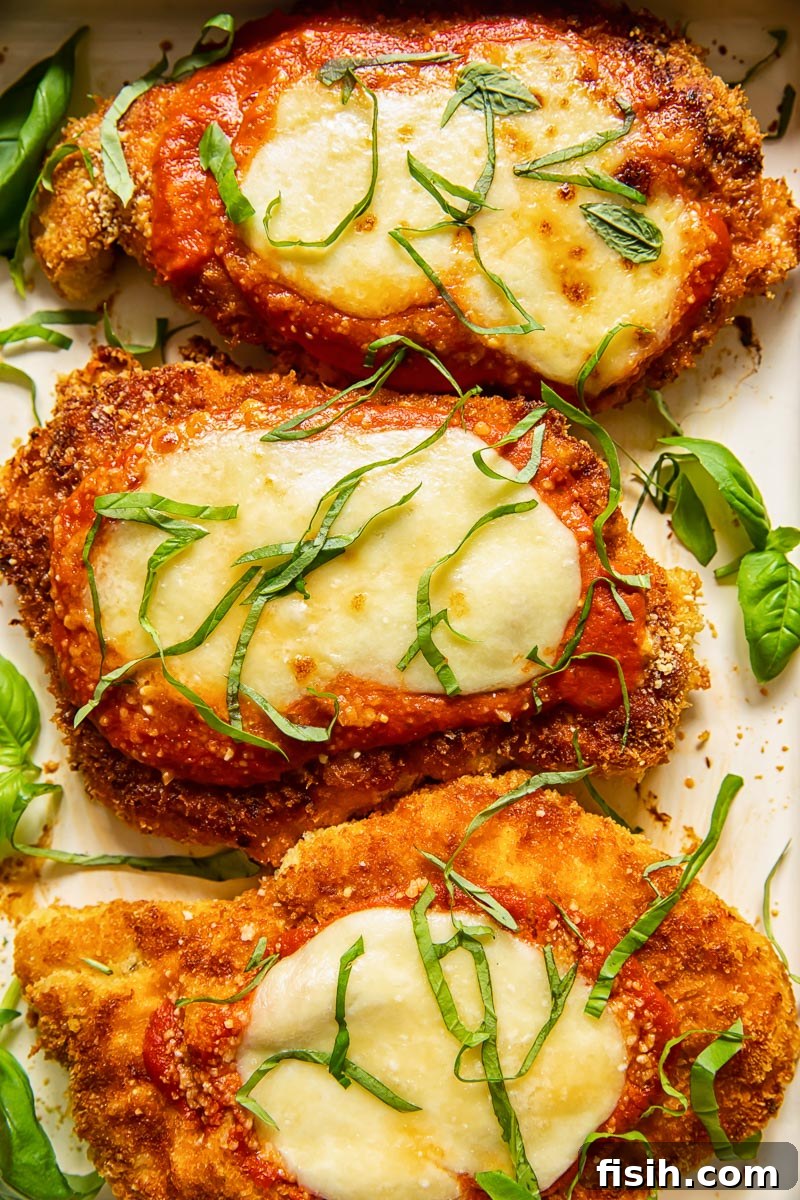
- **Assembling for the Oven:** Once fried, transfer the chicken to a shallow baking dish. This is where our “crispy” secret comes into play. Instead of drowning the chicken, spread just a modest dollop (about ¼ cup) of your delicious tomato sauce over each breast. This is enough to impart flavor without saturating the breading. Top with a generous slice of fresh mozzarella, ensuring some of the crispy chicken is still exposed, then finish with a final sprinkle of Parmesan cheese. Bake at a high temperature until the cheese is beautifully melted and bubbly, and the chicken is cooked through.
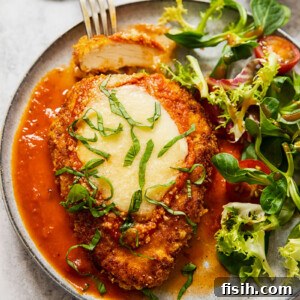
- **Serving with Flair:** The remaining warm tomato sauce is your secret weapon for serving. Ladle a generous amount onto the plate, and then place your crispy, cheesy chicken parmesan right on top. This way, the sauce adds moisture and flavor, but the chicken’s breading remains perfectly crisp until the very last bite. A final sprinkle of chopped fresh basil adds a burst of freshness and aroma.
Serving Suggestions for Your Chicken Parmesan Feast
Chicken Parmesan is a versatile dish that pairs wonderfully with a variety of sides, allowing you to tailor your meal to your preference. Traditionally, its rich tomato sauce makes it a natural companion for pasta, such as spaghetti, linguine, or penne, creating a truly classic Italian-American experience. However, if you’re looking to lighten the meal, there are plenty of fresh and flavorful alternatives.
Consider serving it with a crisp green salad, like our recommended Tomato Salad, or a medley of cooked vegetables. Our Roasted Parmesan Broccoli with Sun-Dried Tomatoes and Chillies or a comforting Warm Zucchini Salad would both complement the Italian flavors beautifully. For an even lighter option, a side of steamed green beans or asparagus dressed with a squeeze of lemon and a drizzle of olive oil works wonders. Don’t forget a sprinkle of fresh, chopped basil over the finished dish to enhance its aroma and visual appeal before serving. For a complete collection of Italian-inspired side dishes, explore our Italian Collection.
Storage and Reheating Tips for Leftover Chicken Parmesan
Delicious as it is, sometimes you’ll find yourself with leftover Chicken Parmesan – a welcome treat for another meal! Proper storage and reheating are key to maintaining its quality, especially that precious crispy coating. Leftovers will keep beautifully for 3-4 days when stored in an airtight container in the refrigerator. For longer storage, Chicken Parmesan freezes well for up to 6 months. To freeze, allow the chicken to cool completely, then wrap individual portions tightly in plastic wrap and then foil before placing them in a freezer-safe bag or container.
Since we put so much effort into achieving a crispy exterior, the method you choose for reheating is crucial. The best way to bring back that delightful crunch is by using an air fryer. Place the chicken in a single layer in your air fryer basket, ensuring not to overcrowd it, which allows for optimal air circulation. Reheat at around 375°F (190°C) for 3-5 minutes, depending on your air fryer model and the thickness of the chicken, until heated through and crispy. If needed, reheat in batches.
If an air fryer isn’t available, your oven is the next best option. Preheat your oven to 400°F (200°C). Place the chicken on a baking sheet, preferably on a wire rack set over the baking sheet. This setup allows hot air to circulate around the chicken, helping to recrisp the breading. Reheat for about 10-15 minutes, or until the chicken is hot and the cheese is melted and bubbly again. Avoid using a microwave, as it will inevitably make the breading soggy, sacrificing the texture we worked so hard to create.
Explore More Italian-Inspired Chicken Recipes
- Chicken Arrabiata with Herb and Garlic Breadcrumbs
- Tuscan Chicken with Saffron Cream Sauce
- Best Chicken Marsala
- Italian Rosemary Chicken
Classic Chicken Parmesan
Print Recipe
Equipment
- Ceramic baking dish
- Non-stick frying pan
- Meat tenderizer
Ingredients
- 3 tbsp olive oil
- 1 clove garlic
- 500g/2 cups tomato passata/crushed tomatoes
- 2-3 basil leaves, chopped
- 125ml/1/2 cup water
- salt to taste
- 4 skinless boneless chicken breasts
- 2 tsp salt , divided
- 1 tsp pepper
- 70g/1/2 cup flour
- 2 eggs
- 120g/1 cup Panko breadcrumbs
- 50g/1/2 cup Parmesan cheese, grated
- 125g/4 oz fresh mozzarella ball, sliced
Instructions
-
Make the sauce: Heat one tablespoon of olive oil in a medium-sized saucepan. Add 1 whole garlic clove and let it cook for about 30 seconds to infuse the oil with flavor, then remove and discard the garlic. Pour in the passata or crushed tomatoes, add torn basil leaves and a pinch of salt, and ½ cup of water. Let it simmer over medium heat for 10 minutes. Taste and add more salt if needed. If the sauce is too acidic, a teaspoon of sugar can help balance the flavors. Keep the sauce warm and set aside. Preheat your oven to 400°F (200°C).
-
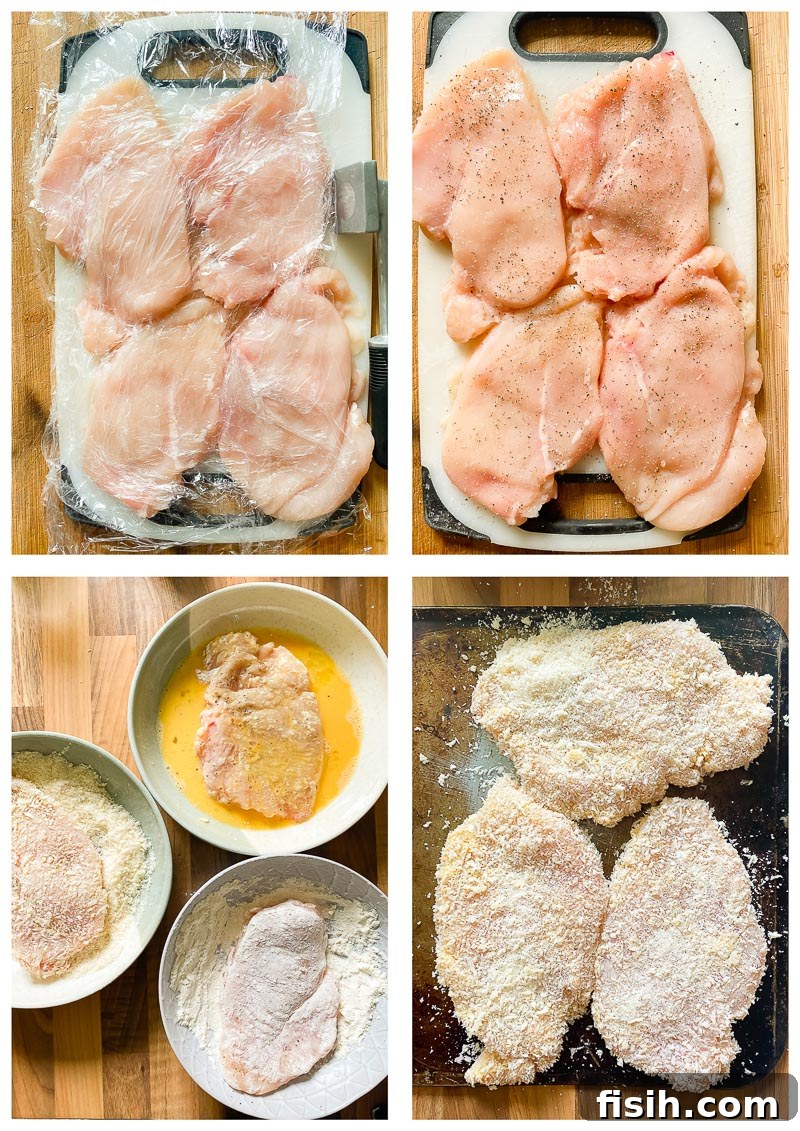
Prepare the chicken: Lay the chicken breasts on a work surface and cover them with two layers of plastic wrap. Using a meat mallet, pound the thicker part of each chicken breast until it is uniform in thickness with the thinner end. This ensures even cooking. Season both sides of the flattened chicken breasts generously with salt and pepper.
-
Set up your breading station: Prepare three shallow bowls. In the first bowl, add the beaten eggs. In the second, combine the flour with the remaining salt. In the third, mix the Panko breadcrumbs with half of the grated Parmesan cheese.
-
Bread the chicken: Dredge each chicken breast first in the seasoned flour, ensuring it’s fully coated, then dip it into the beaten eggs, letting any excess drip off. Finally, thoroughly coat the chicken in the Panko and Parmesan breadcrumb mixture, pressing gently to ensure the breading adheres well. Set the breaded chicken aside on a plate or wire rack until ready to fry.
-
Pan-fry the chicken: Heat 2 tablespoons of olive oil in a large non-stick frying pan over medium heat. Once the oil is shimmering, carefully place the breaded chicken breasts into the pan, ensuring not to overcrowd it (cook in batches if necessary). Fry for approximately 5 minutes per side, or until golden brown and crispy. During the first few seconds of frying, gently press down on the chicken breast to ensure full contact with the pan surface, which helps achieve a consistent golden crust. Don’t worry if the chicken isn’t fully cooked through at this stage; it will finish cooking in the oven. Add more oil if needed for subsequent batches.
-
Assemble for baking: Transfer the fried chicken breasts to a shallow baking dish, arranging them in a single layer. Scoop about ¼ cup of the warm tomato sauce over each chicken breast. Be mindful to leave some of the crispy coating exposed to maintain its texture. Top each sauced chicken breast with a slice of fresh mozzarella cheese. Finish by sprinkling the remaining Parmesan cheese over the mozzarella.
-
Bake and serve: Place the baking dish in the preheated oven and bake for 15 minutes, or until the cheese is beautifully melted and bubbly, and the chicken is cooked all the way through (internal temperature reaches 165°F/74°C). Serve immediately, placing each chicken parmesan on top of a generous ladleful of the reserved warm tomato sauce. Garnish with fresh basil, if desired.
Notes
- There is no need to butterfly the chicken. Instead, pound the thicker end of the breast until it’s even with the thinner end. A meat mallet or rolling pin work for this. This step prevents the chicken from drying out after being fried and put in the oven.
- Panko are the best breadcrumbs to use. They result in much crispier breading than traditional breadcrumbs.
- After the breasts are dredged in flour, seasoned, and coated in breadcrumbs, I fry them in extra virgin olive oil until they are golden brown. If you don’t want to use olive oil, butter can be used instead.
- I recommend only using a dollop of the sauce on each breast before topping with mozzarella and Parmesan cheese and cooking in the oven. But don’t worry, the rest gets put to work when it is time to serve because you can add a full ladleful of sauce at this point. Waiting till serving means that the crispy breaded chicken doesn’t have time to go soft while sitting in the sauce.
Nutrition
Nutrition information is automatically calculated, so should only be used as an approximation.